One of our favorite things to do is paint. With the weather turning cooler we were inspired to make some Fall prints. In the past we have made Fall Fingerprint Trees. Today we made Fall prints in a different way. These prints are simple and fun for kids to create, but they can be used to make some more elaborate crafts like this Fall Handprint Wreath.
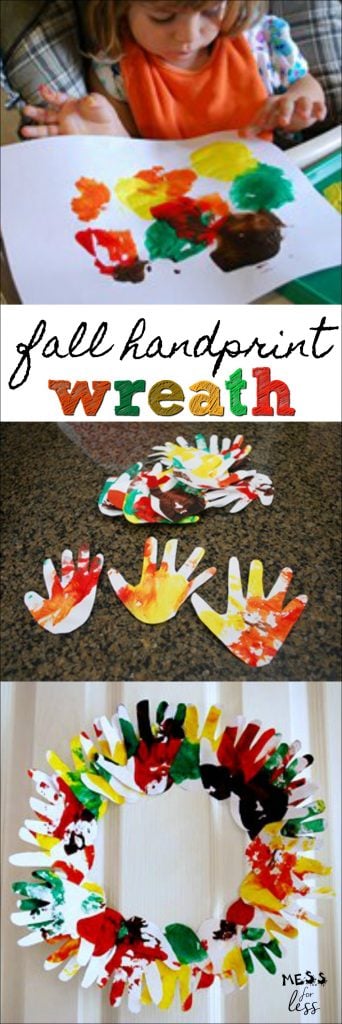
Fall Handprint Wreath
Supplies you will need:
- Paint in Fall colors
- Tray for paint
- White paper
- Scissors
- Glue or tape
- Pencil
- Large Styrofoam or paper plate
- Hands
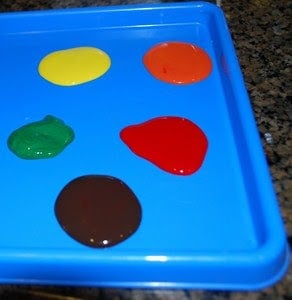
Prints are super easy to make. Just squirt some paint on a tray - we used some fun fall colors - but you can change them up depending on the season or your mood. We used five colors here, but I have done 3 in the past and had them work just as well.
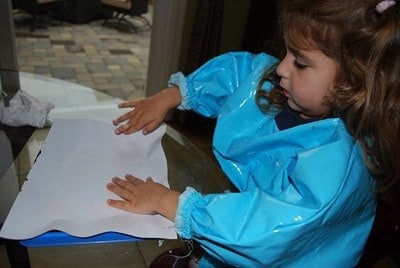
Next, just give your child a sheet of white paper (I like copy paper because it's inexpensive) and have them place it on top of the paint on the tray. Then push and smush. Or you might prefer the pat and splat. I've got a million of these. Did I mention I taught 5 year olds?
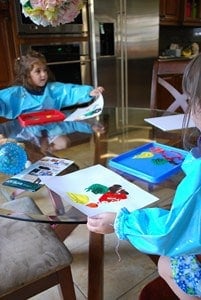
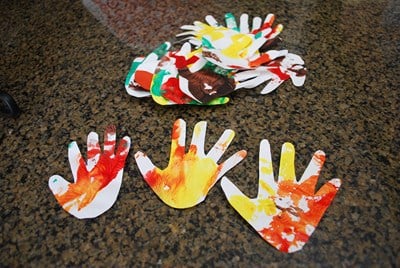
The next step is my kids favorite. I call it the "peel and reveal." They are always so excited to peel the paper off and see what designs they have made. Every one is unique and you can make quite a few prints before you have to add more paint to your tray. Honestly, the biggest challenge for me is trying to find places to put all the prints to dry. You will want to make around 10 prints to make sure you will have enough for your handprint wreath.
Even Little C, at 21 months old, was able to make prints.

For the next part of this project your prints will need to be dry. The next day when ours had dried, I used a pencil to trace the kids handprints onto our Fall prints. I don't have any pictures of this step since I was doing the tracing and I am also the photographer. Hey, I'm a one woman show! So the littlest one was not into having her hand traced. As soon as I started tracing her hand, she started screaming and crying and carried on for a good 20 minutes. So I only used my older daughters handprints. After you trace you child's handprints, you can cut them out. I ended up with 22 handprints. I think as long as you have around 20, you'll be fine.
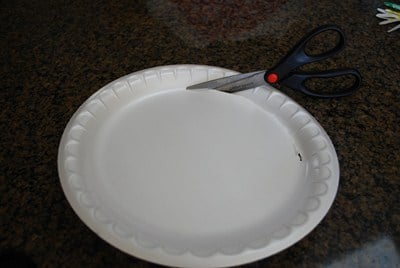
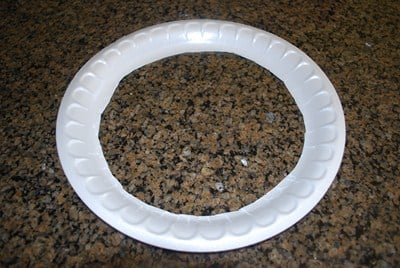
Next, I used a Styrofoam plate that was about 10 inches wide. A large paper plate would work as well. If you don't have any of these items, you can cut a loop out of some cardboard. Use what you have on hand. You will be cutting the inside of the plate and leaving a ring to use as the base from your wreath.
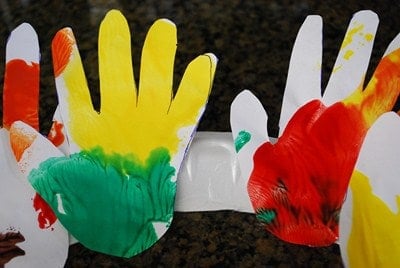
Then you will want to start gluing your hands on the wreath. I started with 4 hands at opposite points just so I would have a good idea about the spacing and make sure I didn't run out of hands. I used a hot glue gun, but I tried this with tape and it worked just as well.
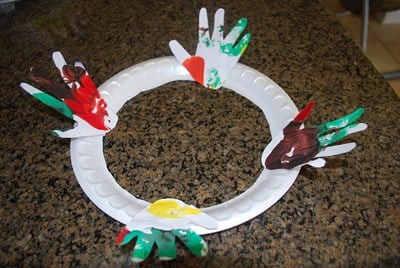
Filling up the wreath.
If you have extra hands when you have finished covering the plates, you can always overlap them and make the wreath look a little more full.
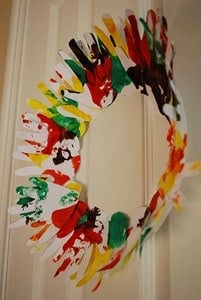
Now all that's left to do is hang and enjoy! It's tough to see in this photo, but because the edge of the plate comes up a bit, the wreath stands out more.
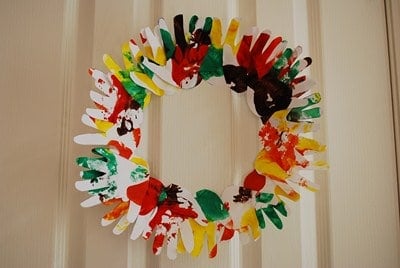
You can see it better here. I love the look of this simple Fall Handprint Wreath and my kids were so thrilled when they saw what I had made with their artwork. This wreath will be a great addition to your Fall decor.
If you liked our Fall Handprint Wreath, check out:


Desire Empire says
How good is this. Kiddos look like they are hainvg a ball. Thanks for adding me to your Stumbleupon