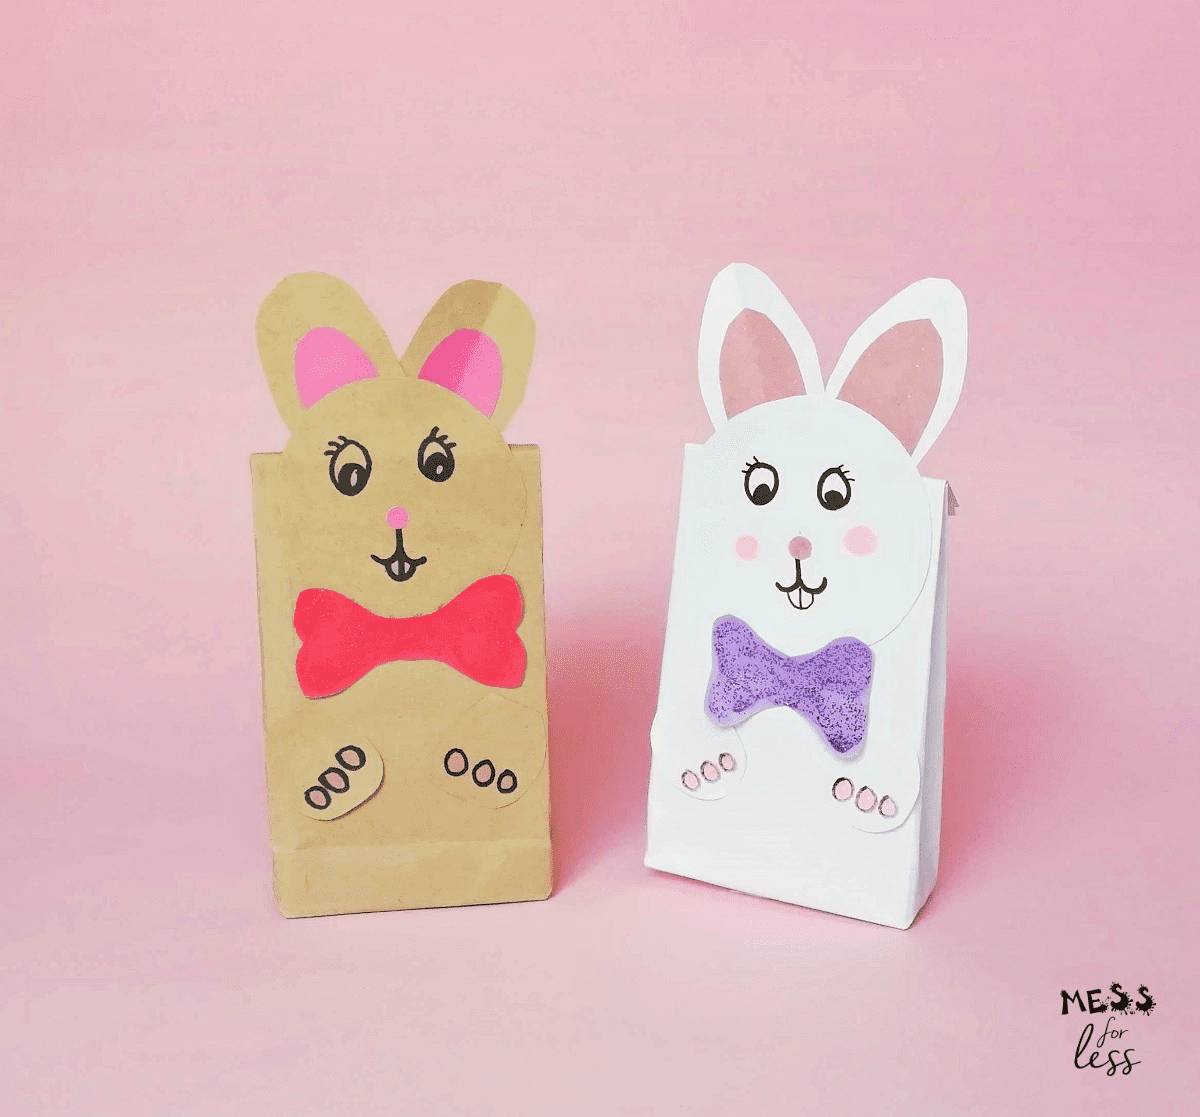
Spring is in the air, and that means it's time for spring activities for kids. My kids love doing crafts, and around this time of year, bunny crafts are quite popular in our house. I love this Easter Bunny Craft because it is truly made from scratch.
Sure, it looks like it is made using a paper bag, but kids will actually be creating their own bags using colored paper. They can have ownership of every step in the crafting process. When you're done with this craft, check out Easter Egg Activities for Kids.

Jump to:
⭐Why This DIY Bunny Craft is Awesome
- Creating this Easter craft requires kids to use scissors which helps work their fine motor skills and hand-eye coordination.
- Makes a fun decoration!
- Rabbit crafts are a fun Easter activity for kids and parents to do together.
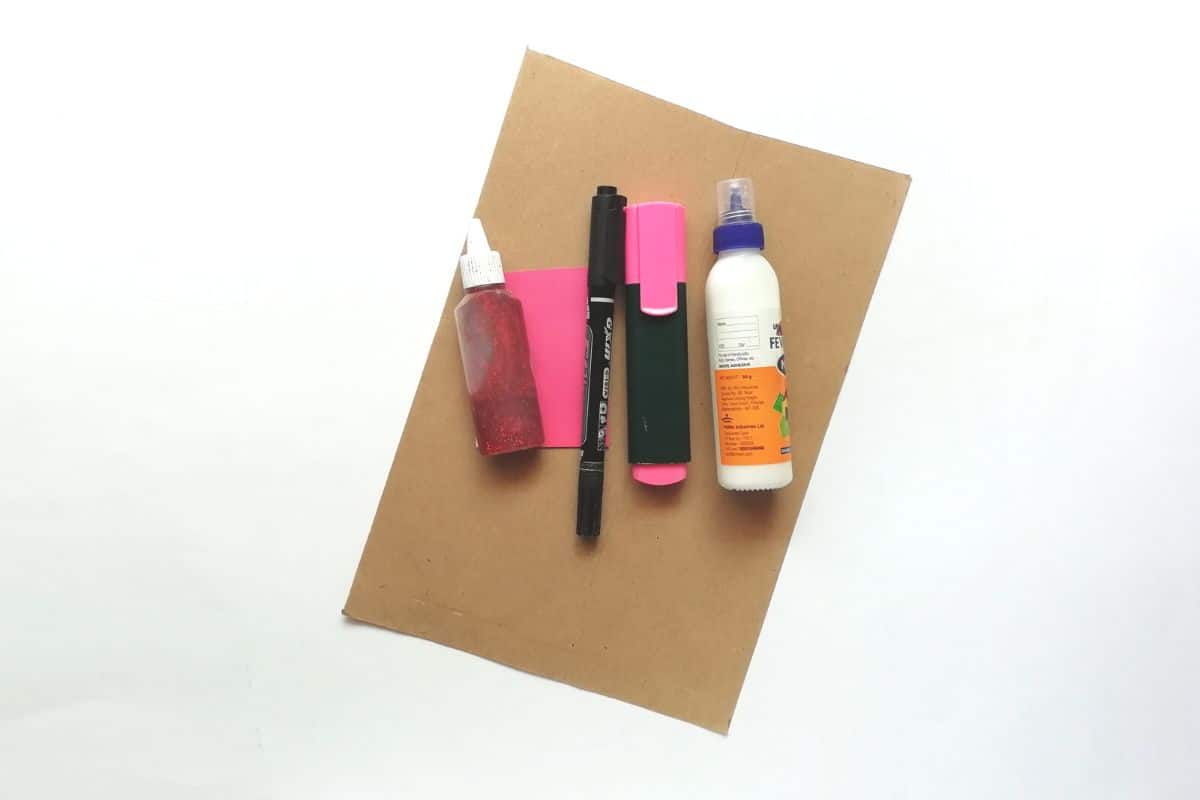
🖍️Supply Notes
- Brown Paper and White Paper - Both 9 x 12
- Scissors - If kids struggle with scissors, an adult can help with the cutting.
- Pencils - Used to trace the bunny template.
- Marker - Black marker.
- Highlighter - Pink.
- Paper Glue - White Elmer's glue works fine
- Glitter glue - Optional, if you want to dress up the bow a bit.
- Bunny template - You can download one one of our free printables and worksheets at the end of this post.
📋Step by Step Instructions
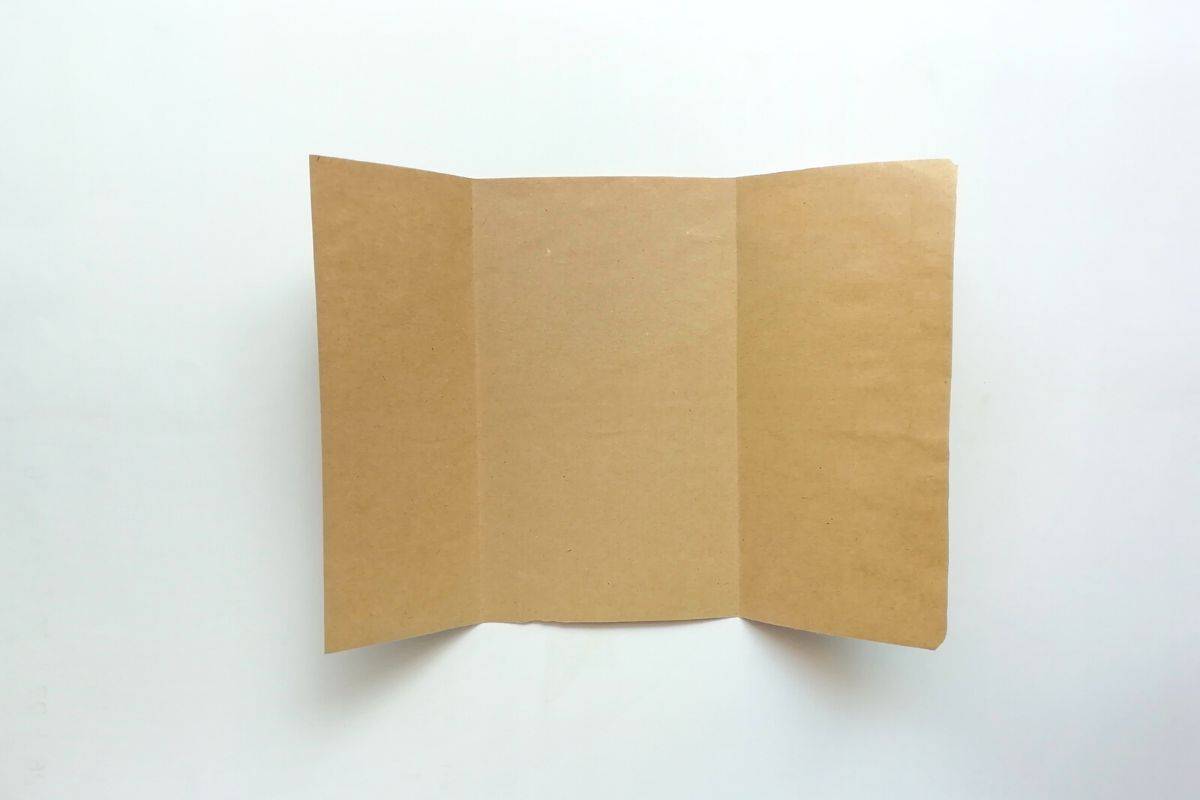
STEP 1: Take a sheet of brown construction paper and hold it horizontally. Make 2 folds - one on the left side and one on the right side of the paper. Make sure the folds overlap each other by at least by an inch.
STEP 2: Glue the areas that overlap.
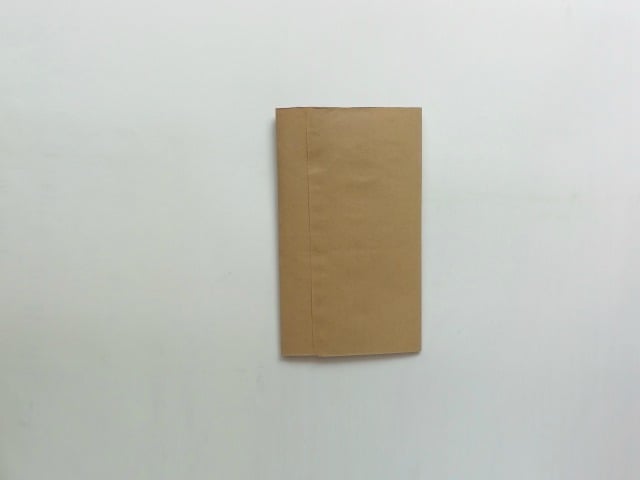
STEP 3: Fold the bottom of the bag up 2 inches.
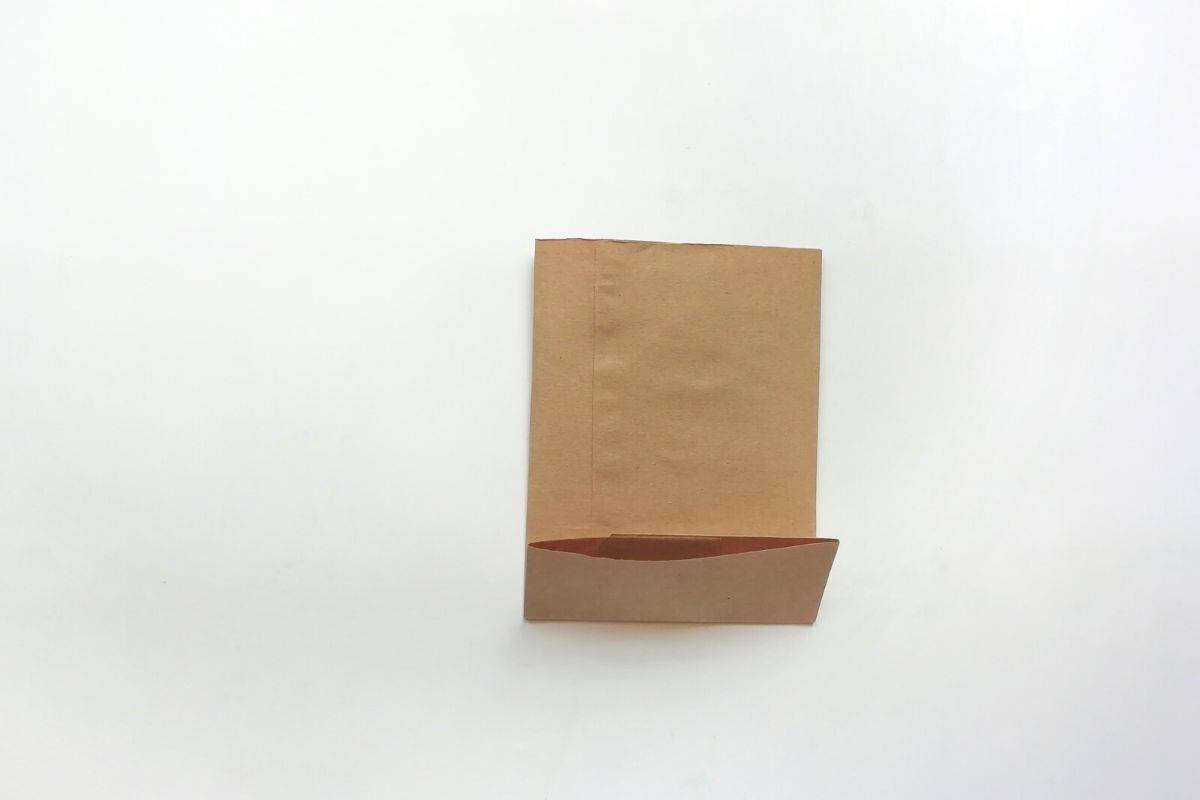
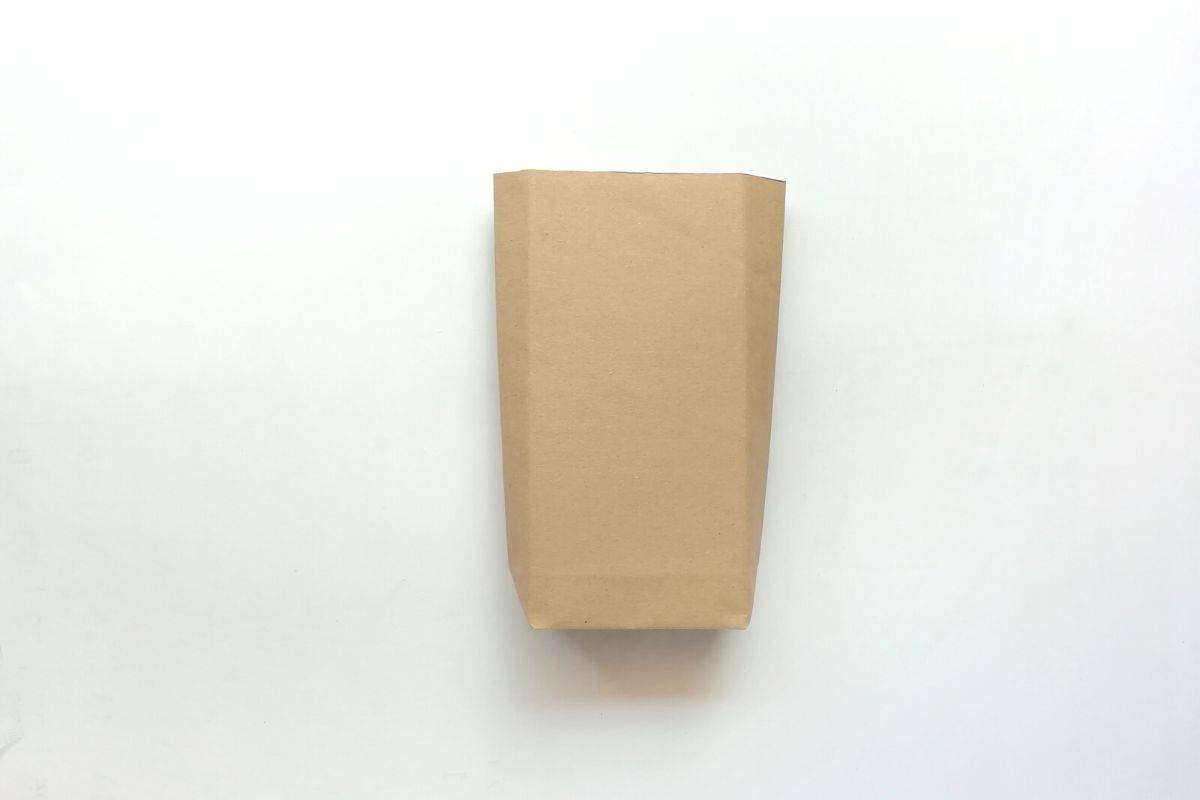
STEP 4: Open up the bottom fold and gently press in both of the corners. When you do this you will have two triangular shapes on both ends.
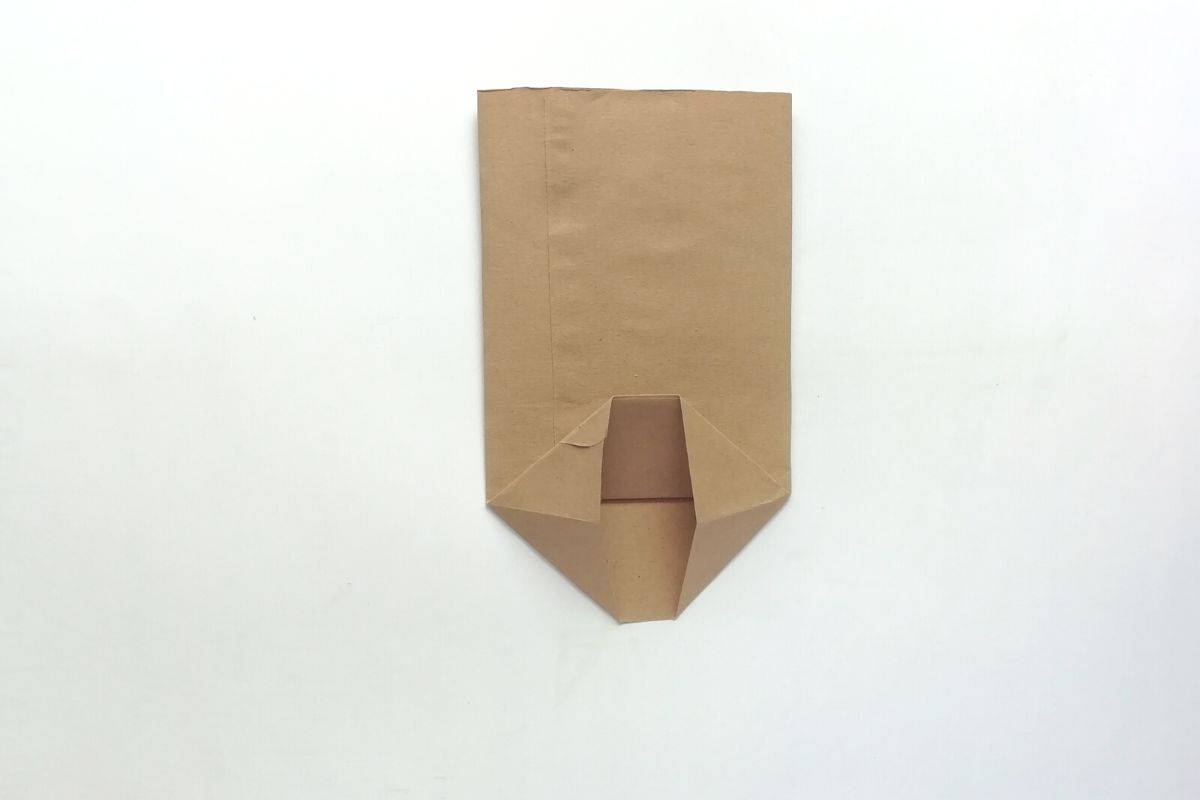
STEP 5: Now, bring the top side of the fold downwards.
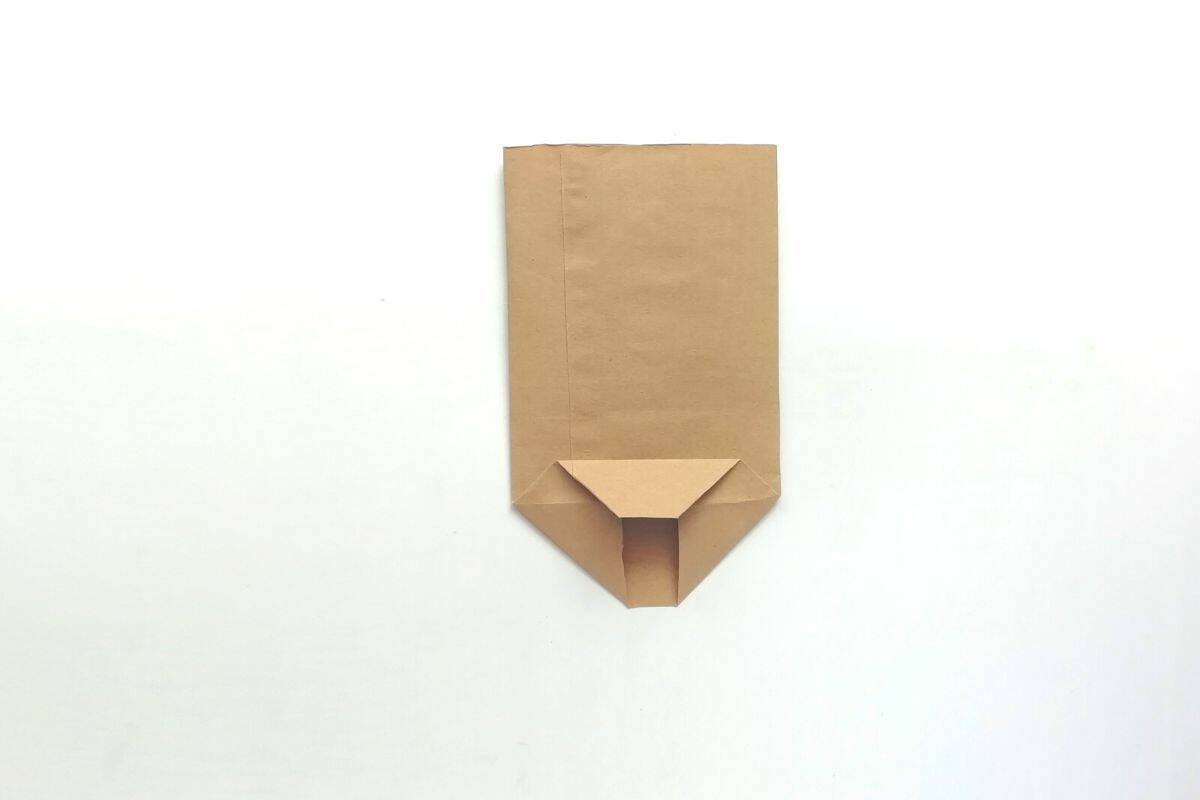
STEP 6: Then bring the bottom side towards the previous fold and make them overlap each other. Glue the overlapped area.
STEP 7: Make 2 vertical folds on each side (about 1 inch wide).
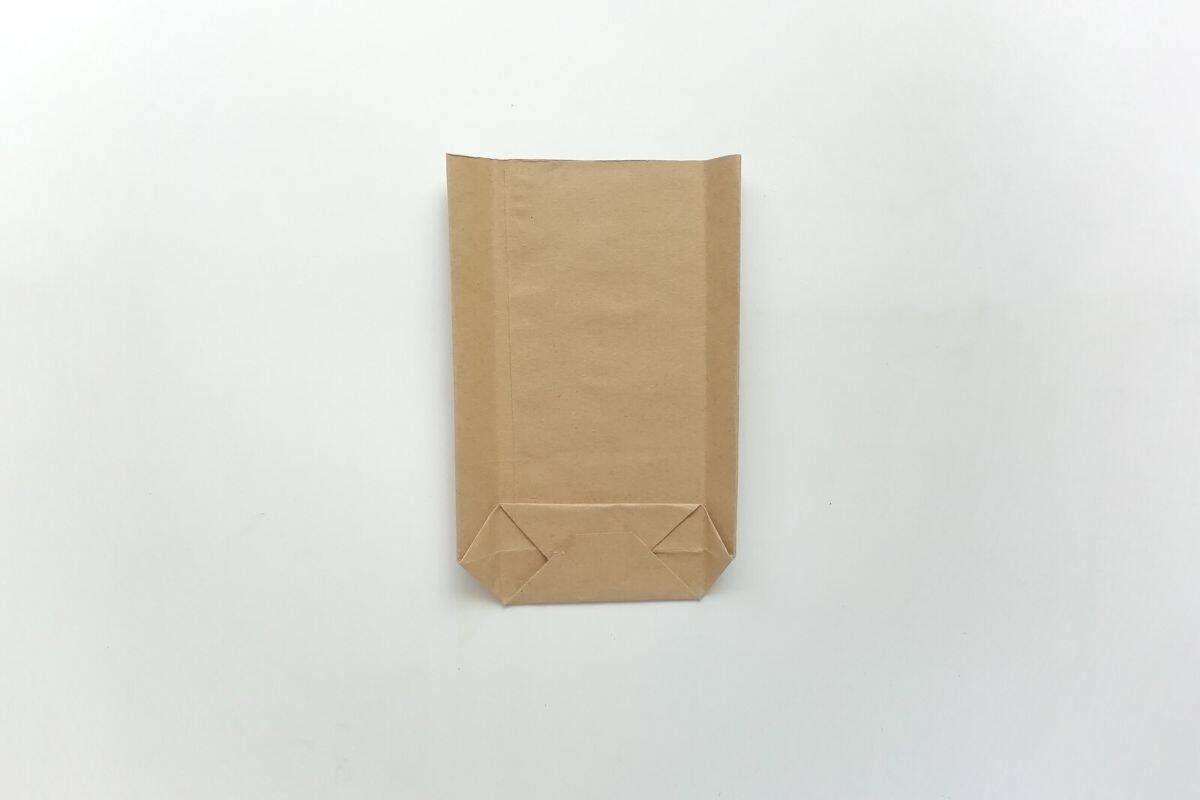
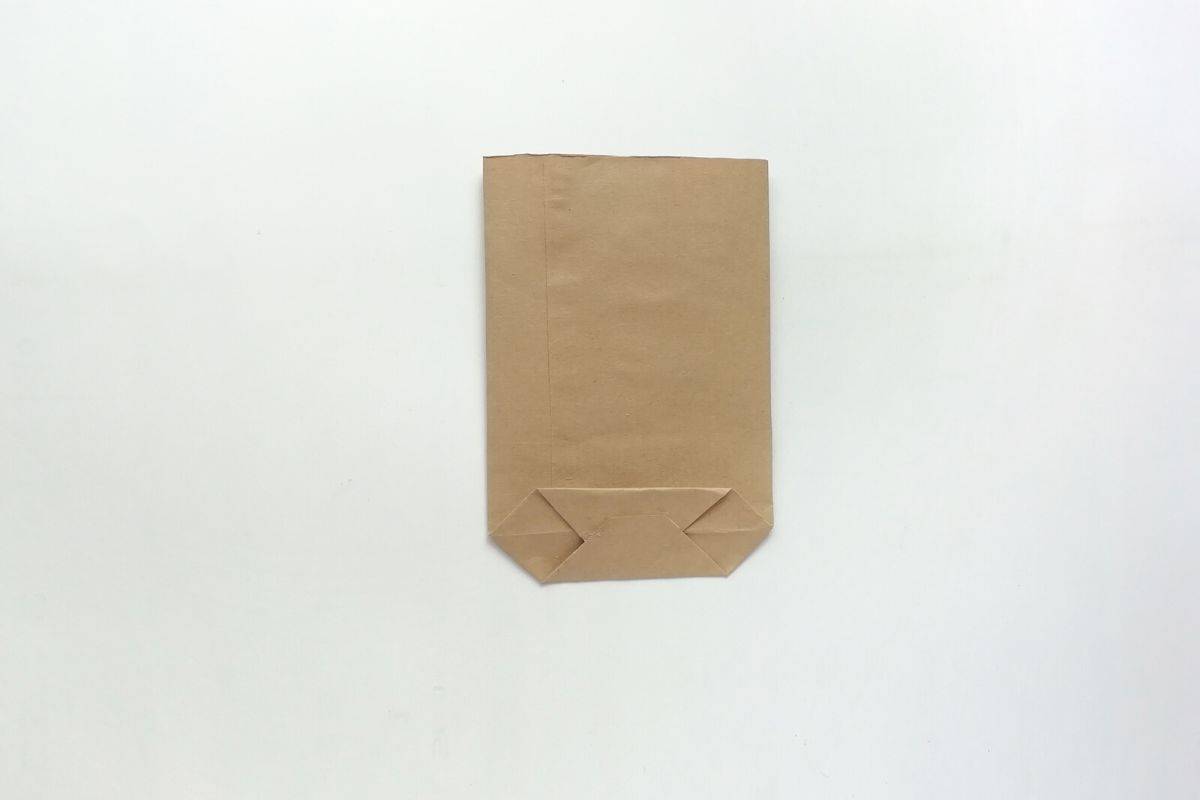
STEP 8: Open up the packet you have created.
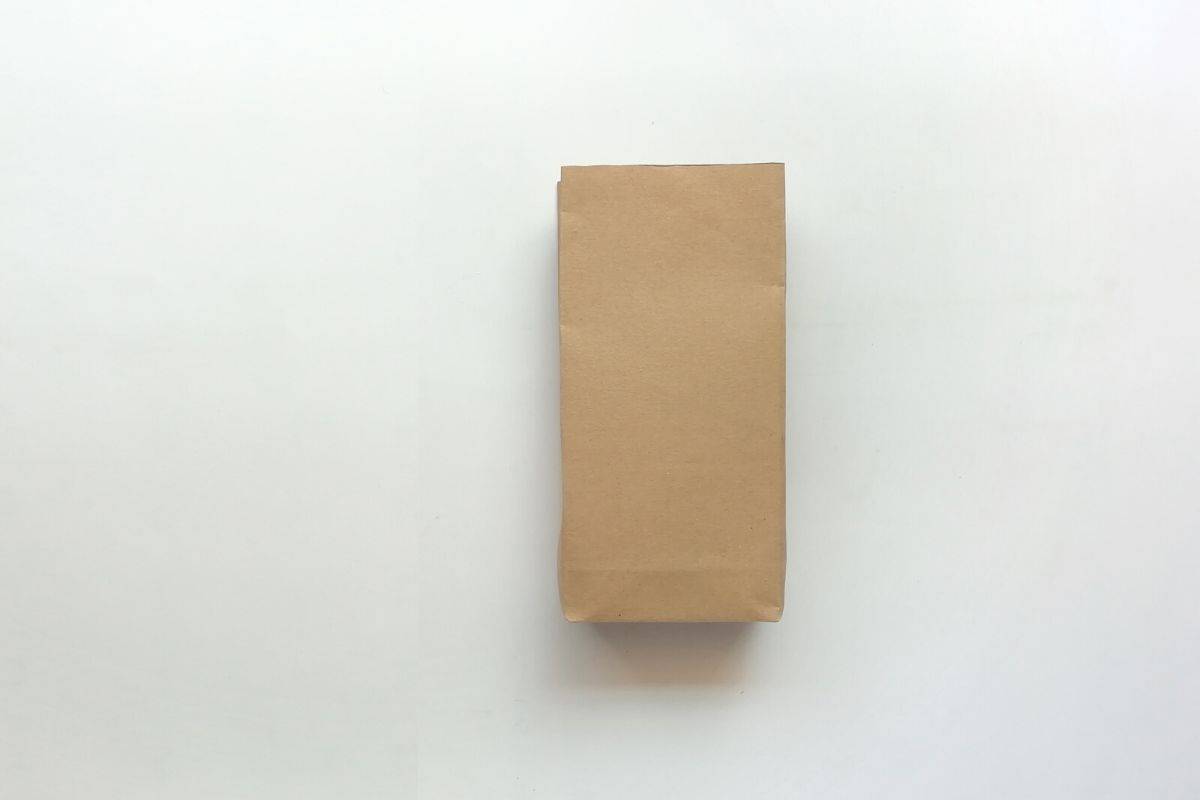
STEP 9: Press the center of both sides of the packet inwards. It will automatically give the packet a rectangular shape because of the previous vertical folds. Looks like a bag doesn't it?
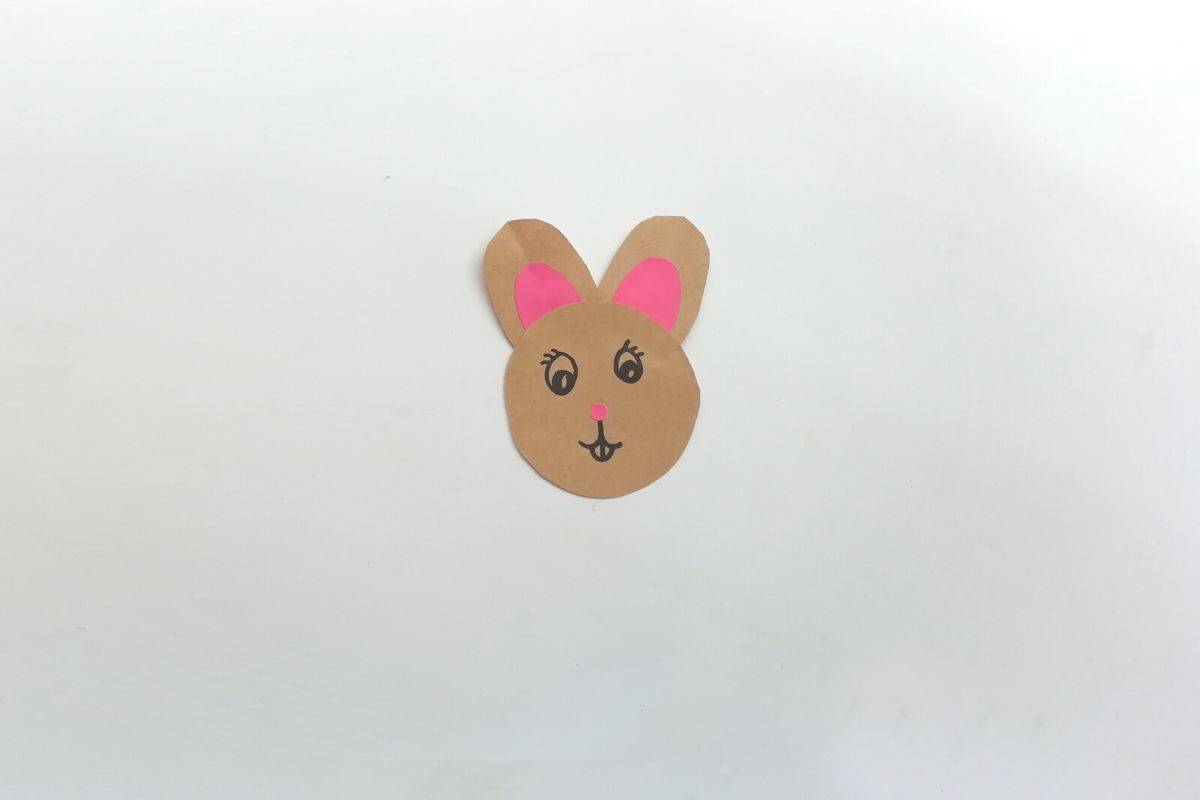
STEP 10: Print the template and trace and cut out the pieces of the rabbit on different colored paper.
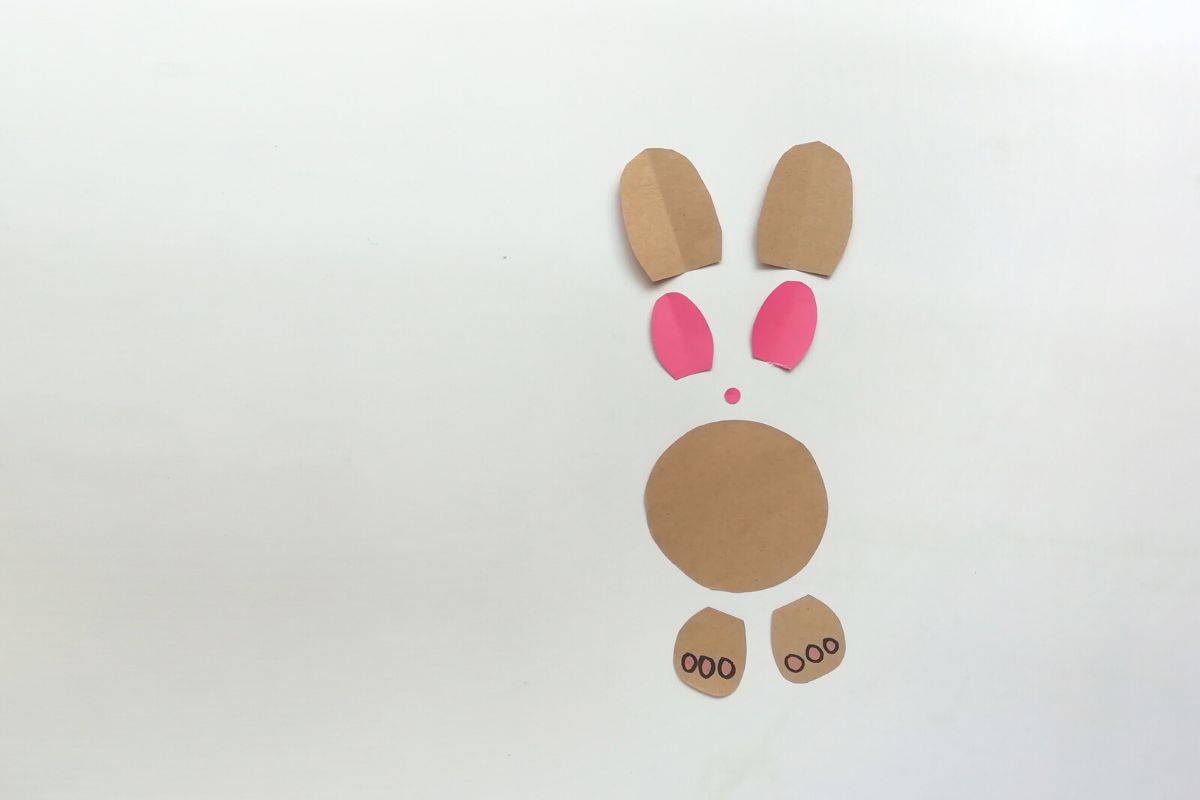
STEP 11: Glue the ears pieces together. Also, glue the nose and draw the face using a marker. Then add a little detail to the paws using a pink highlighter and a thin black marker.
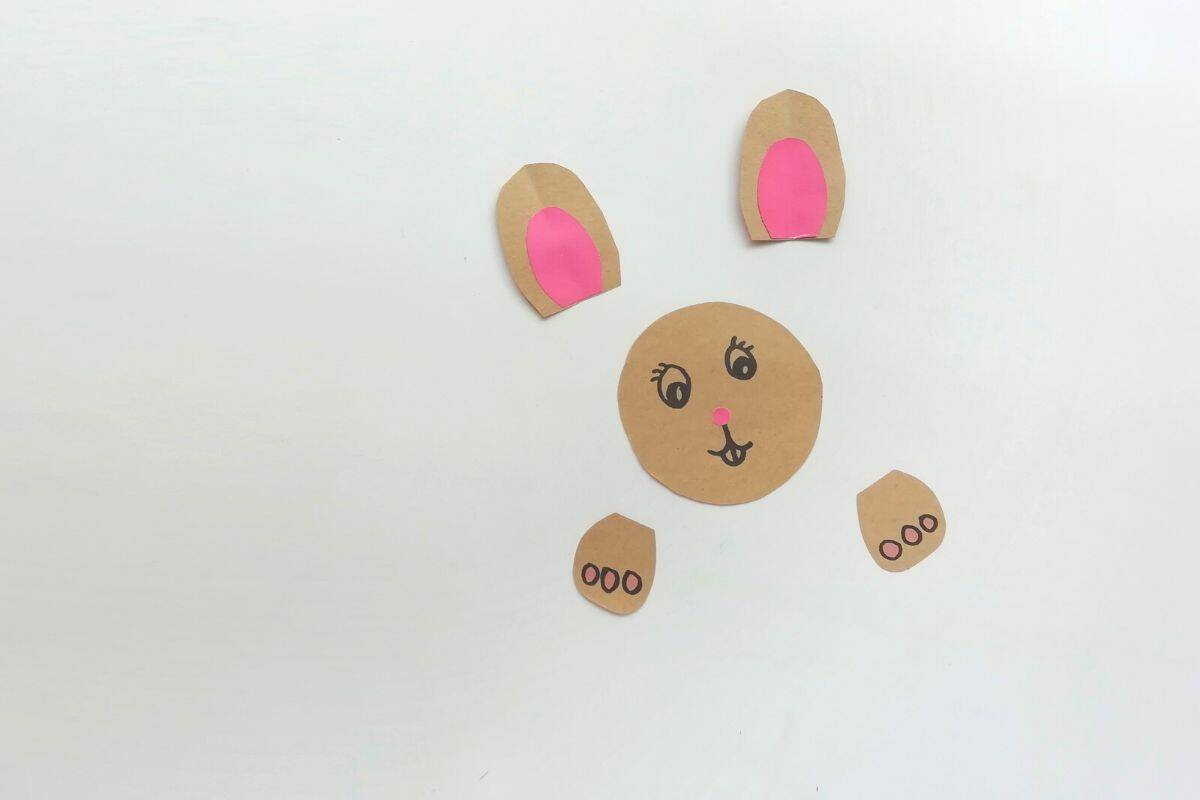
STEP 12: Glue the bunny ears to the round head piece.
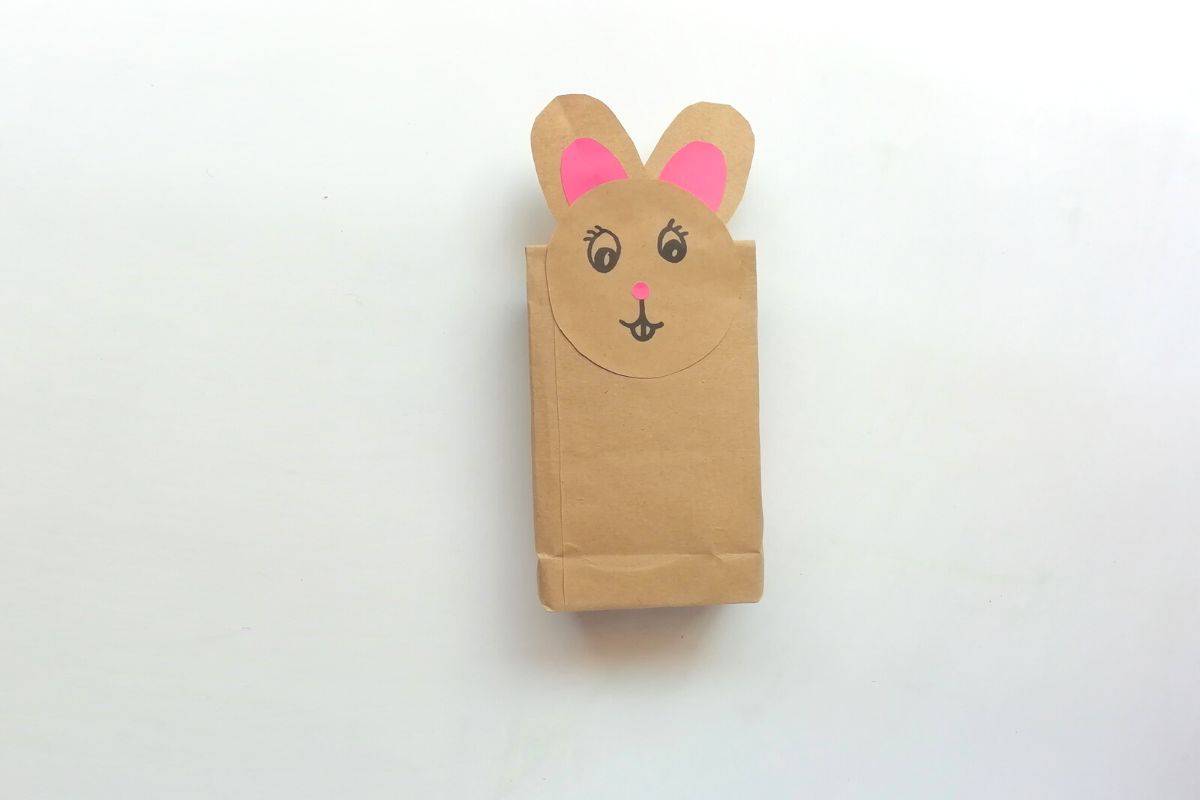
STEP 13: Then glue the rabbit's head on top of the packet.
STEP 14: Glue the bow right under the rabbit's head.
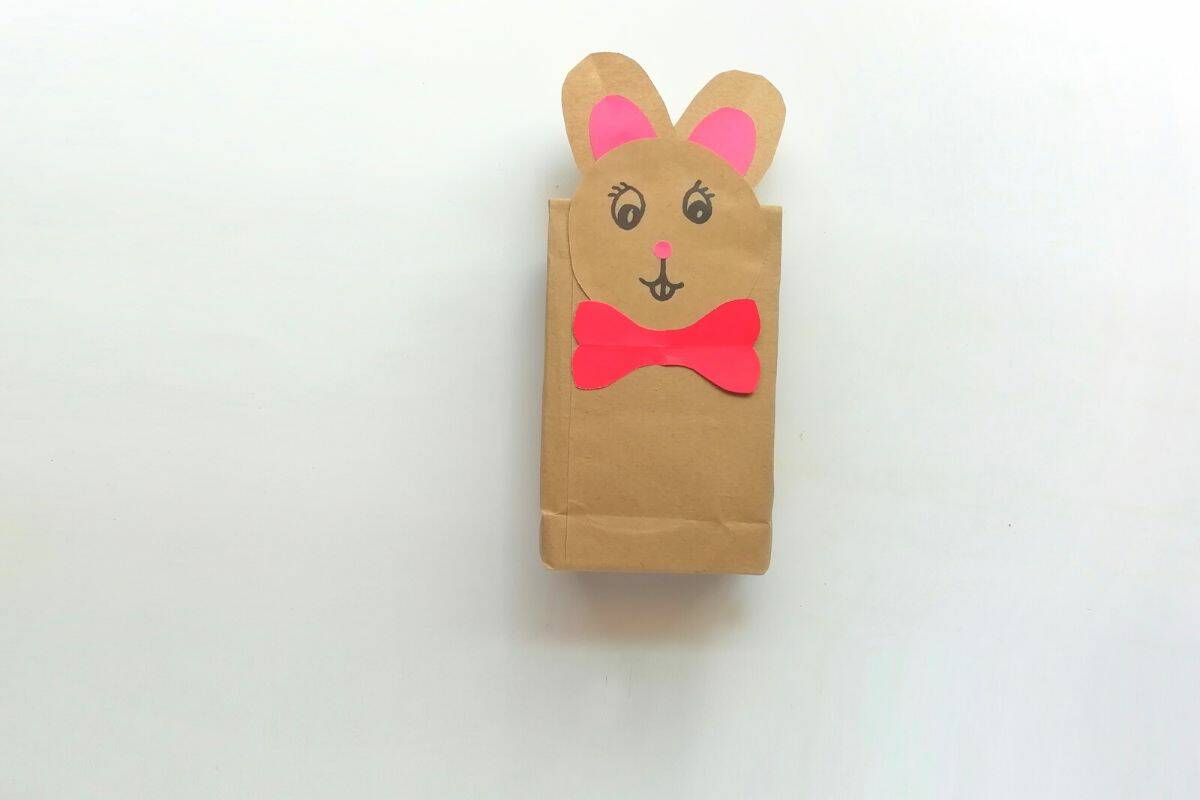
STEP 15: Finish the Easter bunny craft by adding glitter glue to the bunny's bow tie and gluing the paws under the bow.
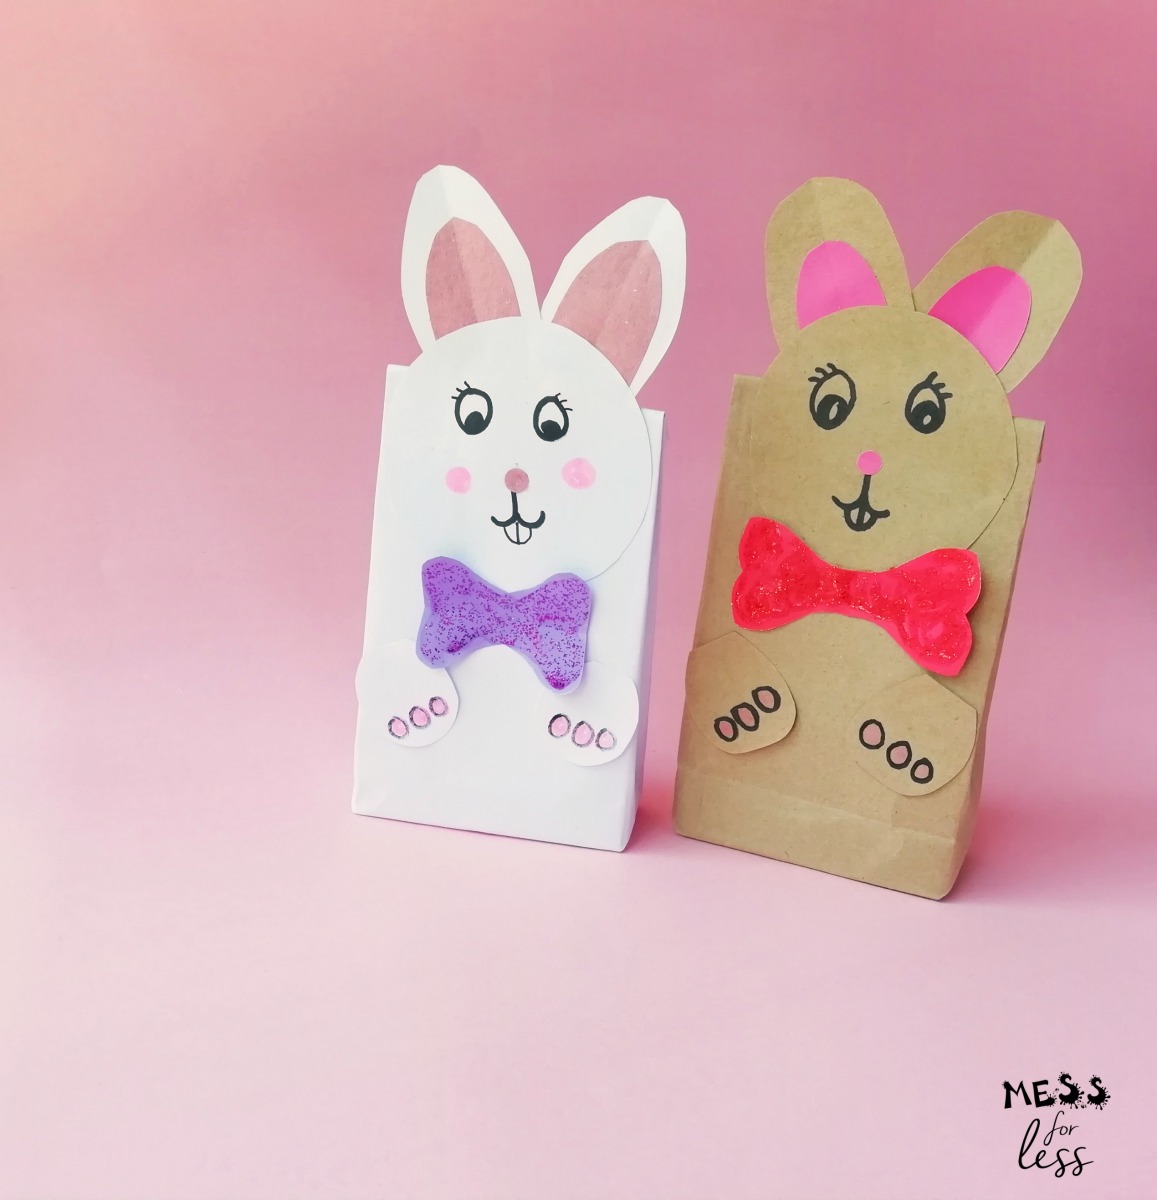
Isn't this easy Easter bunny craft adorable? Now, you can fill them with treats or display them as is. They would be charming place settings for an Easter meal. Just write the guest's name on the front of the bunny.
✂️Expert Tips
Tip 1: You can also make these cute bunny crafts with a brown paper bag and a white paper bag.
Tip 2: If you have patterned scrapbook paper, it would be fun to use to make the bow ties.
🤷🏻♀️Craft FAQs
You do not. It's only if you want to add a little pizzazz to the bunny.
Yes, a glue stick will also work.
💛Related posts


🐰Craft Tutorial

Easter Bunny Craft
Materials
- Brown Paper and White Paper - both 9 x 12
- Scissors
- Pencils
- Markers
- Highlighters
- Paper
- Glue
- Bunny template
Instructions
- Take a sheet of brown construction paper and hold it horizontally. Make 2 folds - one on the left side and one on the right side of the paper. Make sure the folds overlap each other by at least by an inch.
- Glue the areas that overlap.
- Fold the bottom of the bag up 2 inches.
- Open up the bottom fold and gently press in both of the corners. When you do this you will have two triangular shapes on both ends.
- Now, bring the top side of the fold downwards.
- Then bring the bottom side towards the previous fold and make them overlap each other. Glue the overlapped area.
- Make 2 vertical folds on each side (about 1 inch wide).
- Open up the packet you have created.
- Press the center of both sides of the packet inwards. It will automatically give the packet a rectangular shape because of the previous vertical folds. Looks like a bag doesn't it?
- Print the template and trace and cut out the pieces of the rabbit on different colored paper.
- Glue the ears pieces together. Also, glue the nose and draw the face using a marker. Then add a little detail to the paws using a pink highlighter and a thin black marker.
- Glue the ears to the round head piece.
- Then glue the rabbit's head on top of the packet.
- Glue the bow right under the rabbit's head.
- Finish the Easter bunny craft by gluing the paws under the bow.
Video
Notes
- You can also make these cute bunny crafts with a brown paper bag and a white paper bag.
- If you have patterned scrapbook paper, it would be fun to use to make the bow ties.


Marina says
Super cute and easy to make! Wil share your post with my friends with kids x
tiffany Montgomery says
What a fun easy craft idea for Easter. Thanks for showing how it can be affordable!
Erin says
Easter can be such a fun holiday to celebrate with kids. These Easter Bunny crafts are so cute. I bet kids will enjoy making them.
Erin says
So fun! My 4 year old will love these! Can't wait to try it out!!
Jenni LeBaron says
What a fun way to make an Easter treat or treasure bag for the littles. I also appreciate knowing how to make a bag this way for other uses!