
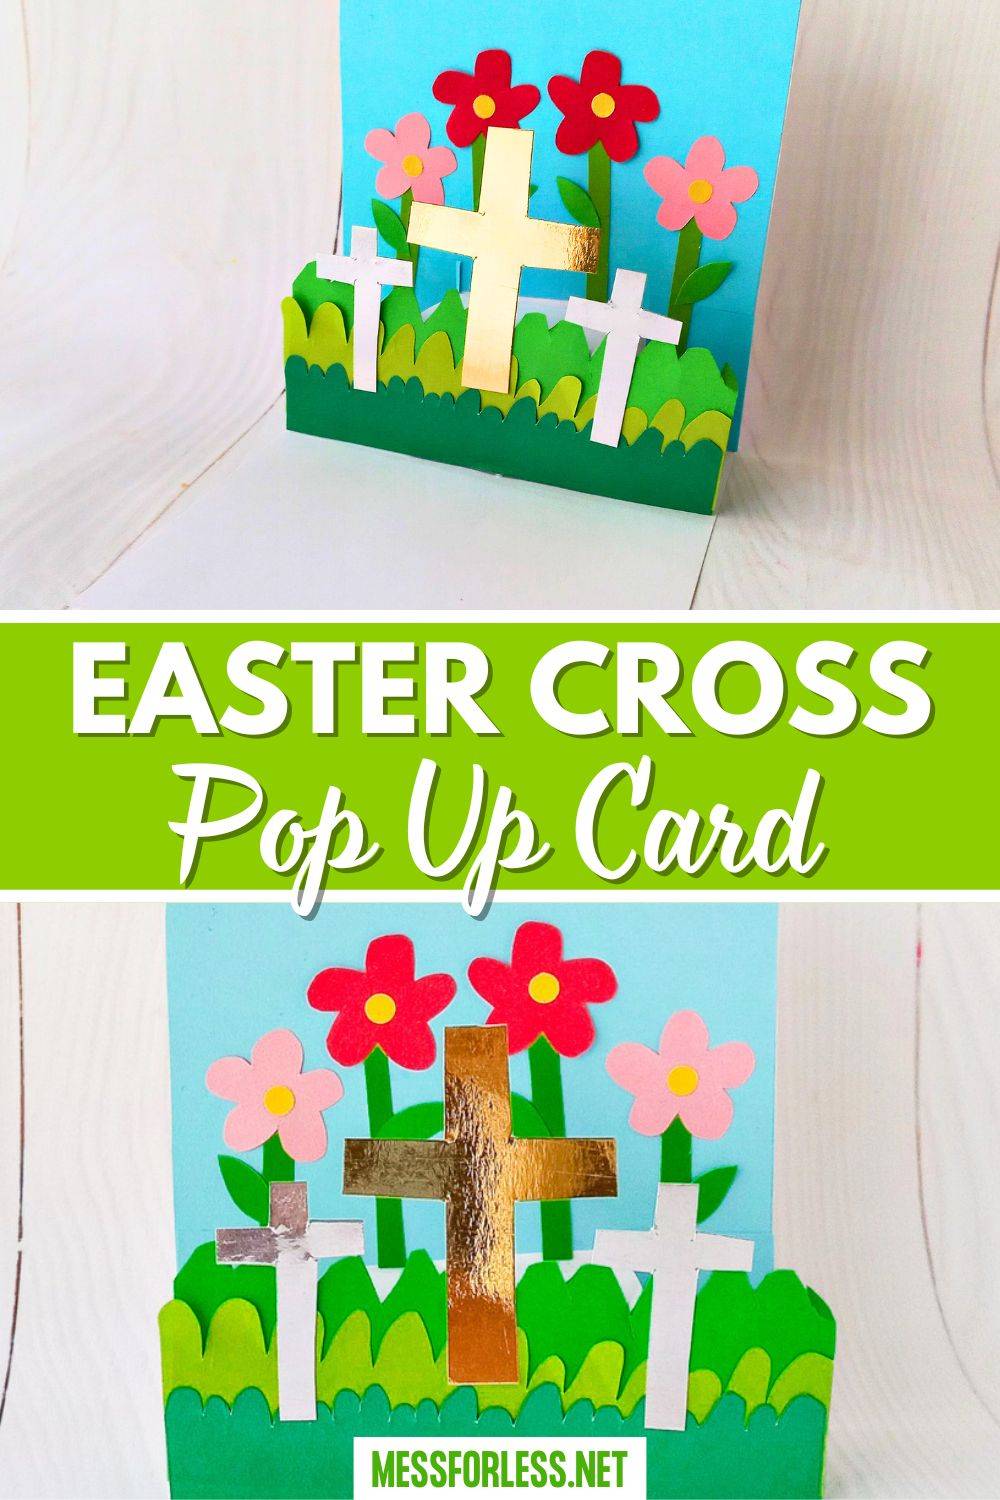
Making crafts for Easter is a great way to bring some fun and meaning to the holiday. This Easter Cross Pop Up Card is a creative way to represent the significance of the season. This is one of those easy crafts for kids that can be made kids or adults.

Jump to:
You might also enjoy trying this paper flower craft as another fun and easy activity for the holiday!
Why You'll Love An Easter Pop Up Card
- Fun - Creating an Easter Cross Pop-Up Card is a fun activity for the whole family.
- Patience - This develops patience and focus as kids stick with the project.
- Coordination - Improves hand-eye coordination for children.
- Learning - Teaches kids about shapes, colors, and measurements.
- Interactive - Provides an interactive way to discuss the Easter story.
Supplies For Easter Cross Card
- Cardstock paper - Used as the base of your card.
- Colorful craft paper - Including golden and silver sheets, add bright colors and details.
- Pencil and ruler - For accurate measurements and layouts.
- Glue and scissors - For assembling the card.
- Free template - Download below.

To make things even easier, I'm including a free template at the end of this post! The printable template includes the crosses, flowers, and grass, so you can easily cut out the pieces and bring your card to life.
White Cardstock 8.5 x 11, 230gsm Cover MIDUOLE Origami Paper, Pack of 200 SheetsHygloss Metallic Foil Paper - 16 SheetsNEENAH Creative Collection Classics Specialty Cardstock Starter


Directions For Easter Cross Pop Up Card
1.Download, print and cut
Download the template for your Easter Cross Pop-Up Card. Print on white card stock. Cut out the shapes from the template, including flowers, stems, grass layers, and the crosses and trace them onto appropriate colored papers. Cut the colored pieces out.
2. Assemble
Assemble the small pieces. Glue the flower stem to the flowers, and add the center part of the flower to the middle of the petals. For the grass layers, sandwich the middle grass layer between the larger and smaller grass layers, gluing them together to create a layered effect.
3. Glue
Finish the intricate details by gluing the flower leaves onto the stems and adding the smaller grass layer over the middle layer.

4. Fold
Take a piece of cardstock paper (3x longer than the largest cross in your design). Fold the card vertically in half. This is your card base. Glue a blue craft paper background onto the folded piece for a bright pop of color.

5. Attach
Cut out another cardstock strip, fold it in half, and make creases on each end to create a pop-up mechanism (or socket). Glue this piece into the center of your folded card, ensuring it pops out when the card opens.


6. Glue Crosses
Attach the layered grass piece to the pop-up section. Then, glue the large cross onto the pop-up in the middle of the grass. Place the smaller crosses to the sides of the large one.


7. Glue Flowers
Place the smaller crosses to the sides of the large one. Add pink and red flowers to the card background behind and around the crosses for a completed design.

More Easter Crafts and Activities
If you're looking for more holiday-inspired projects, try these ideas after creating your pop-up card. You can learn how to make a Mother's Day card for the upcoming holiday or explore a fun, themed Easter chick card craft.
For younger kids, check out these paper bag donkeys that make the Easter story come alive in a creative way. These are awesome ways to add variety to your craft time.
Bluey: EasterThe Very Hungry Caterpillar's Easter Egg Hunt:God Gave Us Easter (God Gave UsHappy Easter, Mouse! (If You Give...)


Tips For Making Pop Up Cards
Tip 1: Take your time cutting out the smaller pieces.
Tip 2: If you're working with small children, precut the tricky shapes so they can focus on gluing and decorating.
Tip 3: Use double-sided tape or a glue stick instead of liquid glue for less mess and faster drying time.

FAQs For Cross Pop Up Card
This project takes about 30-45 minutes, depending on how much help kids need with assembly. Group crafting with kids may take a little longer, as they'll likely want to glue and decorate at their own pace.
Absolutely! For younger children, you can simplify the design by leaving out some of the intricate details and focusing just on the crosses and flowers. You can also precut the shapes from the template so kids can jump straight into assembling and decorating.
While the template makes the process faster, you can absolutely freehand the design. Using simple shapes and measurements, you can create crosses and flowers without a template.

Making an Easter Cross Pop Up Card is a meaningful and creative way to celebrate the holiday, whether you're teaching your kids about Easter or crafting as a family. If you're looking for another idea, check out this tulip pop-up card tutorial for more inspiration!

Easter Cross Pop Up Card
Materials
- Cardstock paper
- Colorful craft papers, including golden and silver sheets
- Pencil
- Ruler
- Glue
- Scissors
- Printable template
Instructions
- Download the Easter Cross Pop-Up Card template and gather colorful craft papers. Use the template to cut out all the pieces, including flowers, stems, grass layers, and crosses.
- Start with the smaller components. Attach the stems to the flowers and glue the center of the flower (the pedicel) onto the petals. For the grass, layer the middle piece between the larger and smaller grass cutouts, gluing them together to give the grass a dimensional look.
- Complete the details by gluing the flower leaves onto their stems. Then, attach the smaller grass piece on top of the middle layer to enhance the layered effect.
- Take a piece of cardstock that's three times the height of your largest cross, and fold it in half vertically to create the card base. To add some contrast, glue a bright blue craft paper background to the front of your folded card.
- Cut another strip of cardstock, fold it in half, and create creases at either end. This will form a pop-up mechanism. Secure this piece inside the center of your card so it pops out when the card is opened.
- Glue the layered grass you assembled earlier to the pop-up mechanism, making sure it's aligned properly.
- Place the large cross in the middle of the grass section, attaching it securely to the pop-up.
- Glue the smaller crosses on either side of the large cross to complete the focal point.
- Finish the design by gluing pink and red flowers around the crosses and on the card background. Arrange them creatively to give your card a beautiful, finished look.
Notes
- Take your time when cutting out the small pieces-it'll make putting everything together so much easier (and way less frustrating!).
- If you're working with little ones, go ahead and precut the tricky shapes so they can just focus on the fun stuff like gluing and decorating.
- Skip the liquid glue and use double-sided tape or a glue stick instead-less mess, faster drying, and way less stress!


Leave a Reply