
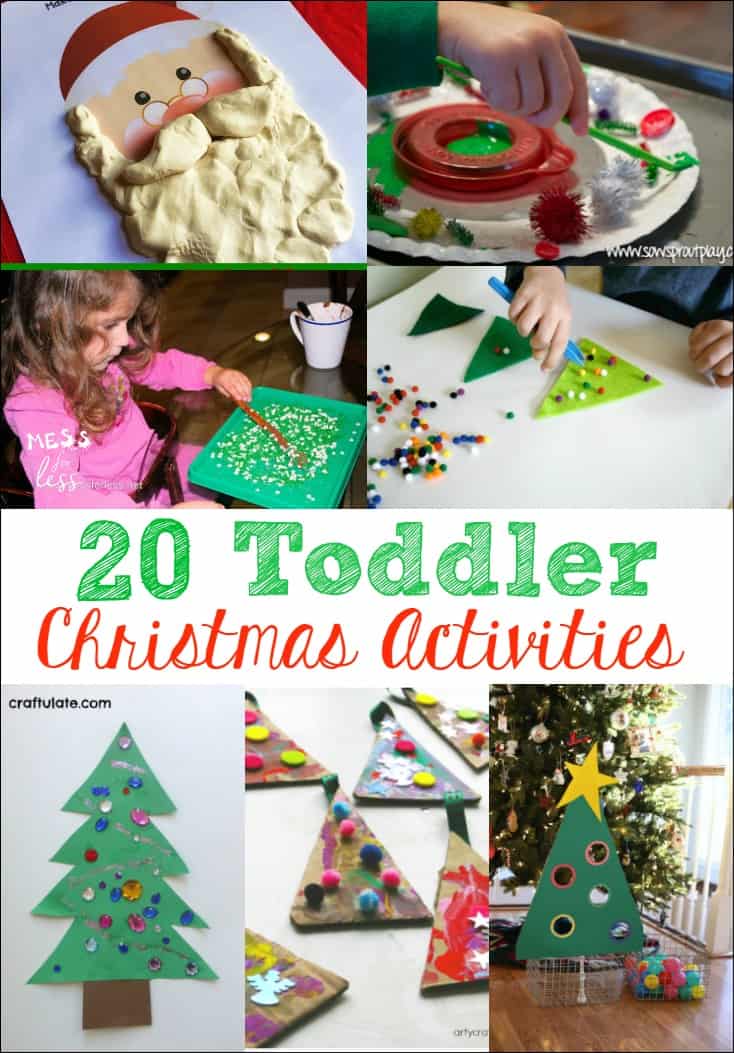
You don't need to spend a lot of money on Christmas advent calendars this holiday season. In the past, we made an easy Advent Jar and it is a holiday tradition we use each year. What's an Advent Jar you ask? Well, it's just like an advent calendar, except you use a jar and Popsicle sticks. This Easy DIY Advent Calendar and 35 Advent Calendar Ideas tutorial will take you through the entire process. If you are still looking for some holiday gifts for your favorite little artist be sure to check out 20 Gifts for the Budding Artist.
Jump to:
⭐Why This Craft is Awesome
- A fun advent calendar that focuses on experiences.
- This countdown calendar is one kids will look forward to each day.
- A Christmas countdown that doesn't cost a lot of money.
Supply Notes
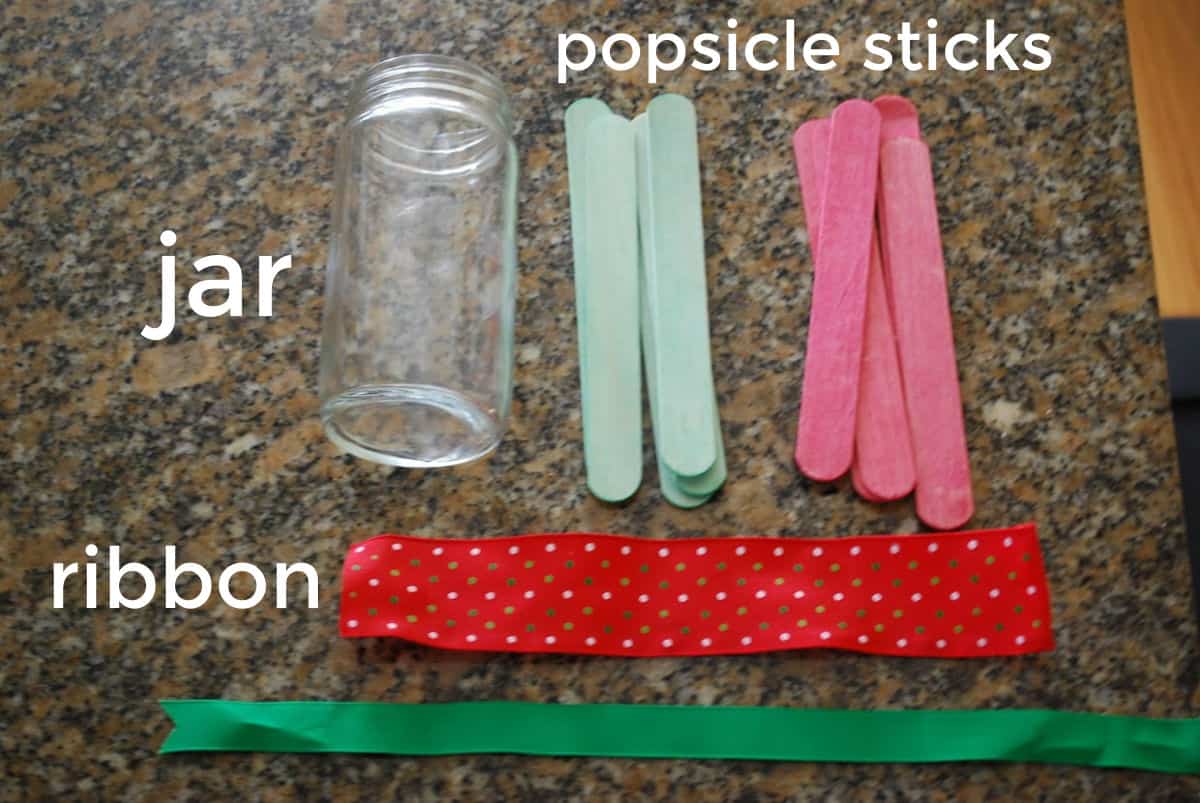
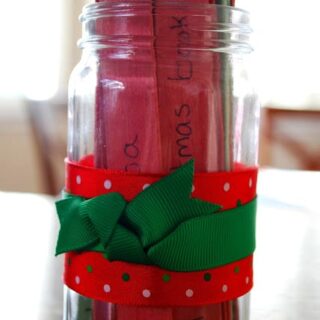
- Clean glass jar - you can buy one or use one you already have on hand. You will want a smooth jar.
- 25 Popsicle sticks (the larger the better) - I found some green and red ones.
- Ribbon - you will need 2: a wider ribbon and a thinner ribbon in holiday colors
- Double sided tape or a hot glue gun - to stick the ribbon on the jar.
- Fine tip permanent marker - to write on popsicle sticks
📋Step by Step Instructions
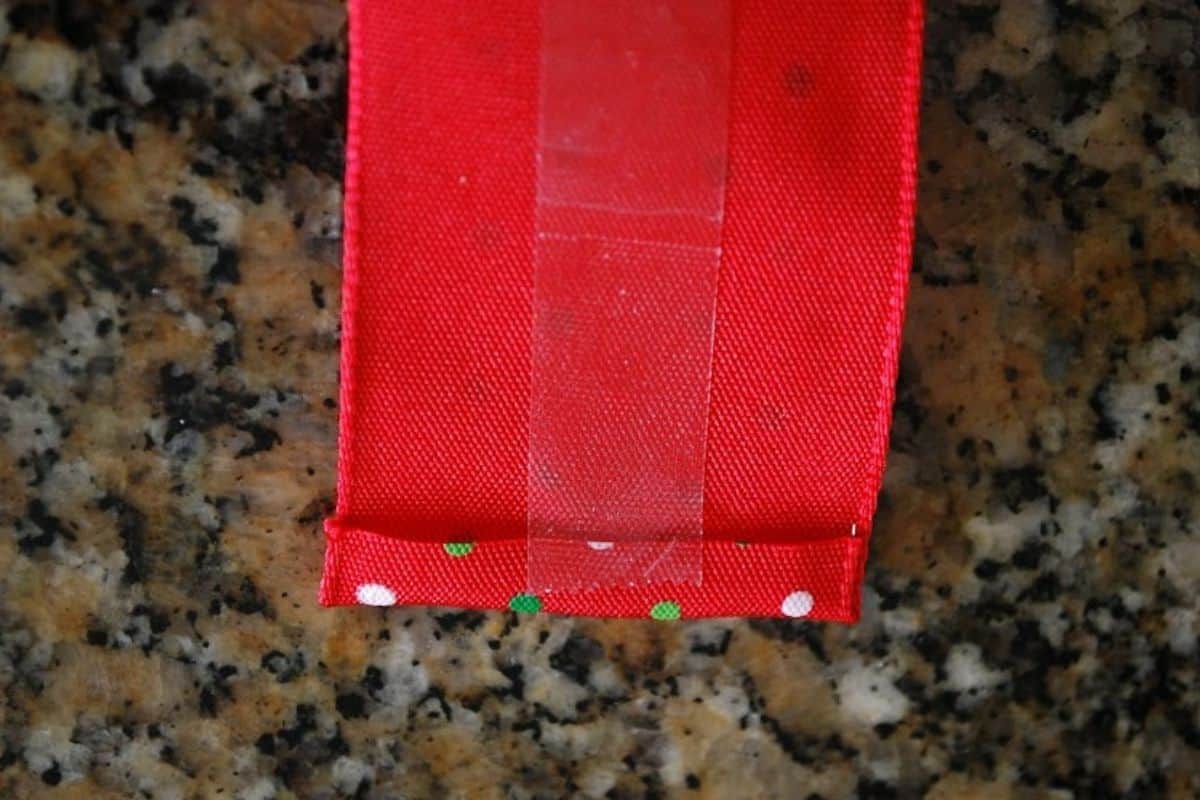
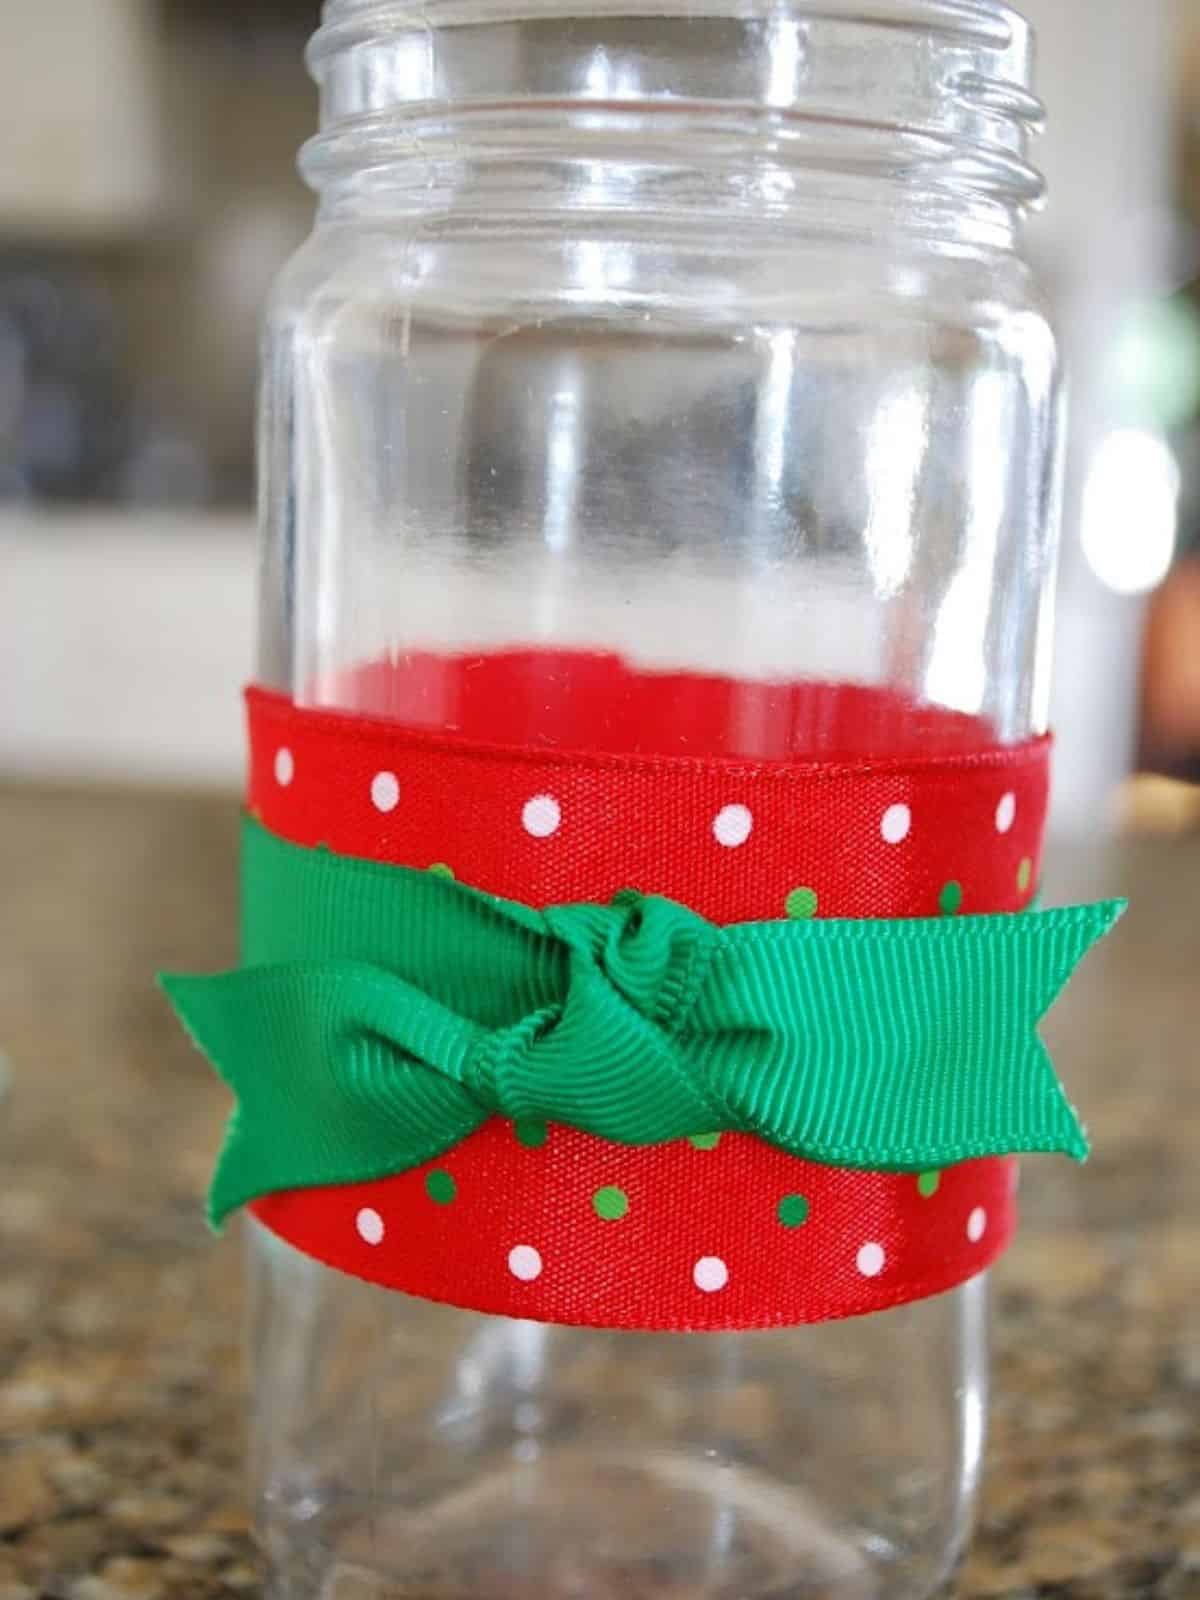
STEP 1: Fold over one end of the wide ribbon about ⅛ of an inch. Then add a few strips of double-sided tape to the back of the wide ribbon.
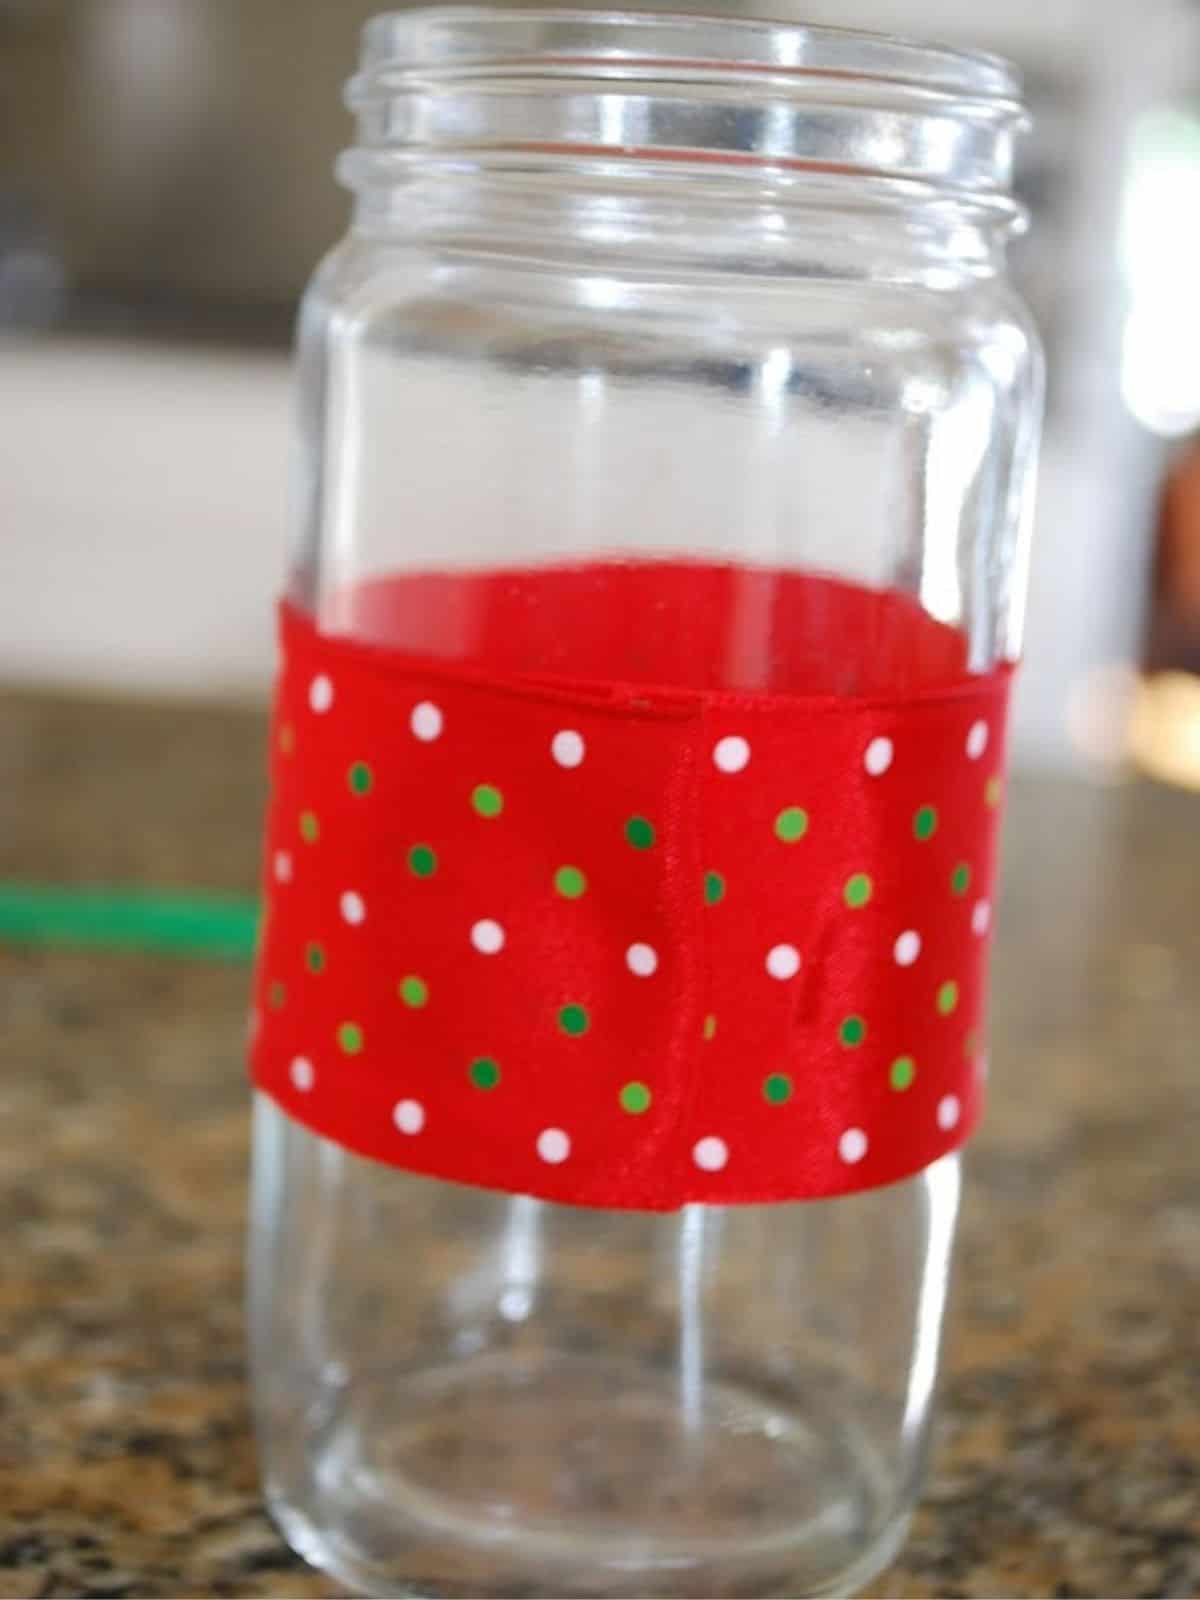
STEP 2: Wrap the ribbon around the jar, making sure it is straight as it goes around. You can also place the ribbon on a table (tape side up) in a straight line and set the jar on it so the ribbon is in the middle. Then you can just pull and stick the ribbon on the jar.

STEP 3: Make sure that the end of the ribbon that you folded over is the end that overlaps, as it will look much cleaner than having the unfinished end overlap.
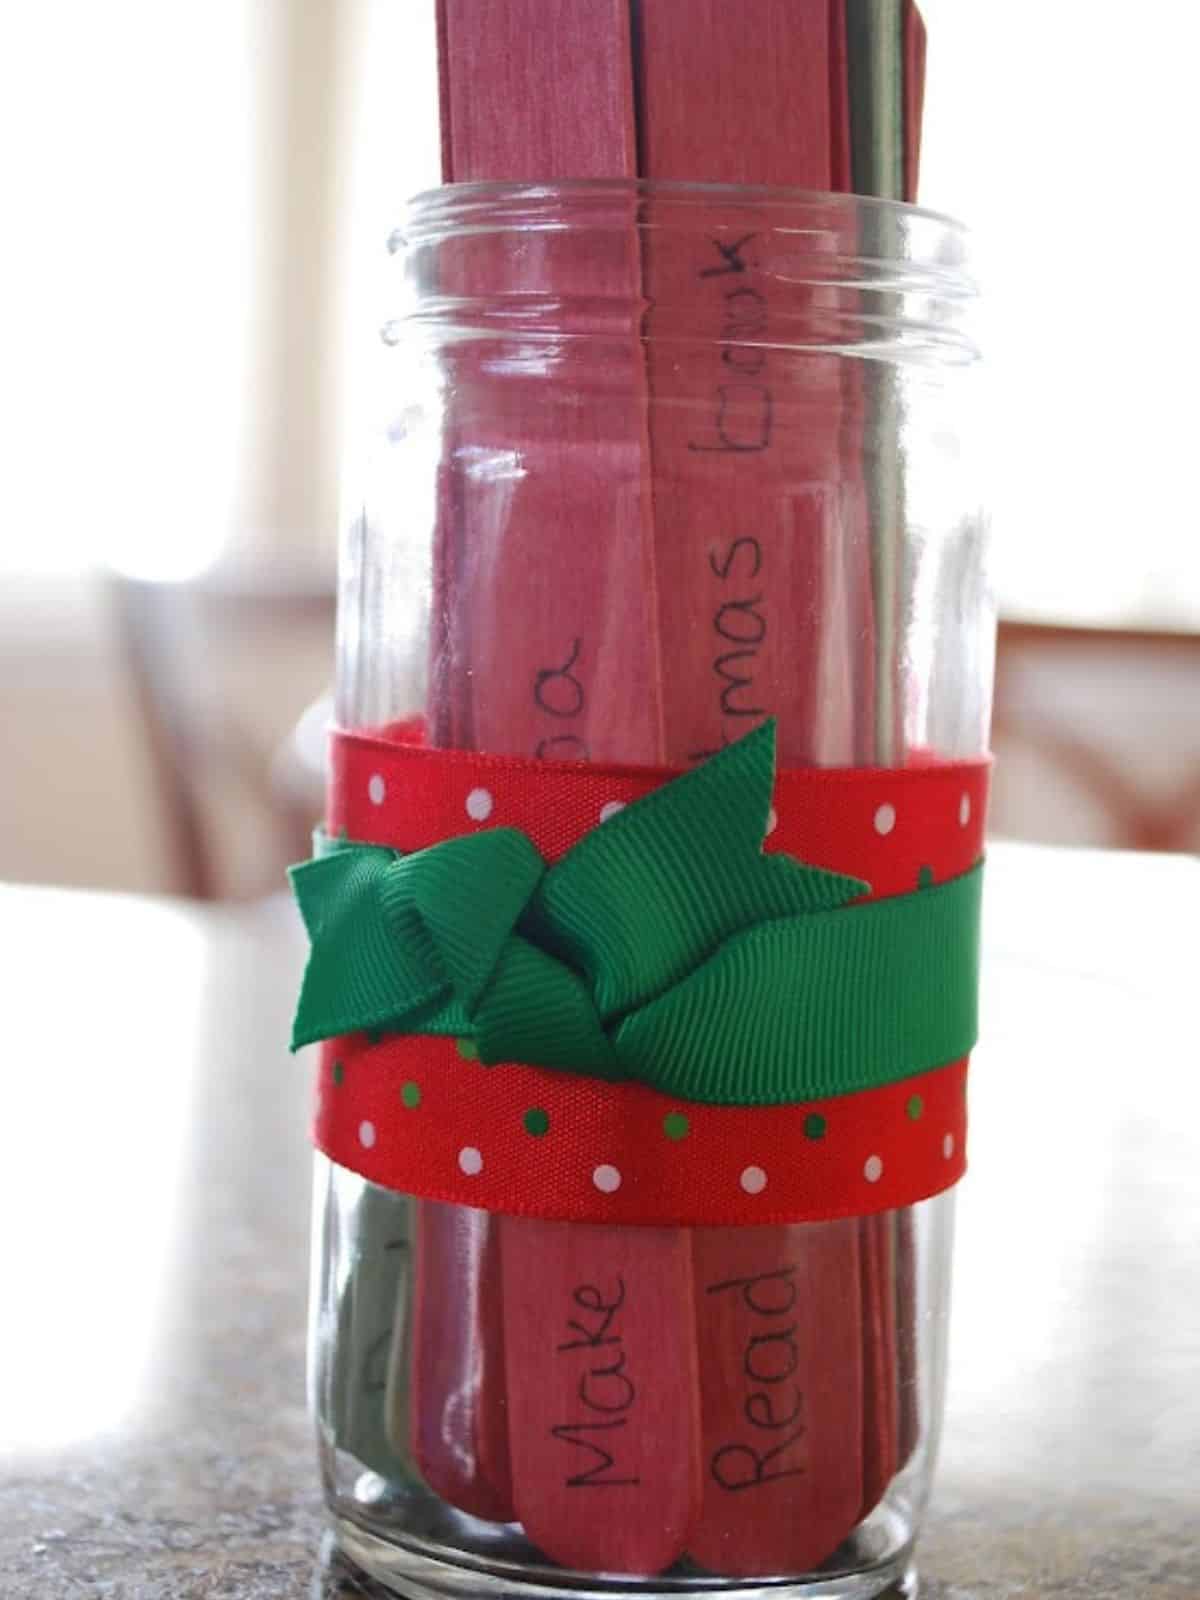
STEP 4: Next you will use your thinner ribbon. You will want to cut this ribbon longer than the wide ribbon since you will be tying it. You do not need any adhesive on the back of this ribbon. You can leave the edges on the thinner ribbon as is, or you can cut a little v-shape as I did on mine. Tie the thinner ribbon around the wider ribbon on the jar and make a knot.
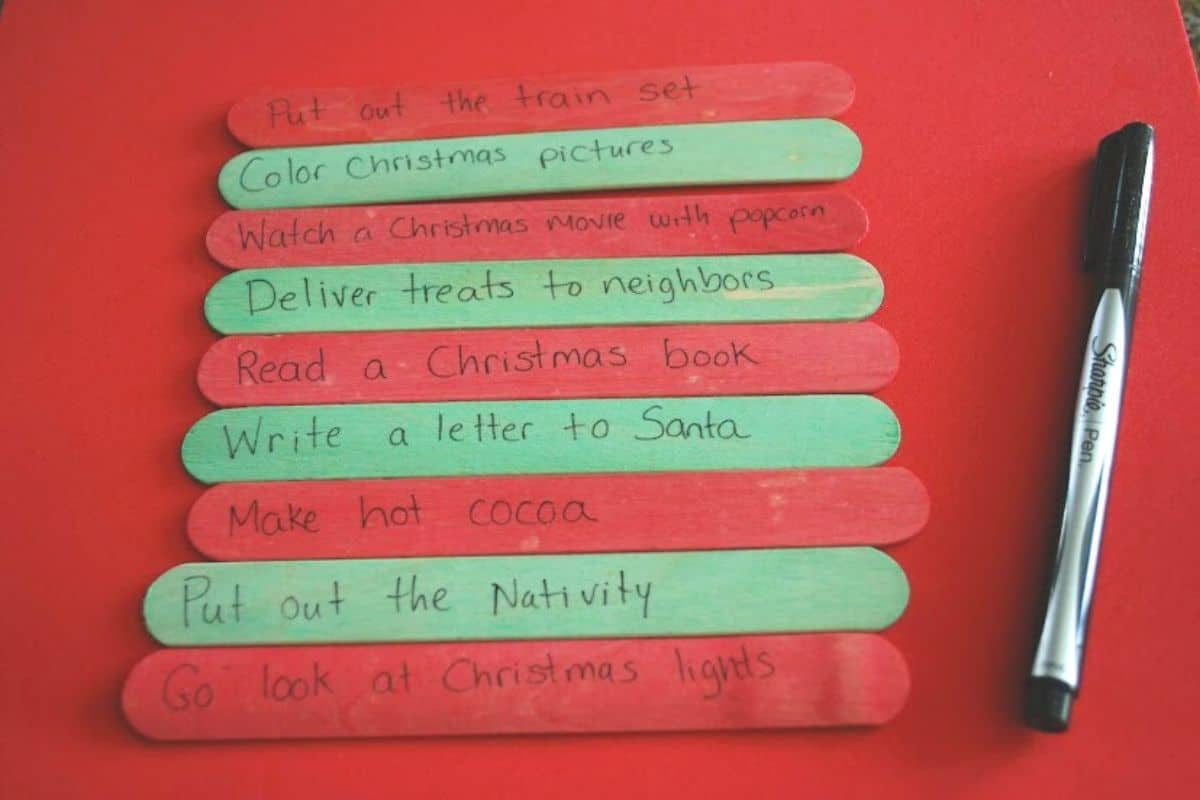
STEP 5: Write fun Advent ideas on the Popsicle sticks. A fine-tip permanent marker works best for this task.
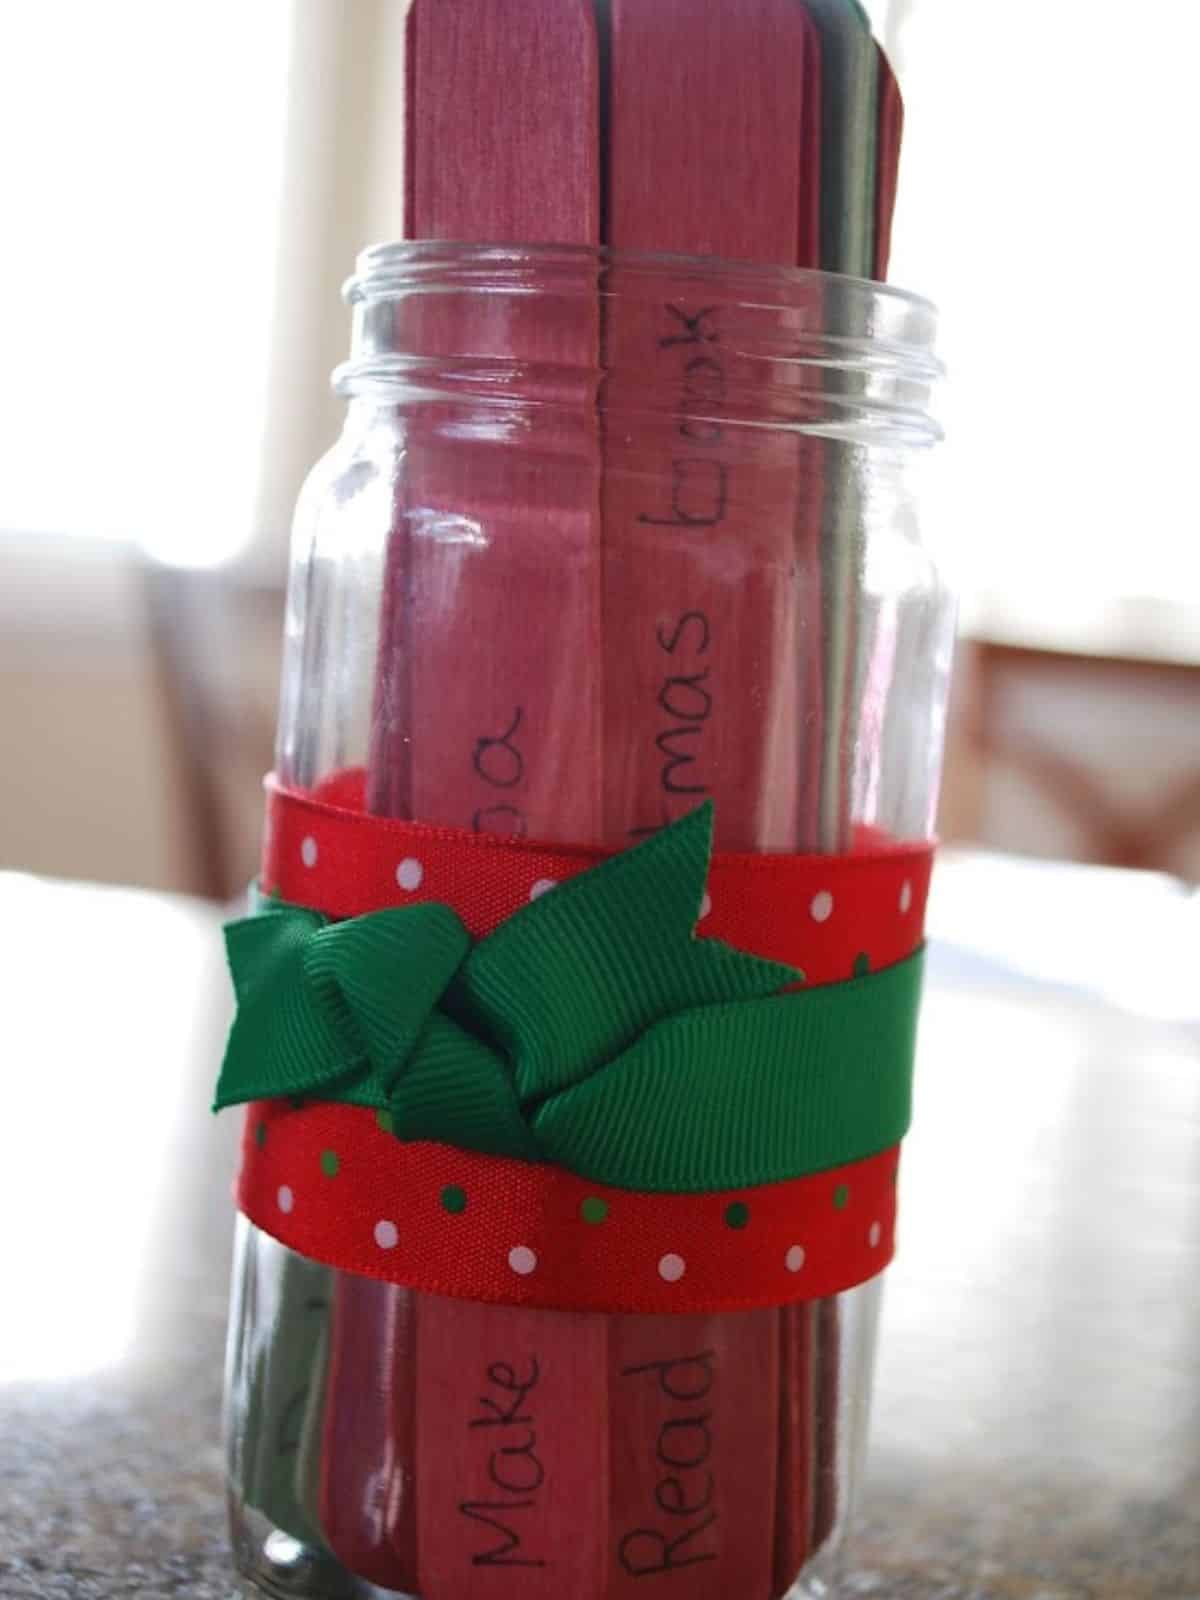
STEP 6: When you are done, place the sticks in the jar and pull out one a night during Advent to do with your family. You can also write a number on the back of the sticks so you know which one to pull out each night. This way you can make sure the activities you have planned go with the time you have on any particular day.
📅 DIY Advent Calendar Ideas
If you are having a hard time coming up with ideas to write on your sticks, here are some ideas:
1. Driving around the neighborhood to look at Christmas lights (In Lieu of Preschool)
2. Putting reindeer food outside the house on Christmas Eve so Rudolph knows which house to stop at. (Nurturestore)
3. Making cranberry sauce which makes the whole house smell festive (Domestic Goddesque)
4. Building Gingerbread houses (Housing a Forest)
5. Going out to the town's annual tree lighting (Toddler Approved)
6. Bake and craft and listen to Christmas music (Life at the Zoo)
7. Decorate the Christmas tree as a family (Childhood 101)
8. Bake and package up goodies to take to neighbors (This Reading Mama)
9. Visit local train displays (Busy Kids Happy Mom)
10. Going on a hunt for the perfect Christmas Tree (Happy Whimsical Hearts)
11. Nighttime shopping with the kids including a Starbucks stop for some sweet treats (Rainy Day Mum)
12. Baking cookies for Santa (Mom to 2 Posh Little Divas)
13. Playing Find the Wisemen. The wisemen wander around the house on their way to the manger and the child has to try and find where they are on their journey to the manger (JDaniel4smom)
14. Enjoying hot chocolate with the family (Creative Playhouse)
15. Making Santa cookies with cookie cutters (Adventures in Mommydom)16. Make chocolate dipped pretzels
17. Set up the Nativity
18. Watch a Christmas movie and eat popcorn
19. Color Christmas pictures
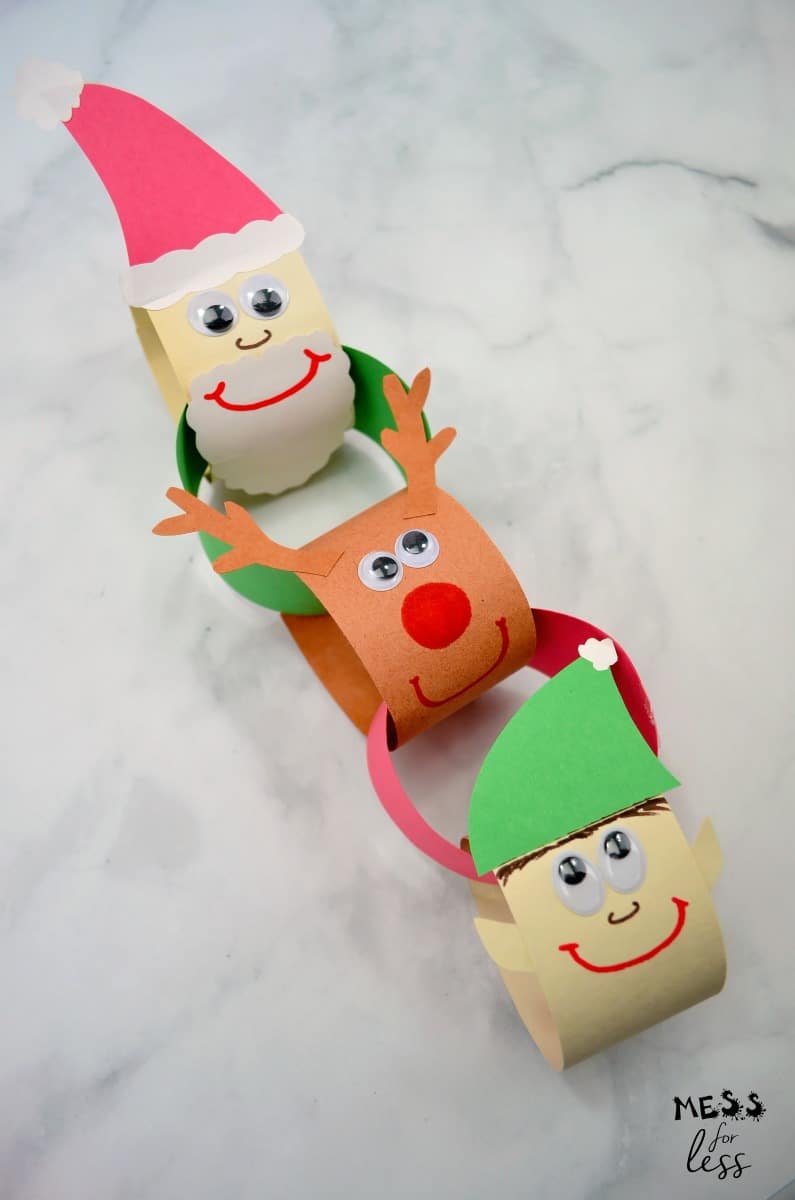
20. Make a construction paper chain using paper strips
21. Write a letter to Santa
22. Reading a Christmas book
23. Open one Christmas present (done on Christmas Eve)
24. Have breakfast or lunch at a restaurant
25. Family pizza night - make a pizza together
26. Visit Santa Claus
27. Make Peppermint bark
28. Read "The Night Before Christmas"
29. Have a dance party to Christmas music
30. Wrap Christmas presents for friends and family
31. Make rice krispie treats
32. Bake an apple pie
33. Put out the train set
34. Make Christmas-colored pancakes
35. Take a trip to the library and look for Christmas books
🌲Expert Tips
The Popsicle sticks they provided us at MOPS were the larger tongue depressor type, but small ones would work as well if that's what you have on hand.
The Popsicle sticks I received were dyed red and green. They sell colored Popsicle sticks if you don't want to go through the trouble of dying them yourself. Of course, you can leave them natural as well.
A recycled jar would be perfect for this advent calendar. Just make sure you have removed the label.
The length of ribbons you use will depend on the width of your jar. You want to make sure you have enough of the wider ribbon to wrap around the jar completely and overlap itself a bit.
🤷🏻♀️Craft FAQs
I prefer a smooth jar since the ribbon lays flat on it more easily, but you can use a mason jar.
You can place it on a mantel or on the counter. Wherever you will see and remember it each day in December.
🎅Related Posts

🌟If you try this recipe, leave a star rating below or a review in the comment section. Be sure to sign up for my newsletter to get my latest recipes!
Easy DIY Advent Calendar and 35 Advent Calendar Ideas
Materials
- Clean glass jar
- 25 Popsicle sticks the larger the better
- Ribbon
- Double sided tape or a hot glue gun
- Fine tip permanent marker
Instructions
- Fold over one end of the wide ribbon about ⅛ of an inch. Then add a few strips of double-sided tape to the back of the wide ribbon.
- Wrap the ribbon around the jar, making sure it is straight as it goes around. You can also place the ribbon on a table (tape side up) in a straight line and set the jar on it so the ribbon is in the middle. Then you can just pull and stick the ribbon on the jar.
- Make sure that the end of the ribbon that you folded over is the end that overlaps, as it will look much cleaner than having the unfinished end overlap.
- Next you will use your thinner ribbon. You will want to cut this ribbon longer than the wide ribbon since you will be tying it. You do not need any adhesive on the back of this ribbon. You can leave the edges on the thinner ribbon as is, or you can cut a little v-shape as I did on mine. Tie the thinner ribbon around the wider ribbon on the jar and make a knot.
- Write fun Advent ideas on the Popsicle sticks. A fine-tip permanent marker works best for this task.
- When you are done, place the sticks in the jar and pull out one a night during Advent to do with your family. You can also write a number on the back of the sticks so you know which one to pull out each night. This way you can make sure the activities you have planned go with the time you have on any particular day.
Notes
- The Popsicle sticks I used are the larger tongue depressor type, but small ones would work as well if that's what you have on hand.
- I used red and green popsicle sticks. They sell colored Popsicle sticks if you don't want to go through the trouble of dying them yourself. Of course, you can leave them natural as well.
- A recycled jar would be perfect for this advent calendar. Just make sure you have removed the label.
- The length of ribbons you use will depend on the width of your jar. You want to make sure you have enough of the wider ribbon to wrap around the jar completely and overlap itself a bit.


Printable Calendar says
What a great idea!! Thank you for sharing at Sharing Saturday!
printable calendar says
What a great idea!! Thank you for sharing at Sharing post! I've discovered a site where you can design your calendars together by day, month, week. I suggest you do yours!