
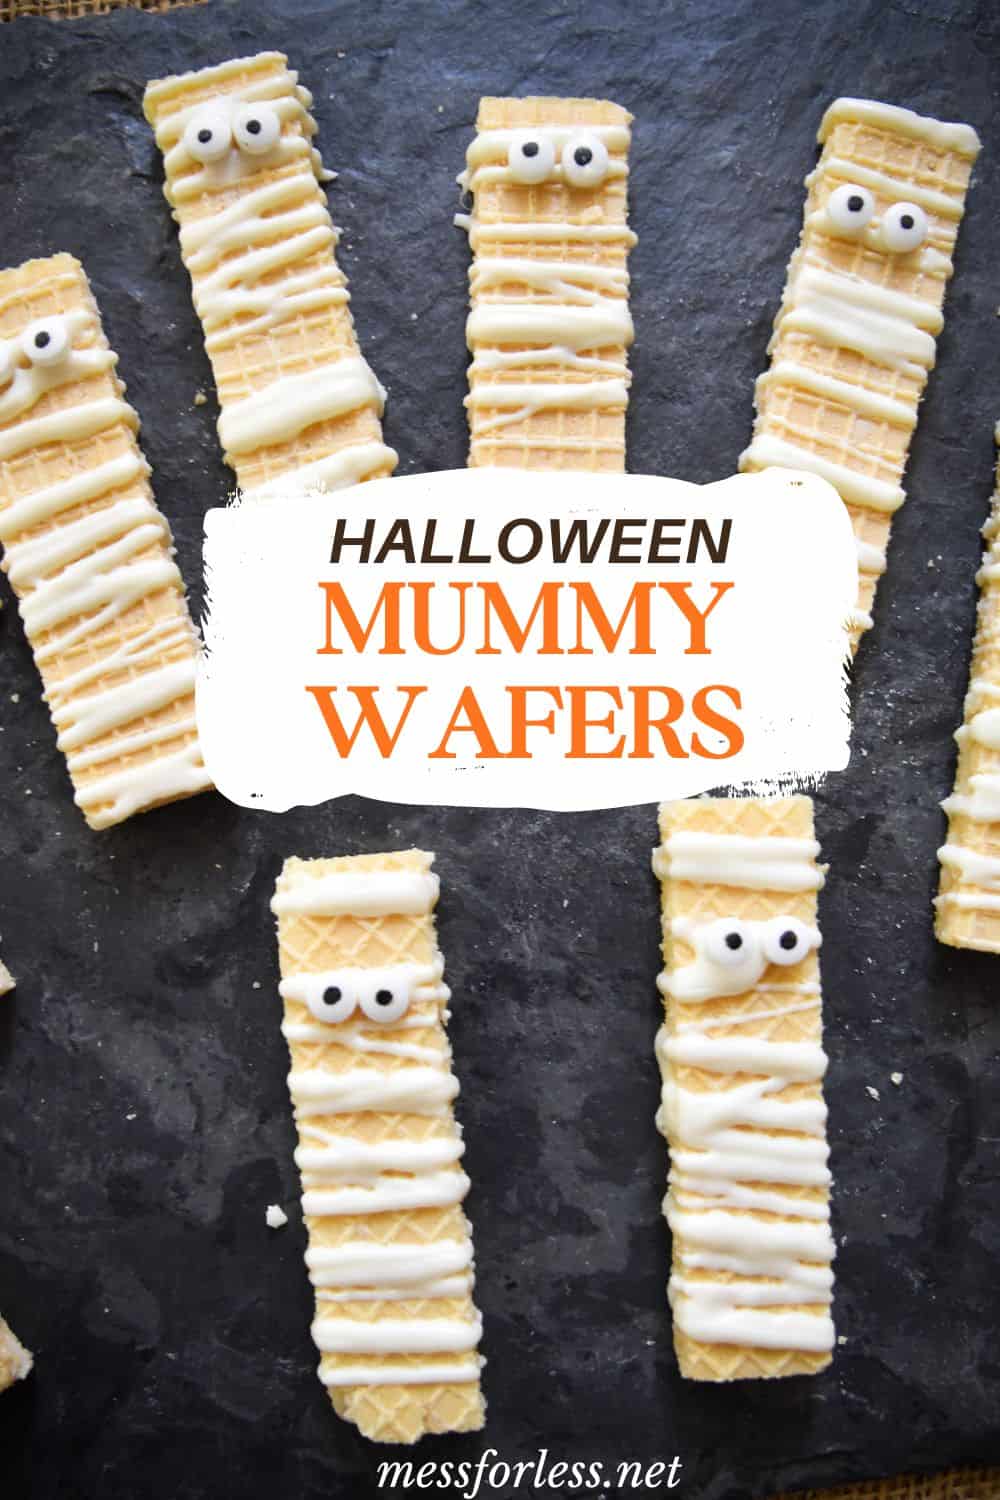
If you're looking for a Halloween treat that's adorable and easy, these White Chocolate Wafer Mummy Cookies are the answer. No baking or fuss, just a little melting, some drizzling, and some googly-eyes. They're a great way to add spooky fun to your Halloween activities and Halloween food lineup!
These are simple enough to make with kids and festive enough to bring to a class party. However you serve them, I'm sure you'll find they're a big hit!
Jump to:
Why You'll Love White Chocolate Wafer Mummies
- Super easy: No baking. No mixing. Just melt, drizzle, and decorate.
- Kid-approved: Kids will have fun adding the eyes and decorating the mummies.
- Perfect for parties: These Halloween snacks disappear fast from Halloween tables.
- Customizable: Change it up by adding food coloring for colored bandages or trying a different wafer flavor.

Halloween Snacks
Homemade Halloween treats are half the fun of the season! They work for parties, in a lunchbox, or just as a festive surprise. These Halloween snacks are as fun to make as they are to eat. Here are some of our favorites to get you in the spooky spirit!
- Halloween Meringue Recipe
- Apple Spiders Halloween Snack
- How to Make Halloween Monster Donuts
- Halloween Witch Bark
Ingredients for White Chocolate Wafer Mummies
- Vanilla sugar wafer cookies: In addition to being light and crisp, they are the perfect shape for a mummy.
- White chocolate melting wafers: They melt easily and can be drizzled over the wafers to make spooky bandages.
- Candy eyes: Big ones or small ones - you can mix it up for a fun, googly-eyed look.

Best Kitchen Tools for White Chocolate Wafer Mummies
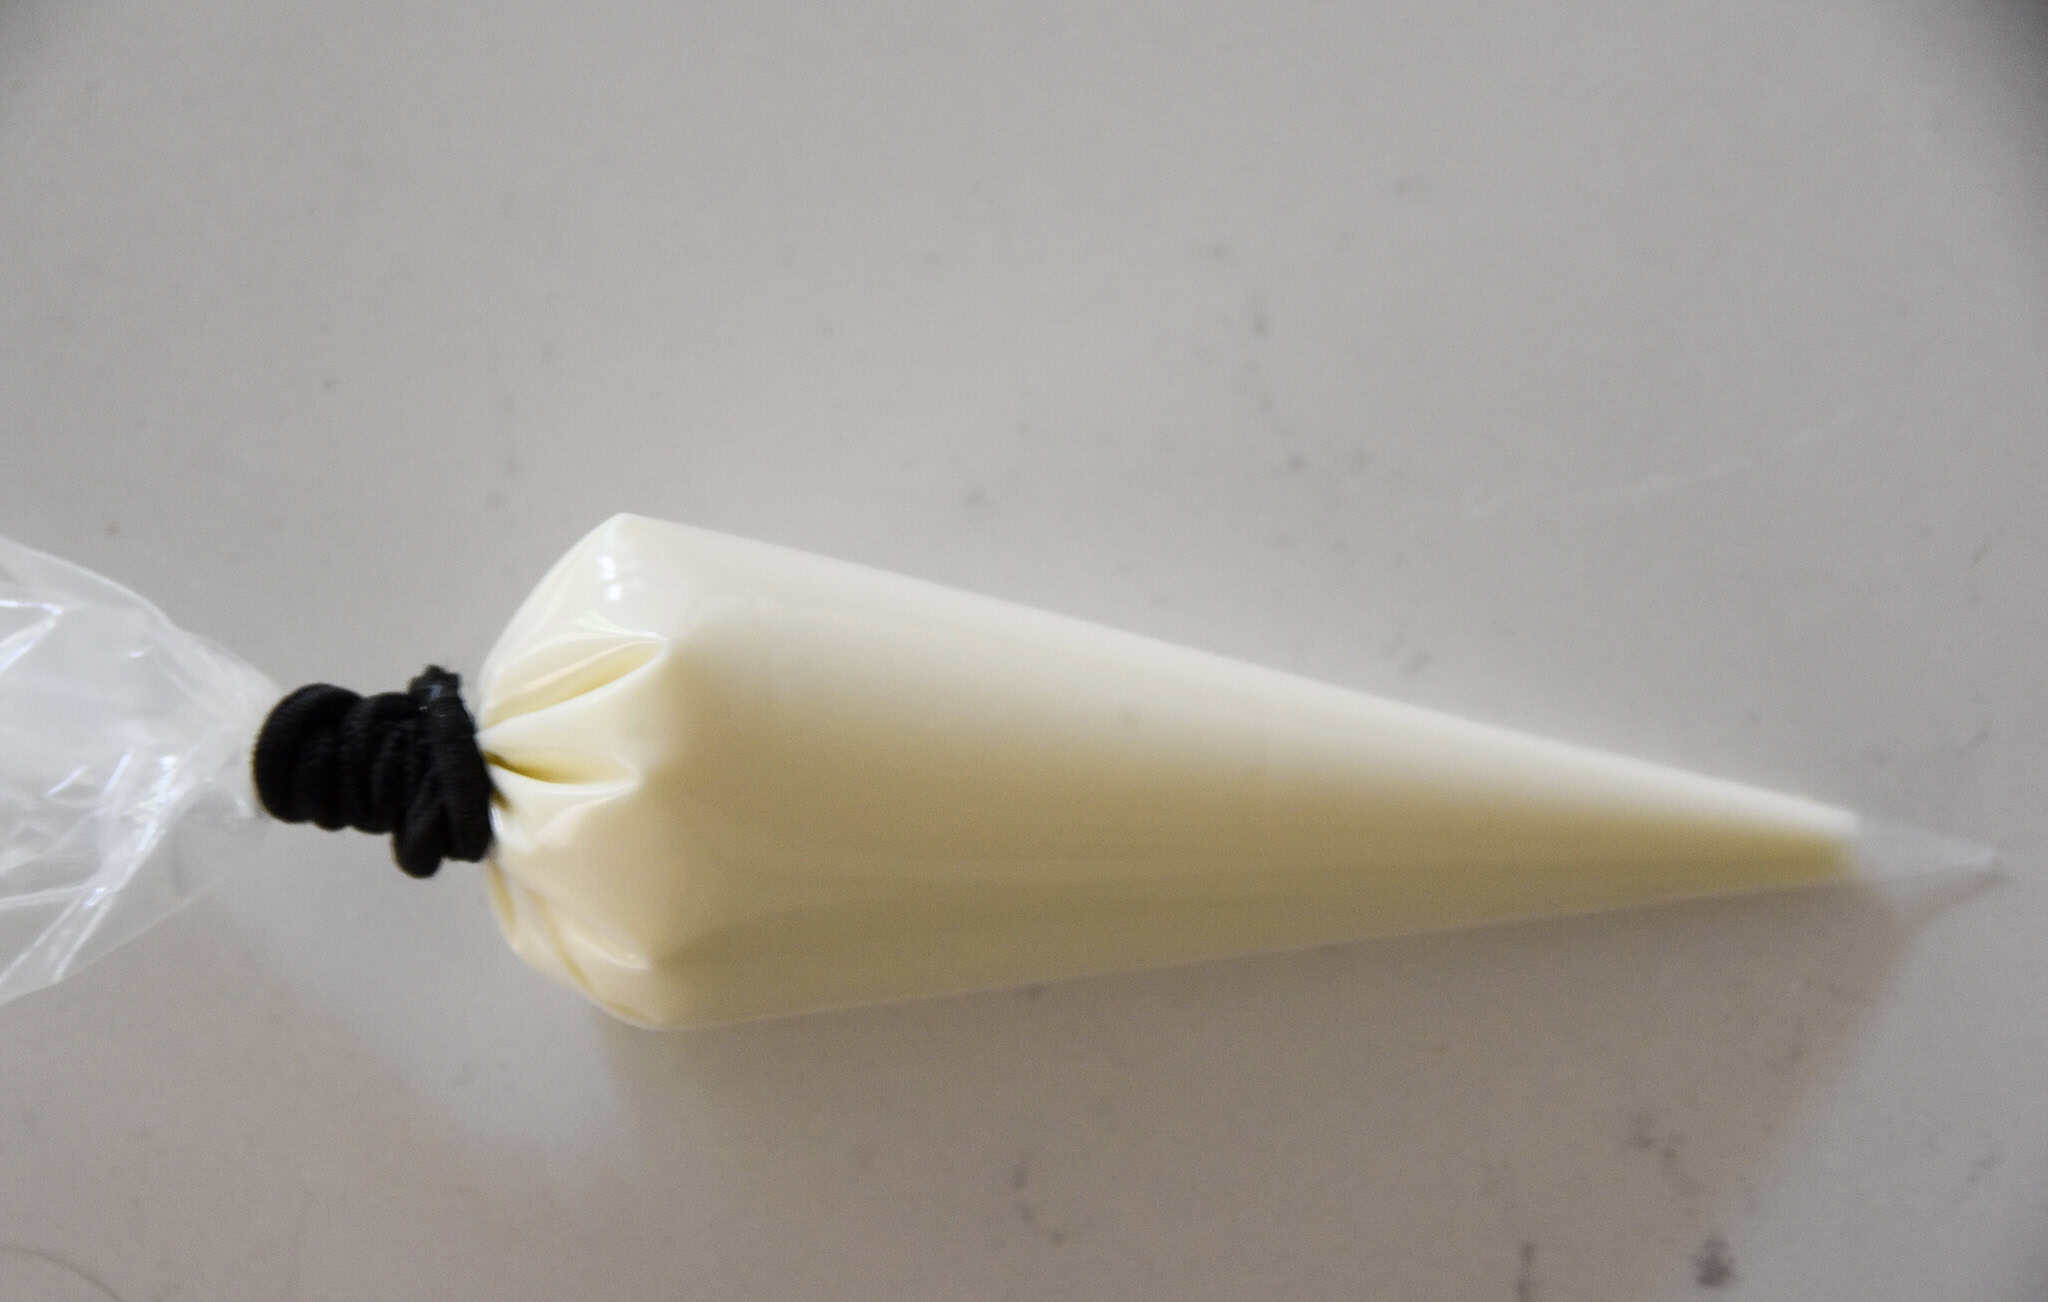
These no-bake Halloween treats are super easy, but a few helpful tools will have you feeling like a pro. I like using a microwave-safe glass bowl for melting chocolate, and parchment paper for easy cleanup. A piping bag makes drizzling the chocolate fun!
👉 Tap any image below to shop these fun and festive kitchen tools on Amazon!


How to Make White Chocolate Wafer Mummies
1. Melt the chocolate - To make it smooth and ready for drizzling. Scoop the melted chocolate into a decorating bag.

2. Drizzle the "bandages" - Create mummy wraps with a fun, messy zigzag.

3. Add the eyes - Stick them on before the chocolate melts.

4. Let them set - Chill for a few minutes or let them rest at room temperature until the white chocolate firms up.

Tips for Making Mummy Cookies
Tip 1: Let the chocolate cool slightly before drizzling. If it's too hot, it will run right off the cookies.
Tip 2: Mix and match candy eye sizes for a silly, slightly spooky look kids will love.
Tip 3: Use a zip-top bag with the corner snipped if you don't have a piping bag. It works just as well.
FAQs for Mummy Wafers
Store these mummy cookies in an airtight container at room temperature for up to a week.
No problem! A spoon works fine, or just cut a tiny corner off a zip-top bag and use it for drizzling.
These are great for Halloween parties! Make sure they're in a single layer or separated by wax paper so the chocolate doesn't get smudged.
Mummy Recipes
Looking for more mummy madness? I got you! Try these adorable Mummy Rice Krispie Treats for a sweet and crunchy option, or serve up classic Mummy Hot Dogs for a kid-favorite dinner before trick-or-treating.
Want something a little spooky, but also a bit fancy? This Black Velvet Cake that looks like a mummy is a beautiful choice. And if you're going all out, a Mummy Meatloaf that's as fun as it is delicious!
These chocolate-covered wafer cookies will make Halloween feel extra special without stressing you out. So melt some chocolate, turn on a spooky playlist, and get your mummy on.
📖 Recipe

White Chocolate Wafer Mummy Cookies
Video
Ingredients
- 24 Vanilla wafer cookies those layered, crispy ones
- 8 oz White chocolate melting wafers
- 48 Candy eyes assorted sizes add personality!
Instructions
- Add white chocolate melting wafers to a microwave-safe bowl. Heat in 30-second intervals, stirring in between, until smooth and fully melted.
- Stick two candy eyes near the top of each wafer cookie into the melted chocolate. Let them set for a few minutes so they stay put.
- Spoon the remaining melted chocolate into a piping bag or zip-top bag with the corner snipped. Drizzle across each wafer in a zigzag pattern to create "bandages."
- Place mummies on wax paper or a lined baking sheet. Chill in the fridge for 10-15 minutes, or let sit at room temperature until the chocolate firms up.
Notes
- Let the chocolate cool just a bit before you drizzle-if it's too hot, it'll slide right off the cookies.
- Mix and match candy eye sizes for a fun, slightly spooky look that kids totally love.
- No piping bag? No problem. Just snip the corner off a zip-top bag and you're good to go!


Leave a Reply