
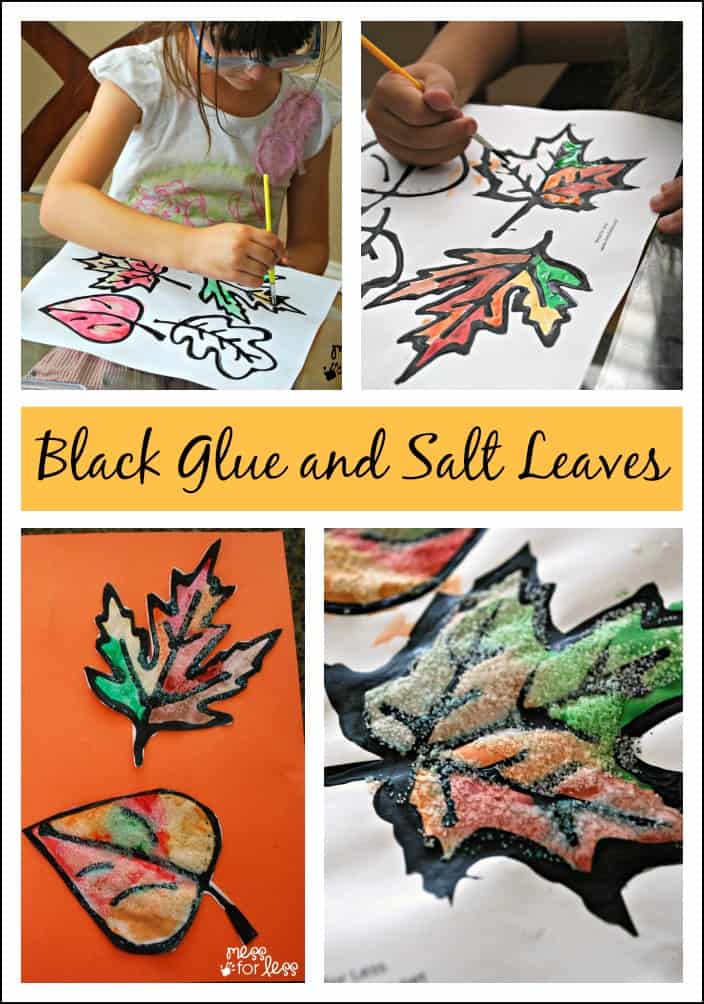
We have been on a Fall Craft kick here at Mess for Less. Recently, we made these Fall Leaves Window Stickers and they are still adorning our front window. As part of that project, I created a fall leaf printable. I loved how the printable turned out and I wanted to be able to use it again for another activity. I remember how we had made Fall Leaves Using Black Glue in the past and decided to make them again but add a twist by using my leaf printable and adding salt. We used a similar process when we made Black Glue and Salt Watercolor Rainbows.
Jump to:
🍂Why Black Glue and Salt Leaves are Awesome
- If you have never used salt with watercolors before, your kids will love the textured art created when you combine the two.
- Anytime you work with paint, there is the chance to learn a little bit about color mixing.
- Kids will be amazed with the colorful textured art they are able to create.
🌳Supply Notes
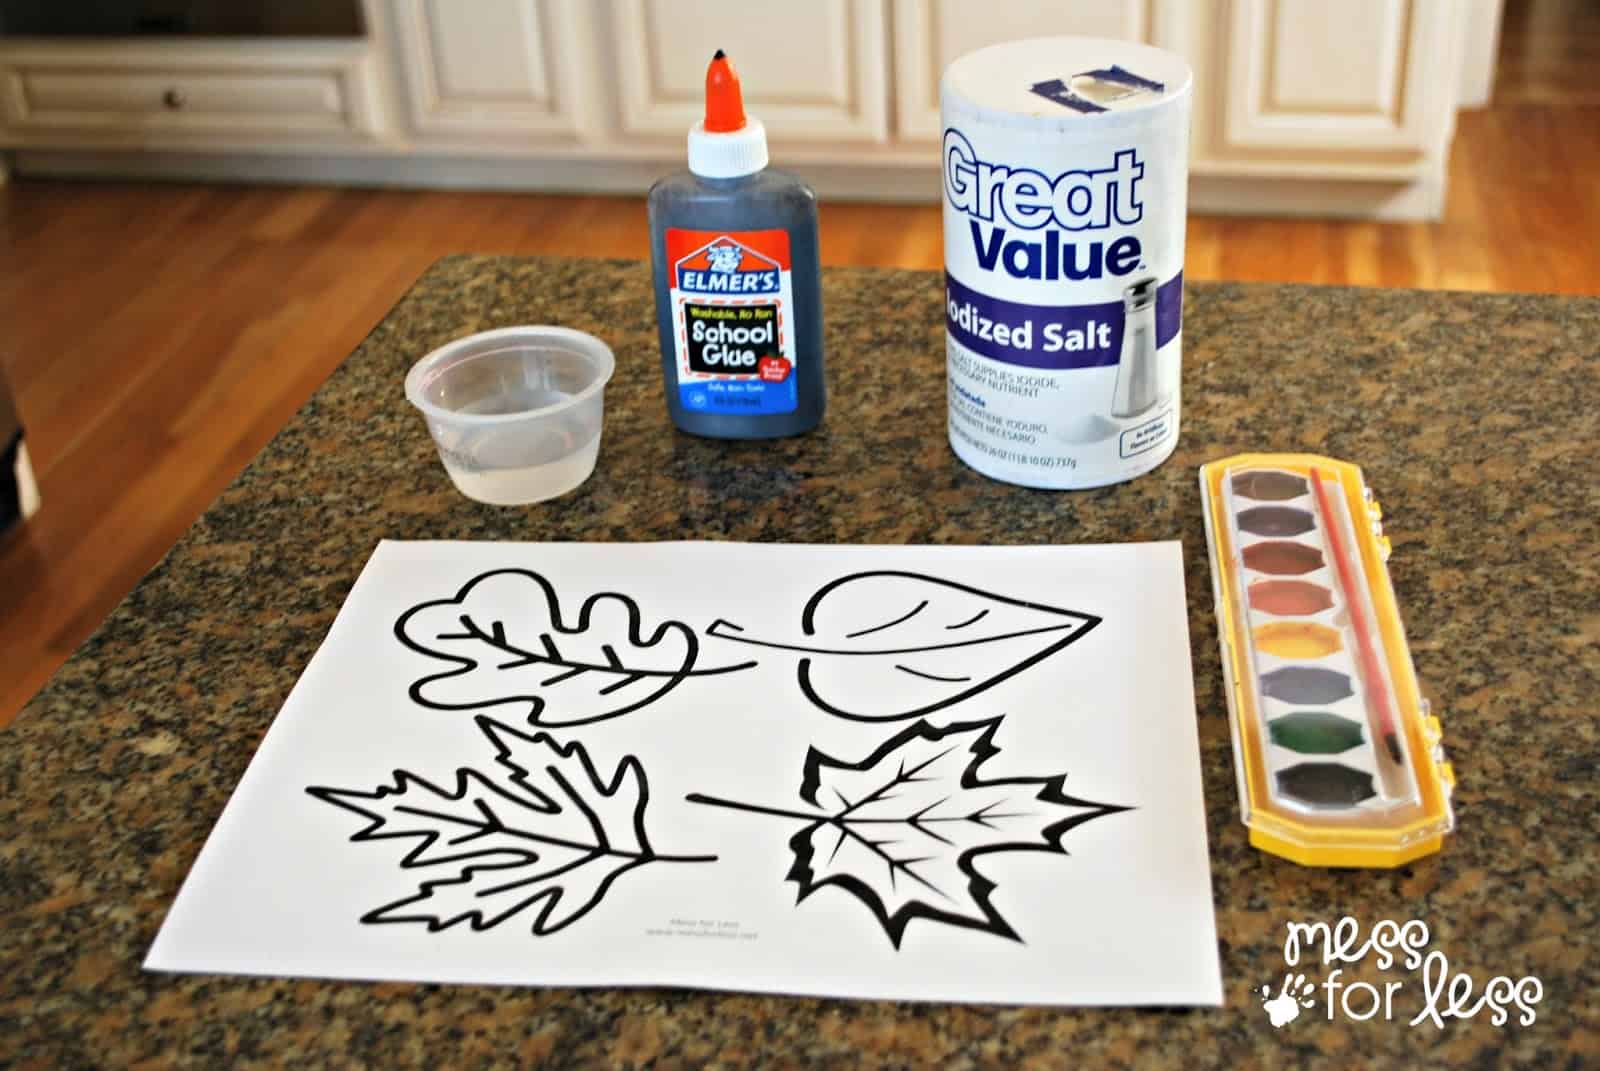
- Free leaf printable - You can download this by clicking the link to the left.
- Watercolors - One with primary colors is fine as you can mix colors to get different shades.
- Small paintbrush - For painting the leaves.
- White glue - To help make the black glue.
- Black paint - Used to make black glue. Find out how to make black glue in the post below.
- Salt - Table salt in a salt shaker works fine.
📋How To Make Black Glue and Salt Fall Leaves
STEP 1: Print out this free leaf printable.
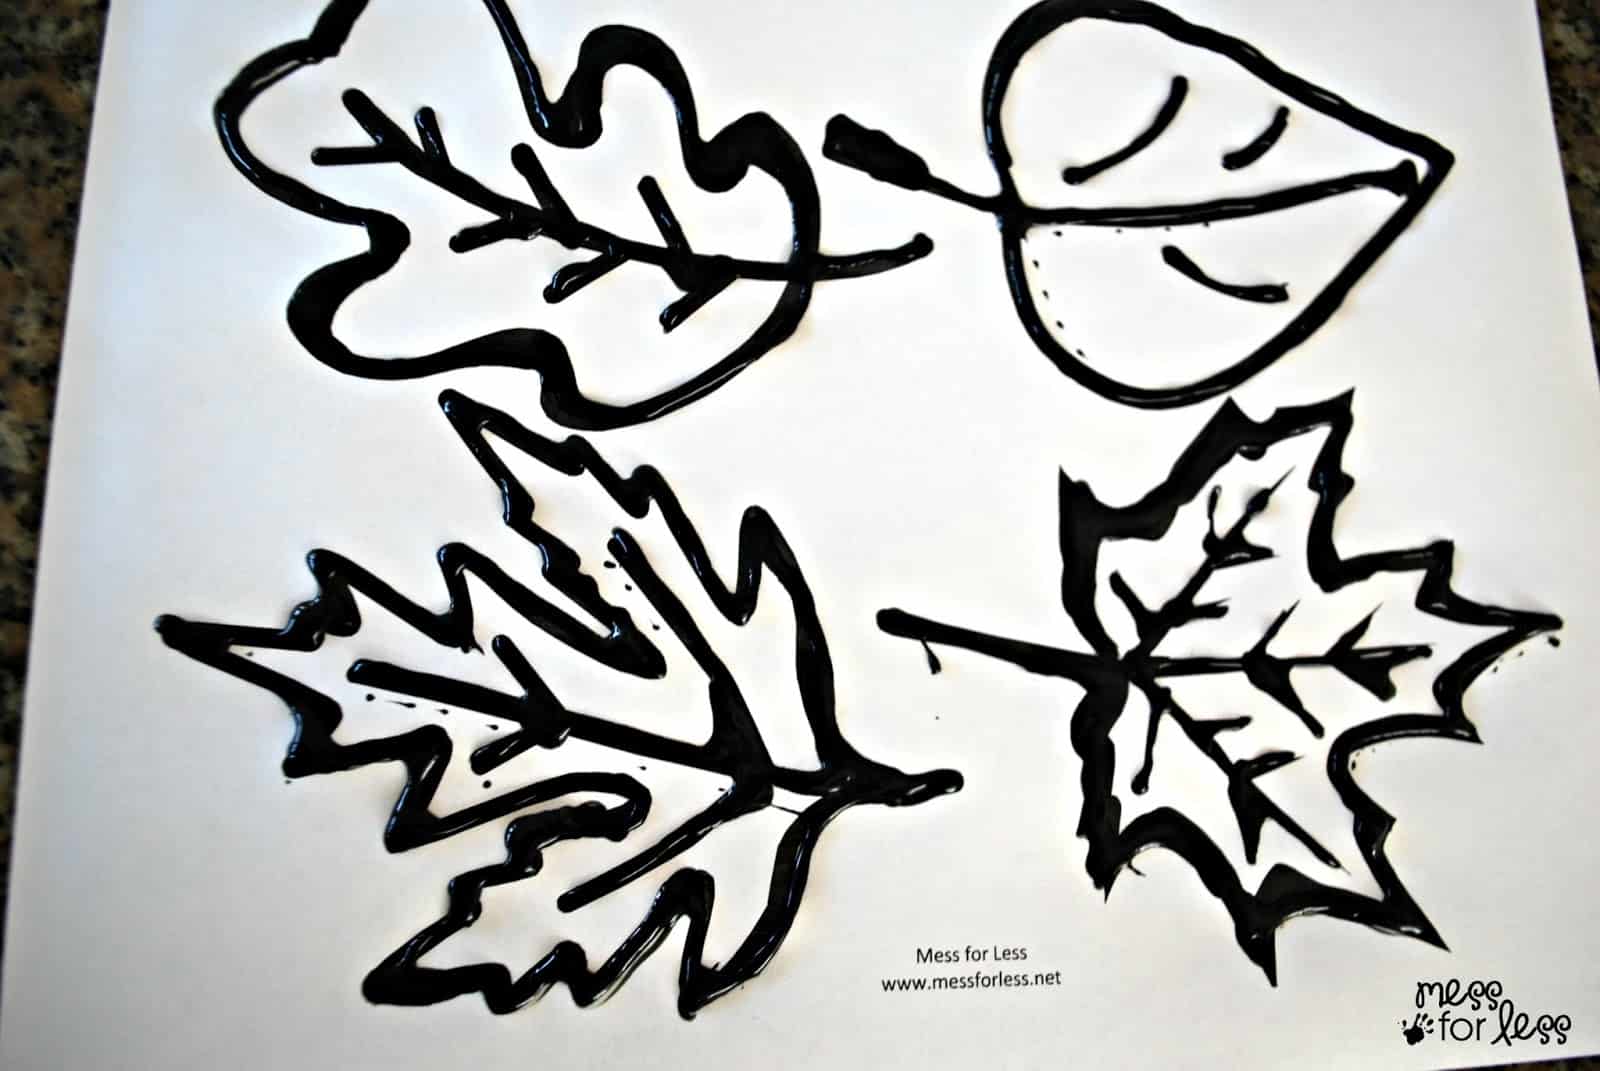
STEP 2: To make black glue, empty your glue bottle so it's only half full. Then add some squirts of black paint. Use enough black paint to fill up an additional quarter of the glue bottle. Shake the mixture until it is totally combined.
STEP 3: Outline the leaves on the leaf printable using the black glue and allow to dry. This step is easier if done by an adult or older child. Make sure you allow plenty of time for the black glue to dry before starting the painting.
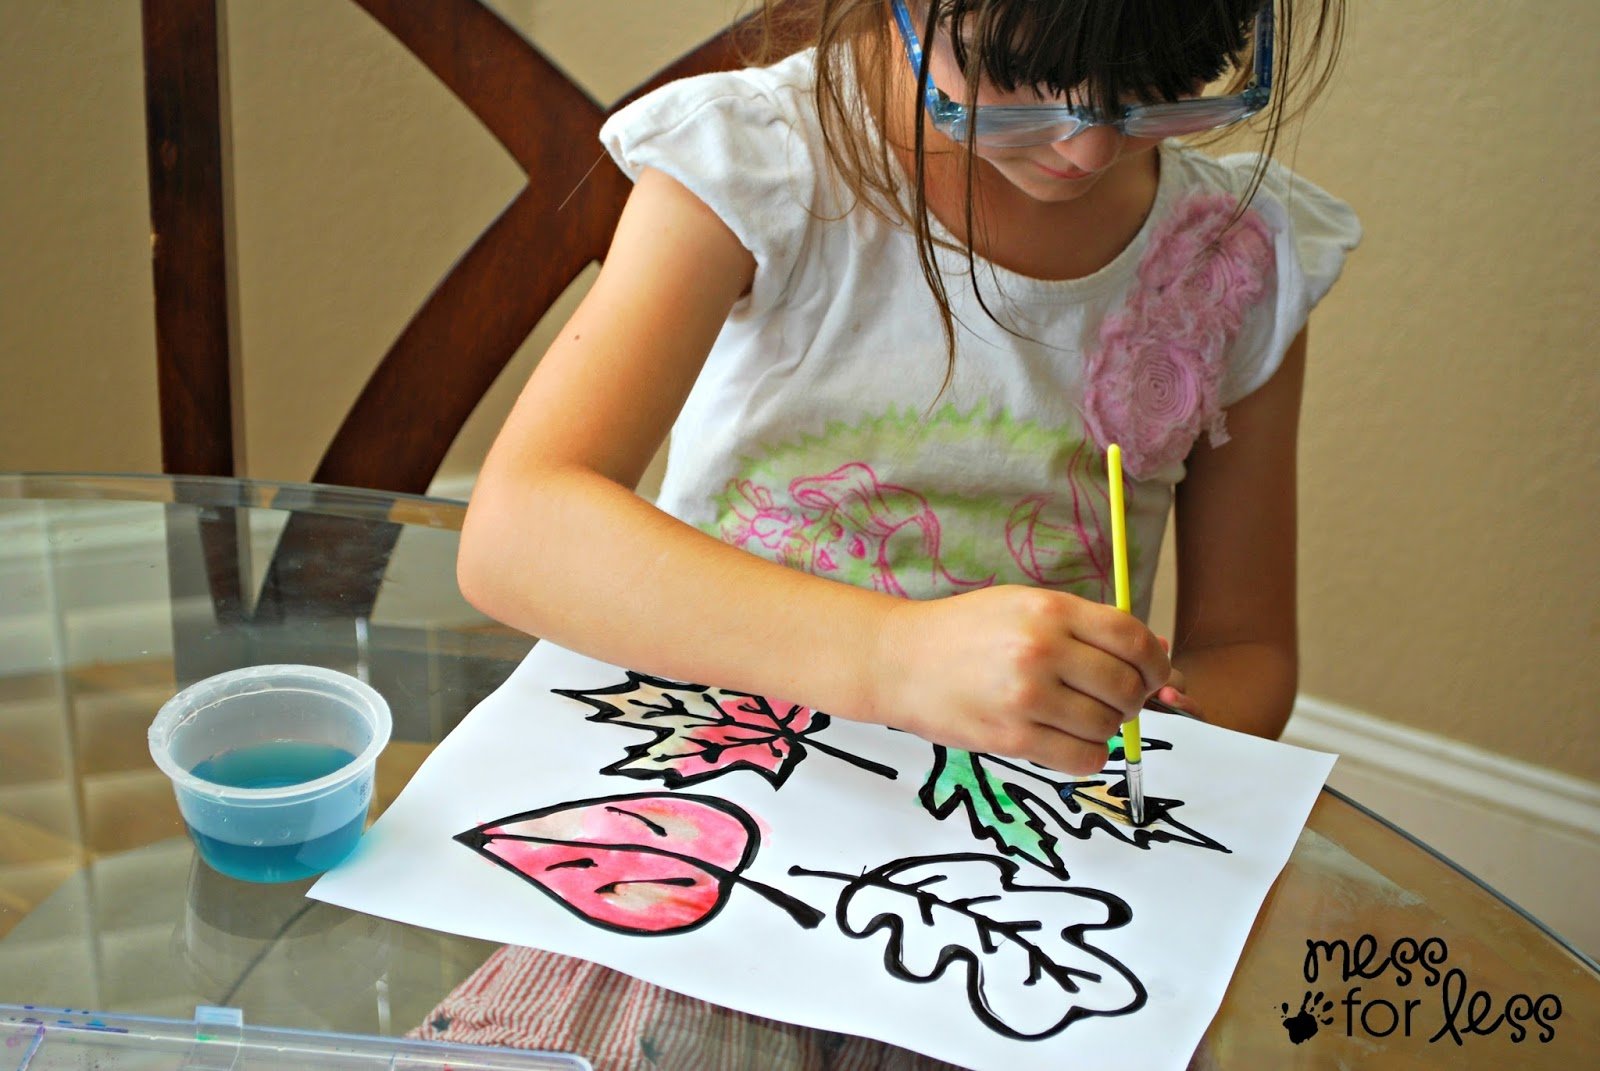
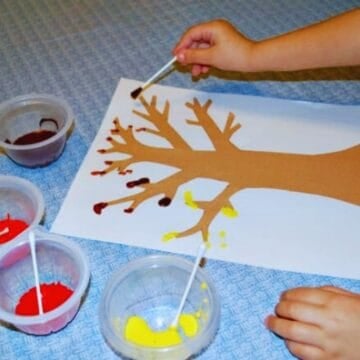
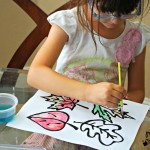
STEP 4: Provide your child with watercolors, a brush and some water.
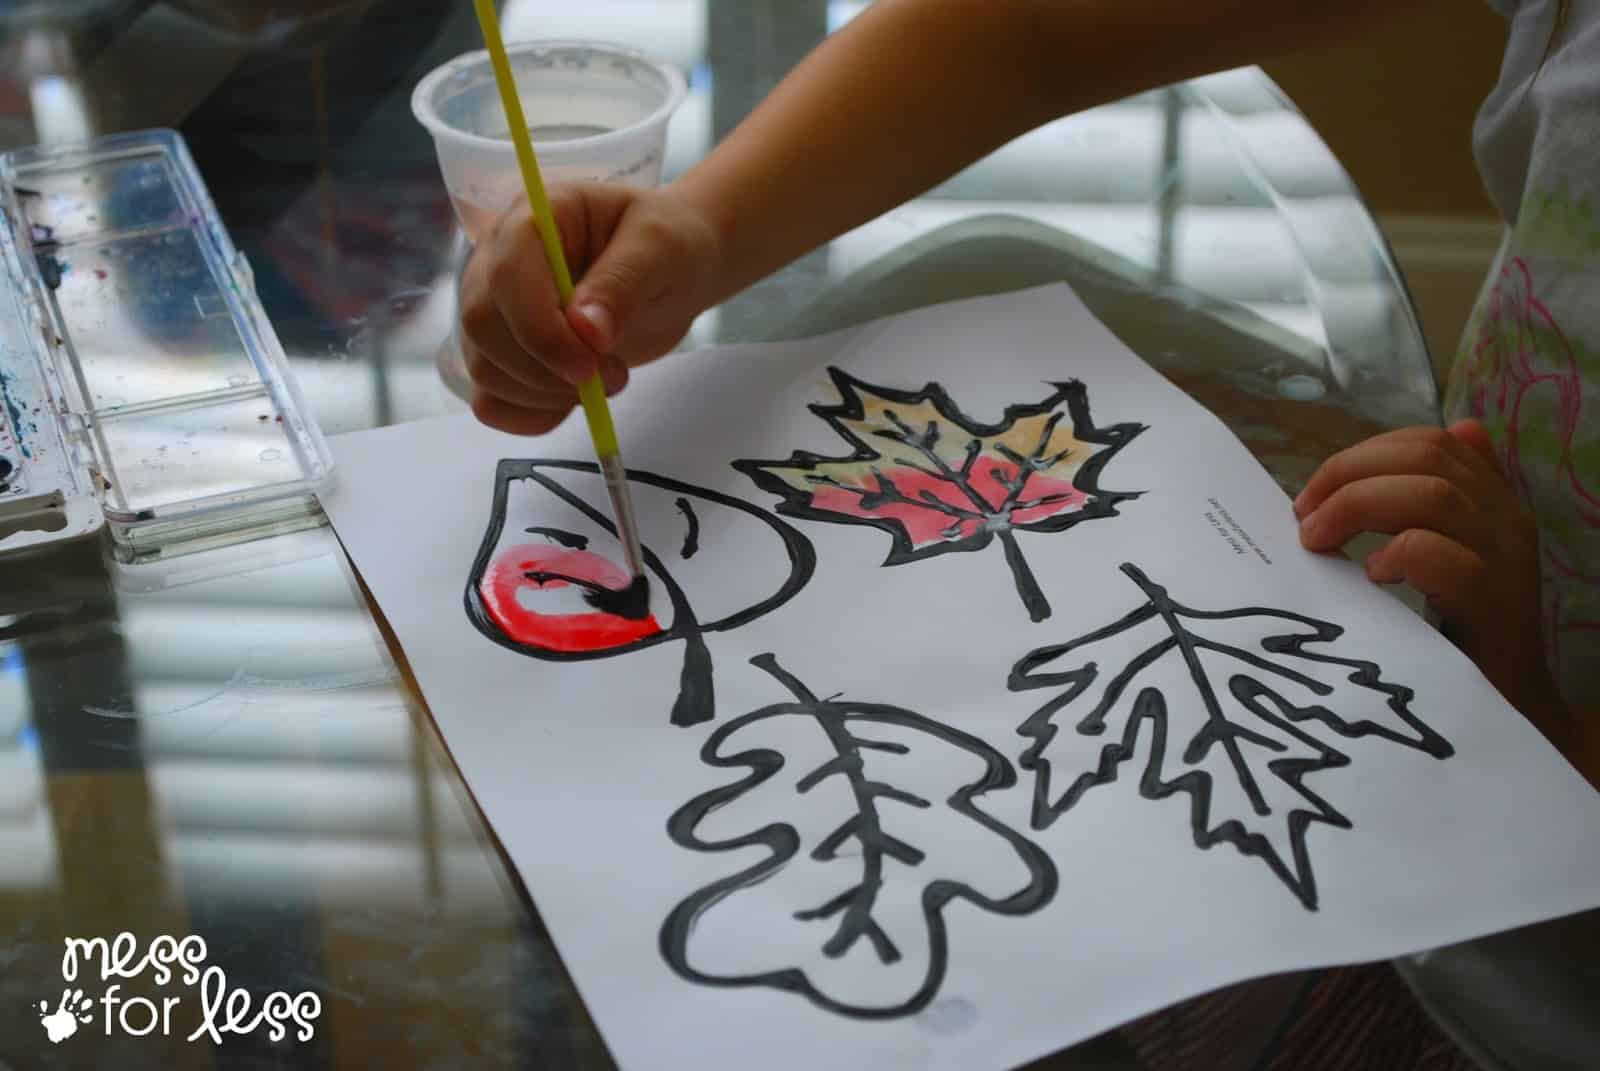
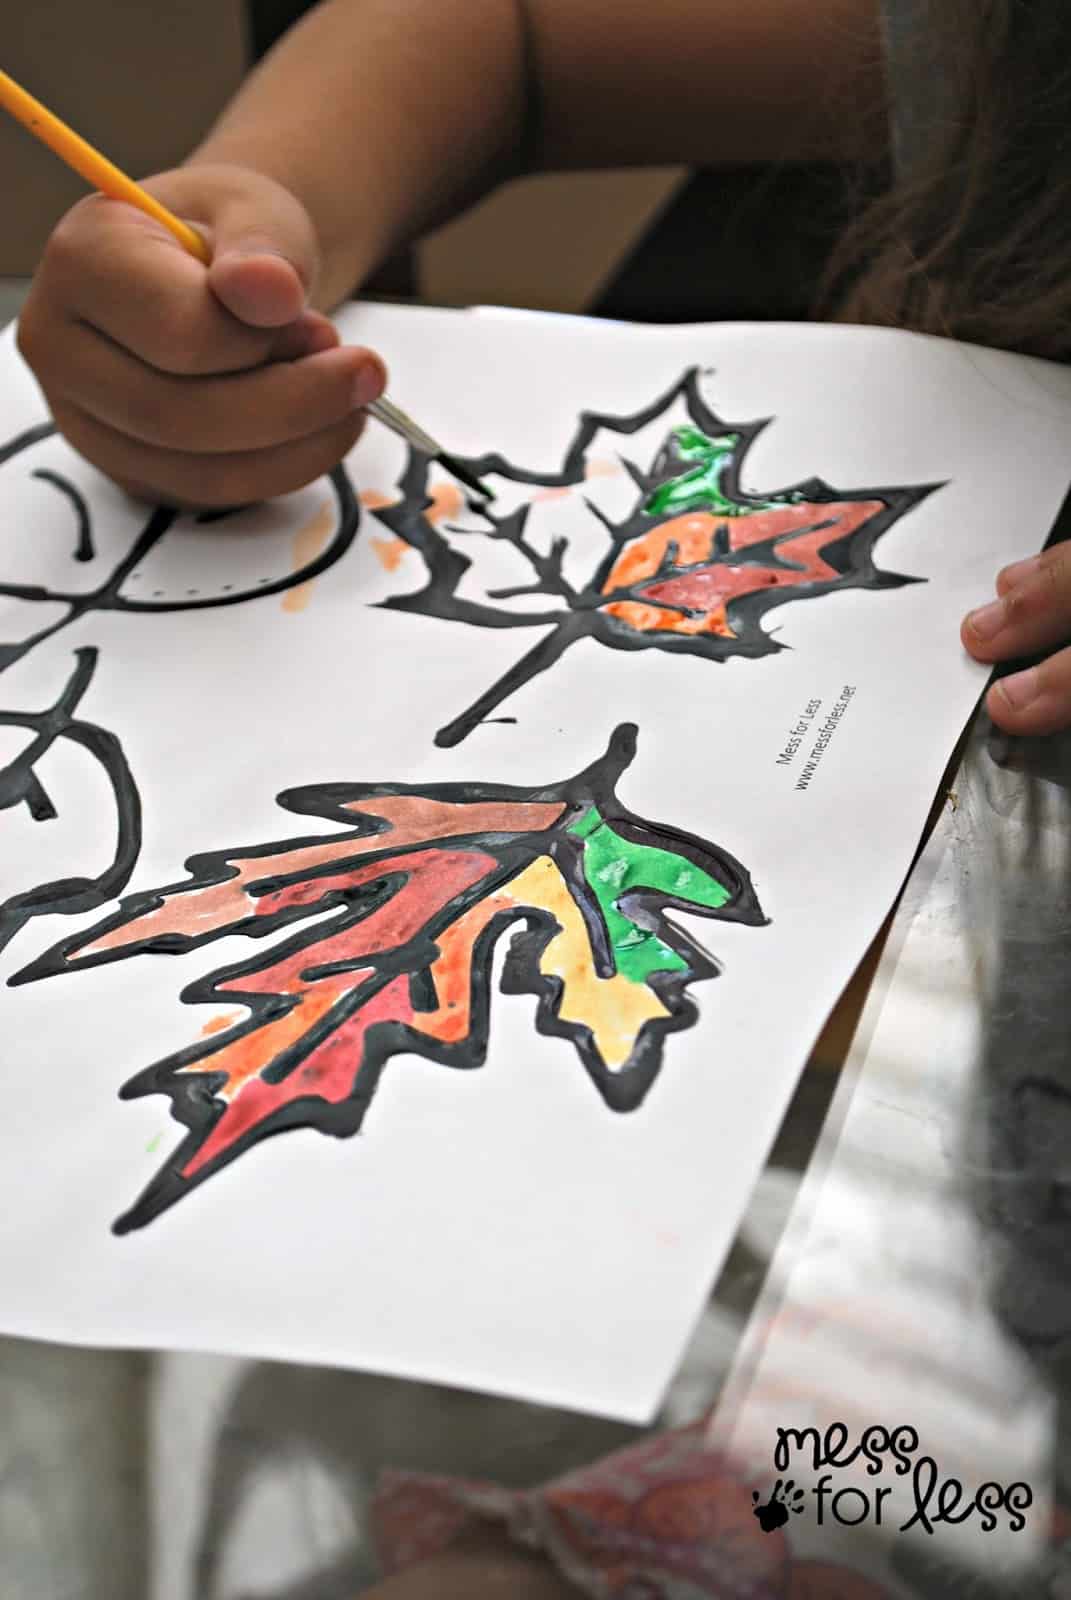
STEP 5: Have your child paint the leaves using the watercolors.
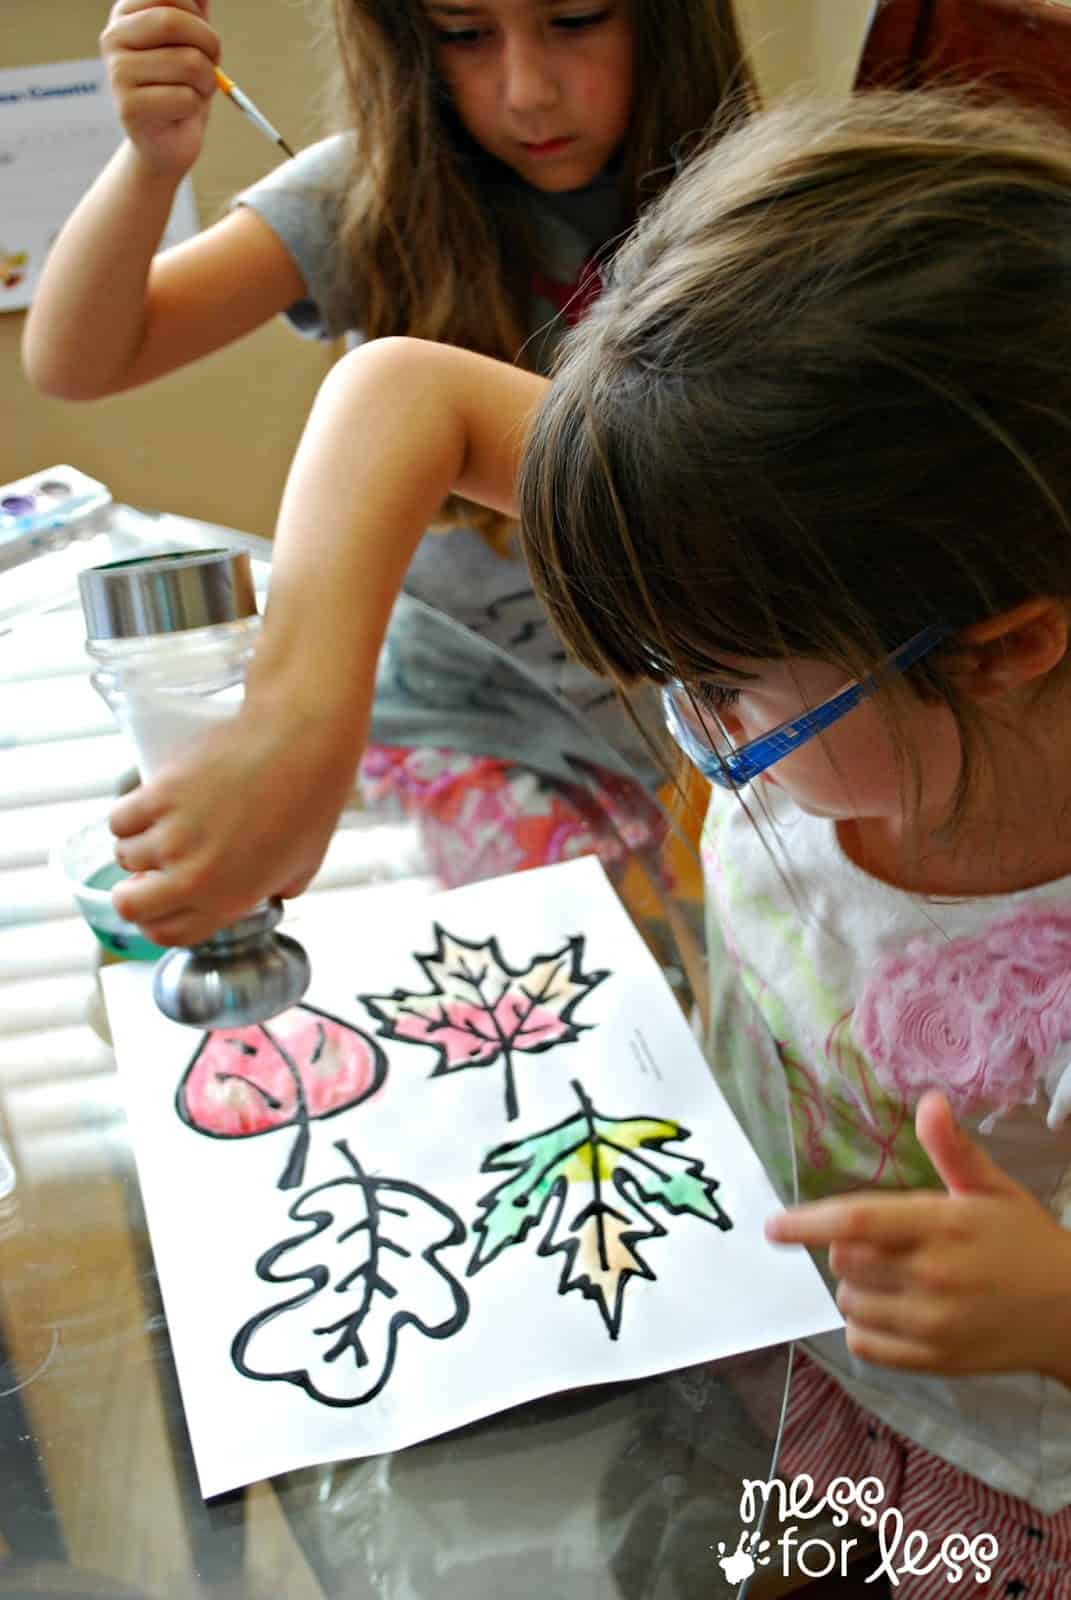
STEP 6: The next step is to add the salt. You will want to be sure the painting is still wet before adding the salt. If parts of the painting have dried already, have your child go over it again with a wet brush.
STEP 7: Allow to dry.
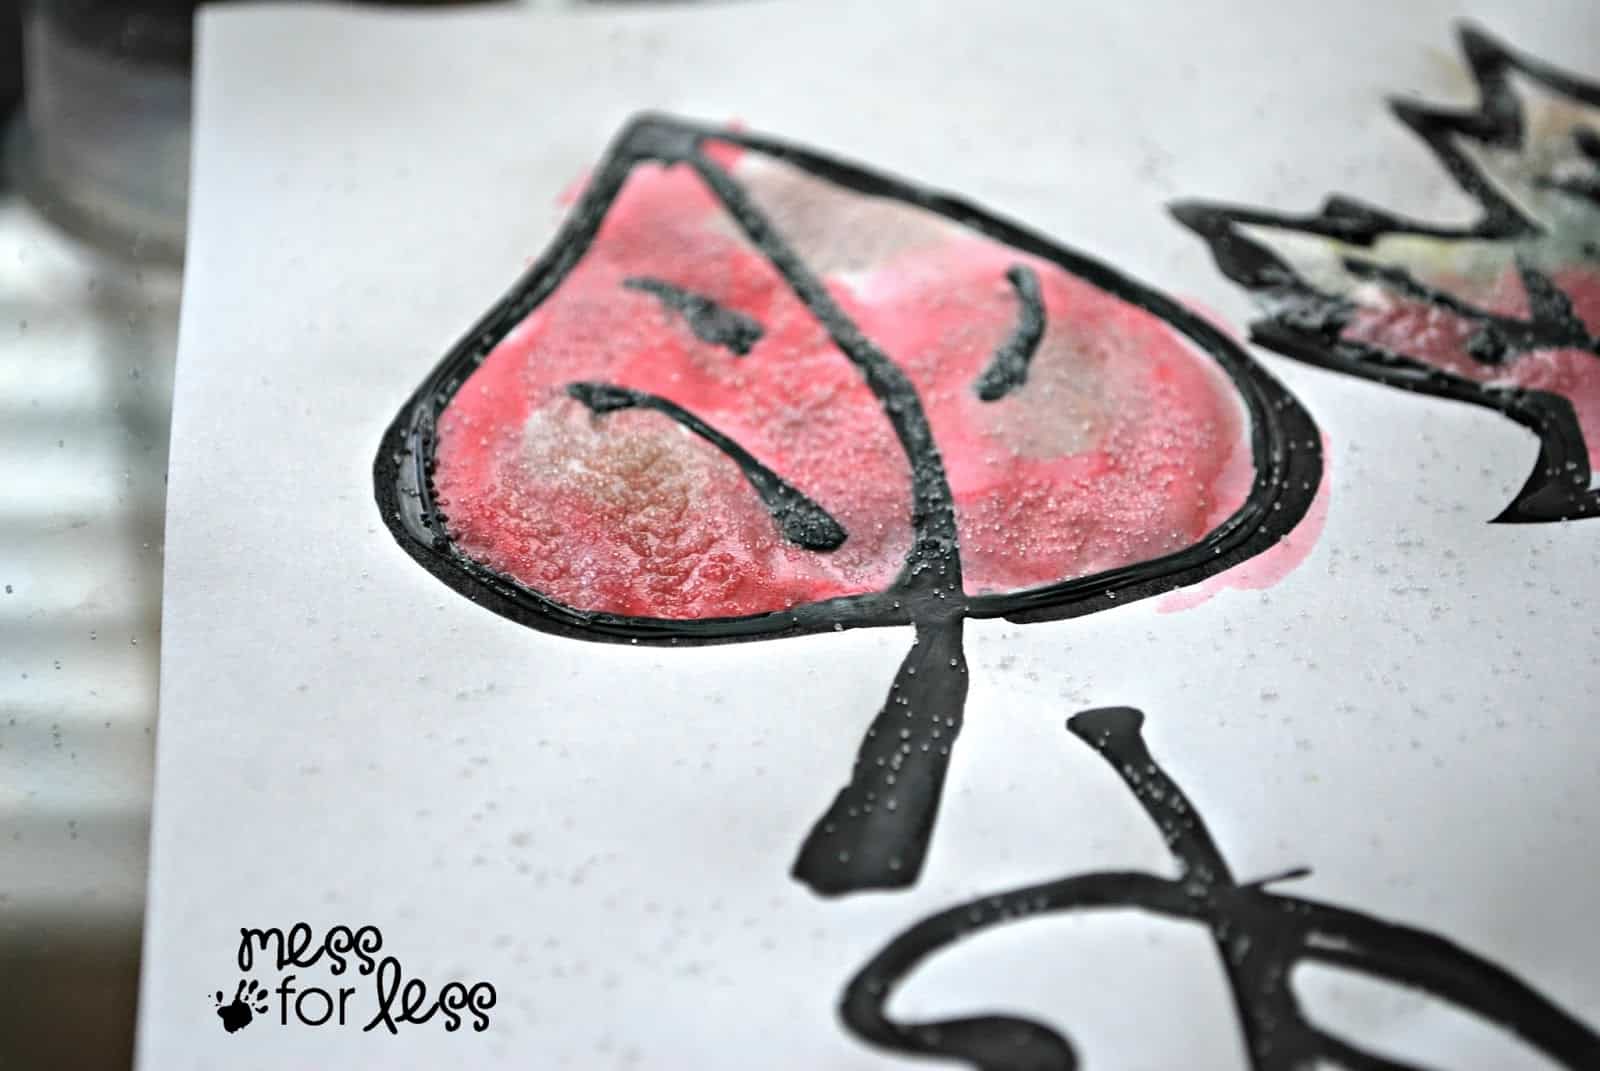
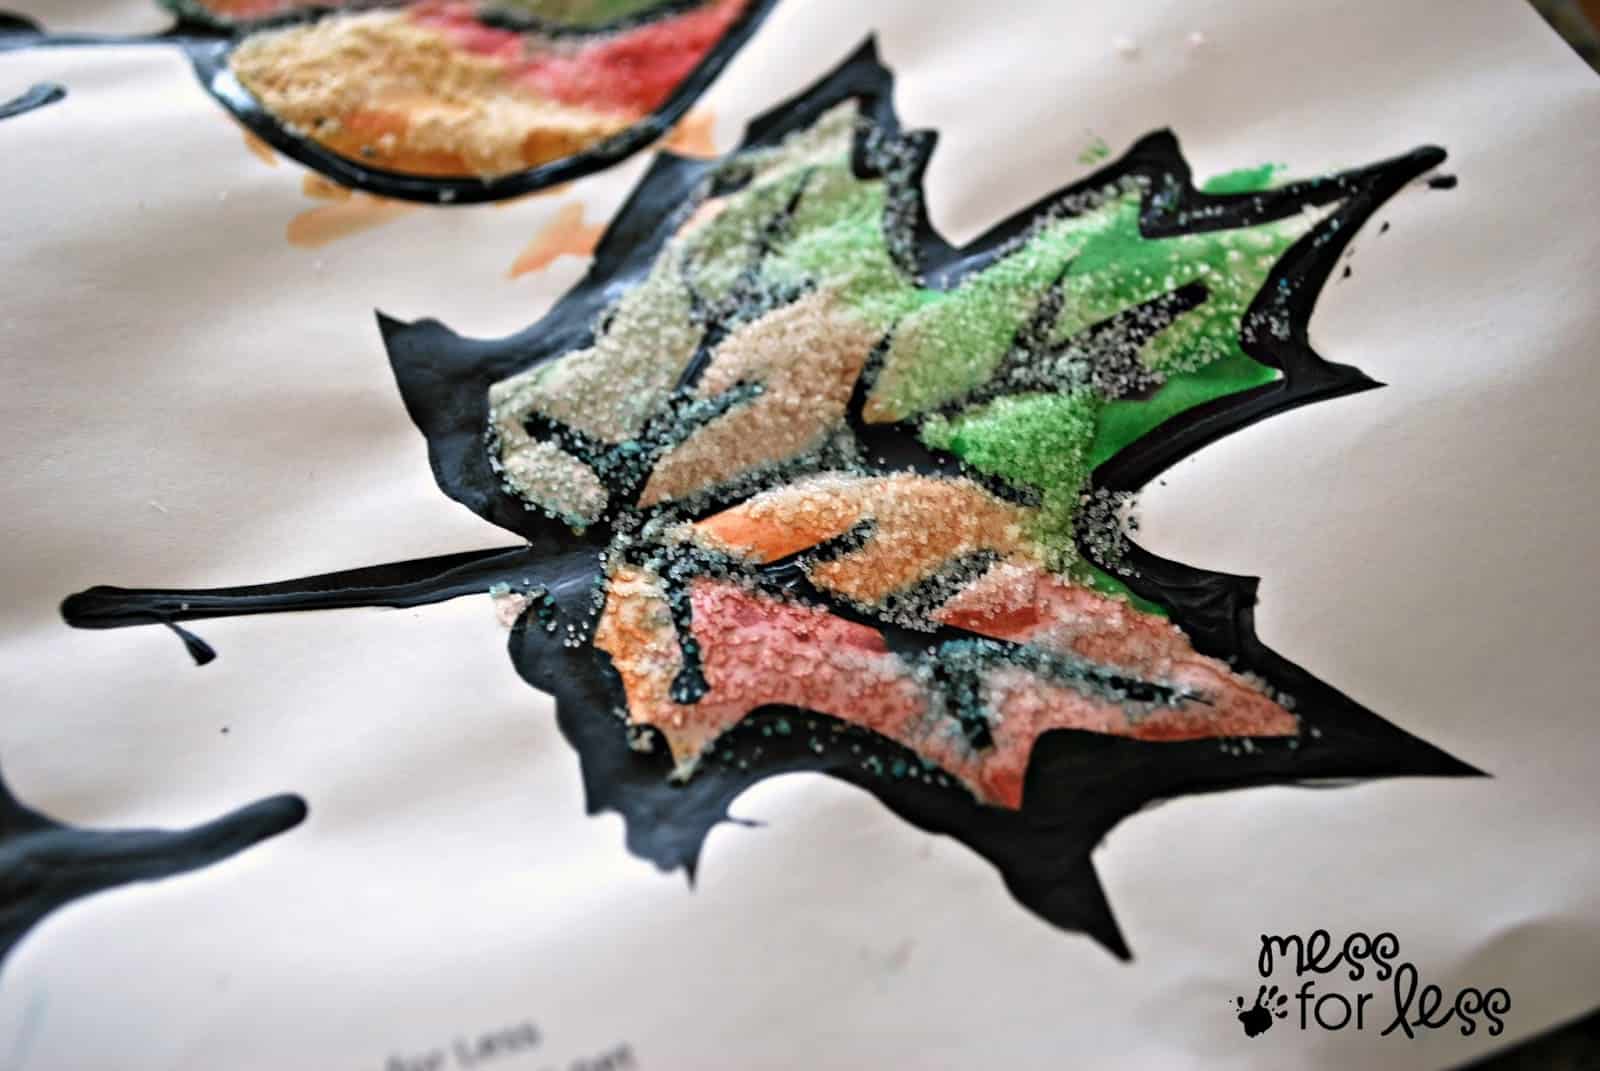
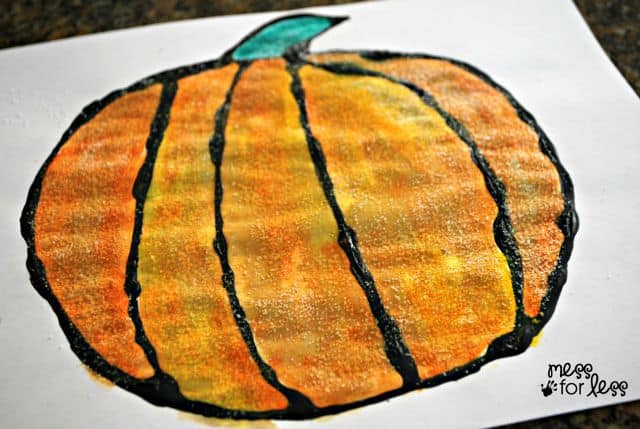
The black glue adds a raised texture that reminds me of stained glass.
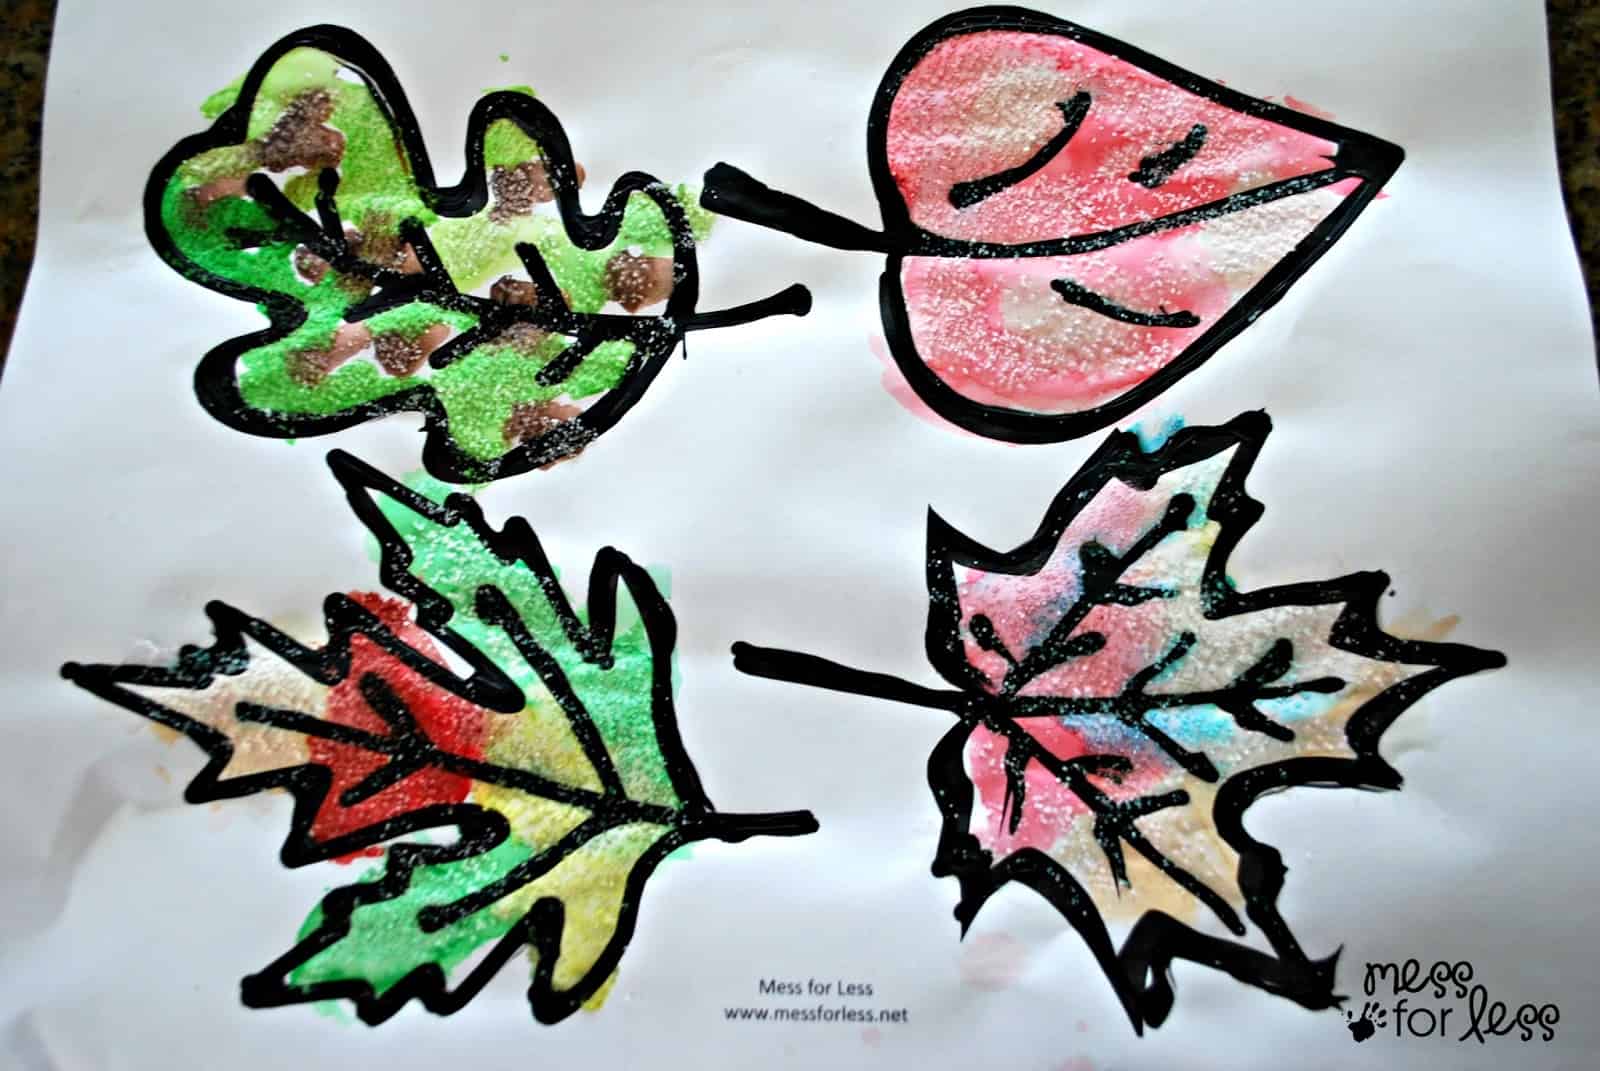
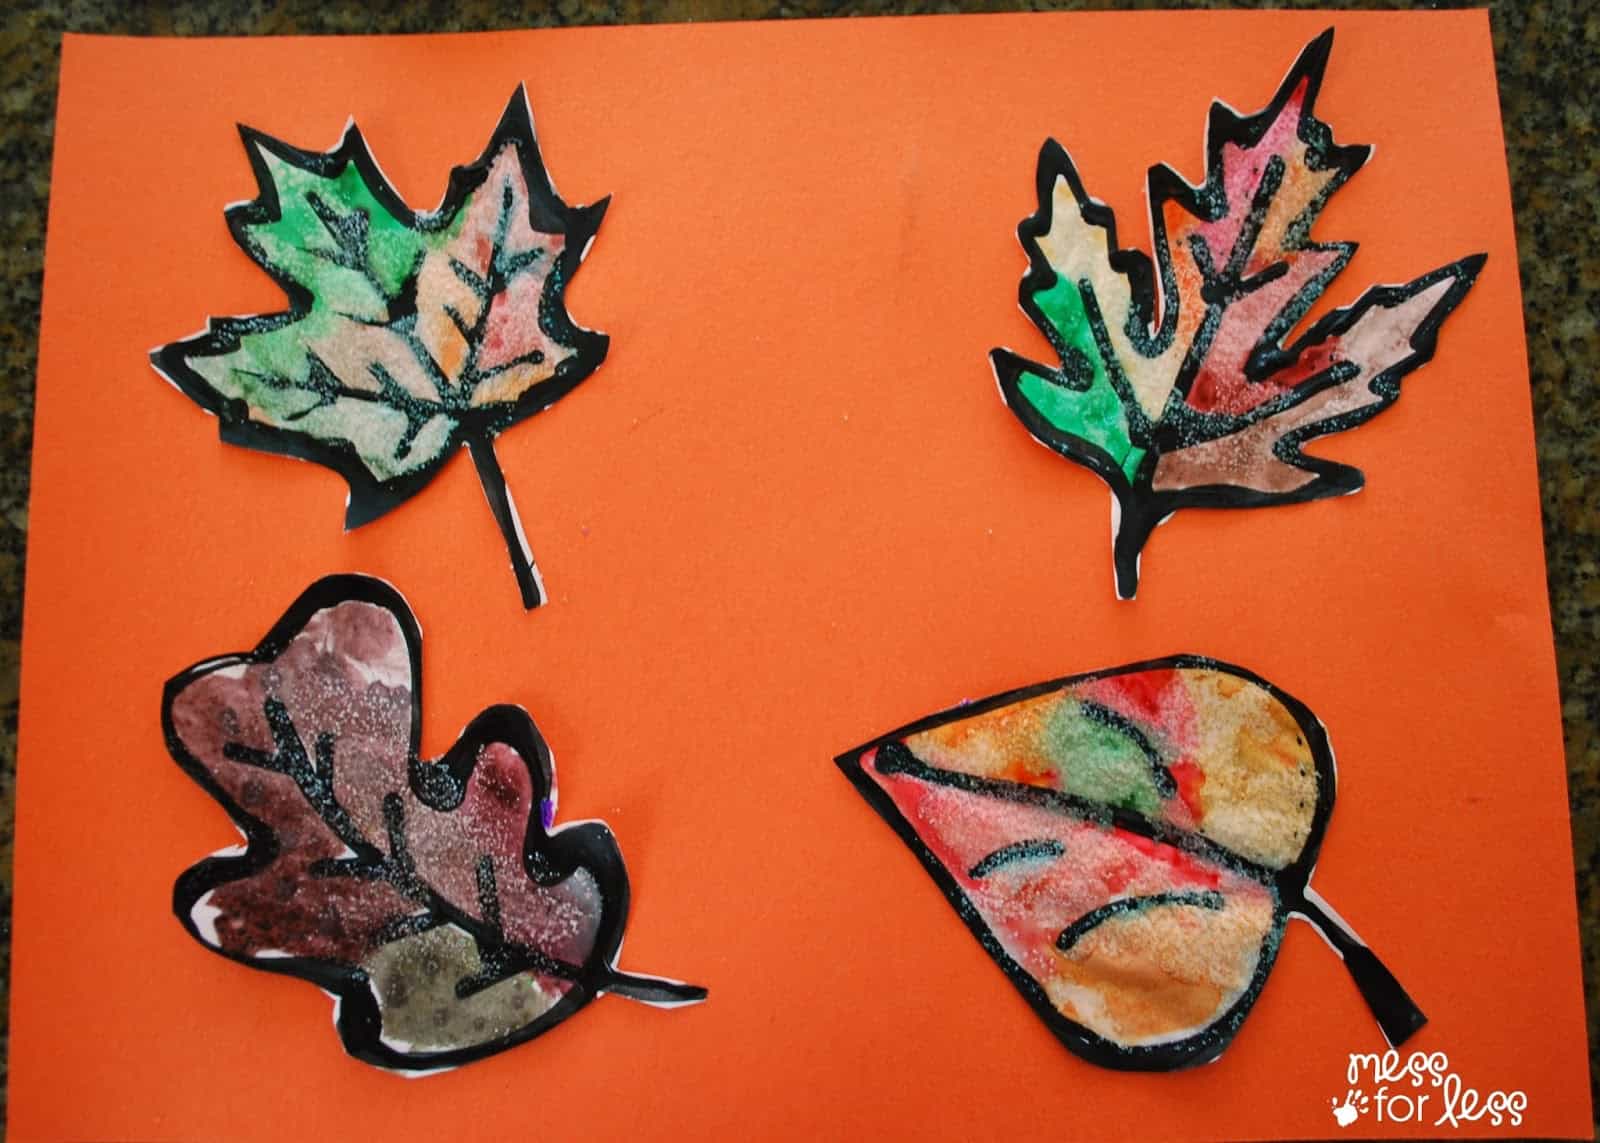
You can display the leaves as is, or you can cut them out and glue them to some colored paper. Either way, these black glue and salt leaves make a fun Fall decoration!
🤷🏻♀️Activity FAQs
Black glue is simply a mix of white glue and black paint. You don't need to buy it as it is easy to make with a mixture of black paint and white glue. The instructions are in the post.
Ours took about 3 hours.
✂️Expert Tips
Tip 1: This fall craft provides a great opportunity for talking about Fall with kids. You can discuss what color leaves are typically seen in Fall as well as other changes that occur during the season.
Tip 2: My kids were determined to stay within the leaf outline but this is certainly not necessary.
🍁Related Posts

Fall Craft - Black Glue and Salt Leaves
Materials
- Free leaf printable
- Watercolors
- Small paintbrush
- Water
- White glue
- Black paint
- Salt
Instructions
- Print out our free leaf printable.
- To make black glue, empty your glue bottle so it's only half full. Then add some squirts of black paint. Use enough black paint to fill up an additional quarter of the glue bottle. Shake the mixture until it is totally combined.
- Outline the leaves on the leaf printable using the black glue and allow to dry. This step is easier if done by an adult or older child. Make sure you allow plenty of time for the black glue to dry before starting the painting.
- Provide your child with watercolors, a brush and some water.
- Have your child paint the leaves using the watercolors.
- The next step is to add the salt. You will want to be sure the painting is still wet before adding the salt. If parts of the painting have dried already, have your child go over it again with a wet brush.
- Allow to dry.
Notes
- This fall craft provides a great opportunity for talking about Fall with kids. You can discuss what color leaves are typically seen in Fall as well as other changes that occur during the season.
- My kids were determined to stay within the leaf outline but this is certainly not necessary.


Donna says
I really like this idea and also your window stickers. Have you ever tried combining the two ideas. I'm thinking about doing this project but on the contact paper and sticking on the windows after.
Vicky says
Great idea Donna. I would love to see how that turned out.
Stacy says
We did this today and it was so much fun! I skipped the salt because my 2 year old was a little too excited about spreading it around. Ha, ha! 🙂
Christina K says
What kind of black paint? Acrylic?
Vicky @ Mess For Less says
I used black tempera paint. There is a link in the post if you want to see the kind I used.
Tami says
This is awesome! I'm going to try it with my day care kids this week.
Mari Corona says
Love it a must share!!!
Vicky @ Mess For Less says
Thanks so much Mari!