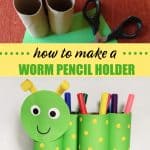
Today I'm going to share how to make a cute Worm Pencil Holder craft with your child. You may already have all the supplies you need at home. I love this craft because it's simple to do and repurposes paper tubes which usually get thrown out. You get to use something in a new way and create something useful. That's what I call a win-win!
Jump to:
Why your kids will love this DIY pencil holder
With a lot of kids doing the virtual learning thing, giving them a work space where they keep their stuff organized has become very important. My kids are lucky enough to have desks where they do their schoolwork. But it can be challenging for them to keep their supplies and materials organized to make them easy to get to. All this helps to make it easier to complete their work in a timely fashion. This worm pencil holder craft is not only adorable, but it's really functional. Make one with your kids and have them place it on their desk or wherever they are doing their school work to hold pencils, pens, markers, even a small pair of scissors. Basically all the things that are typically cluttering up a desk.
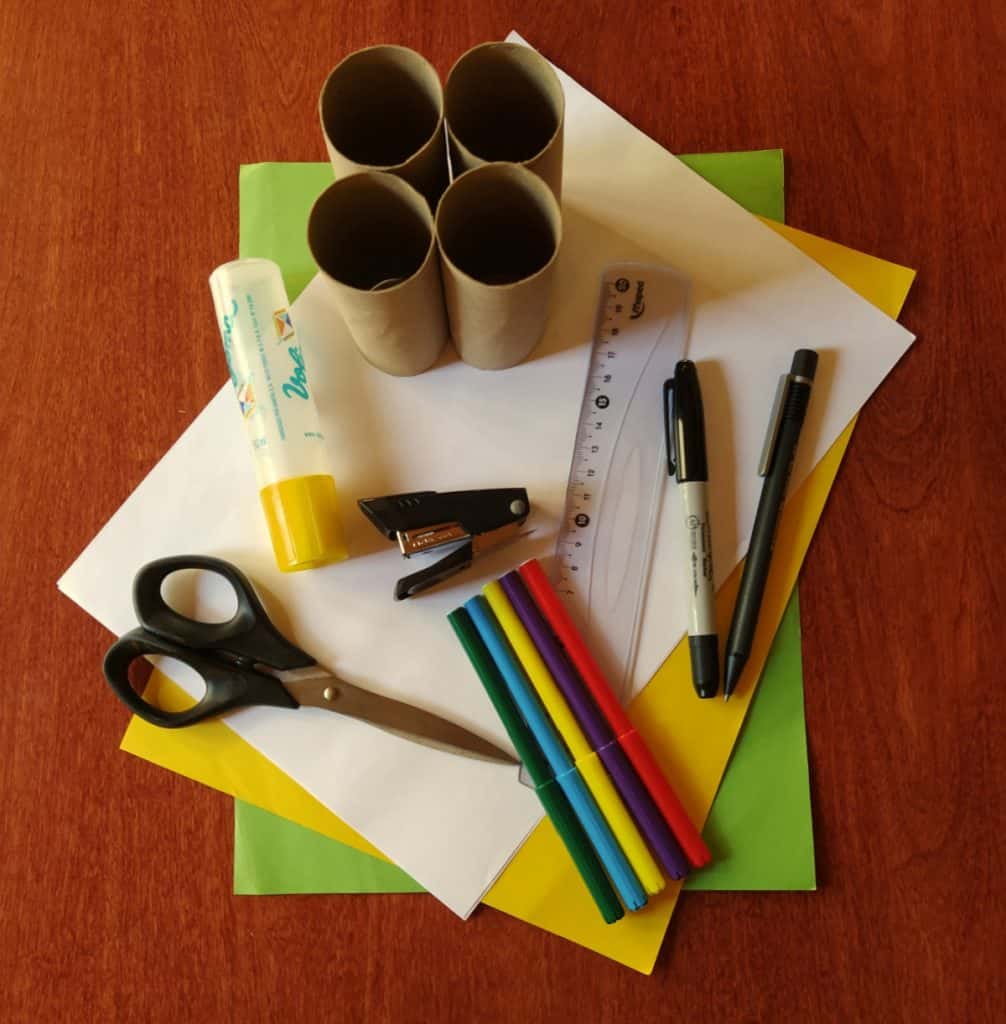
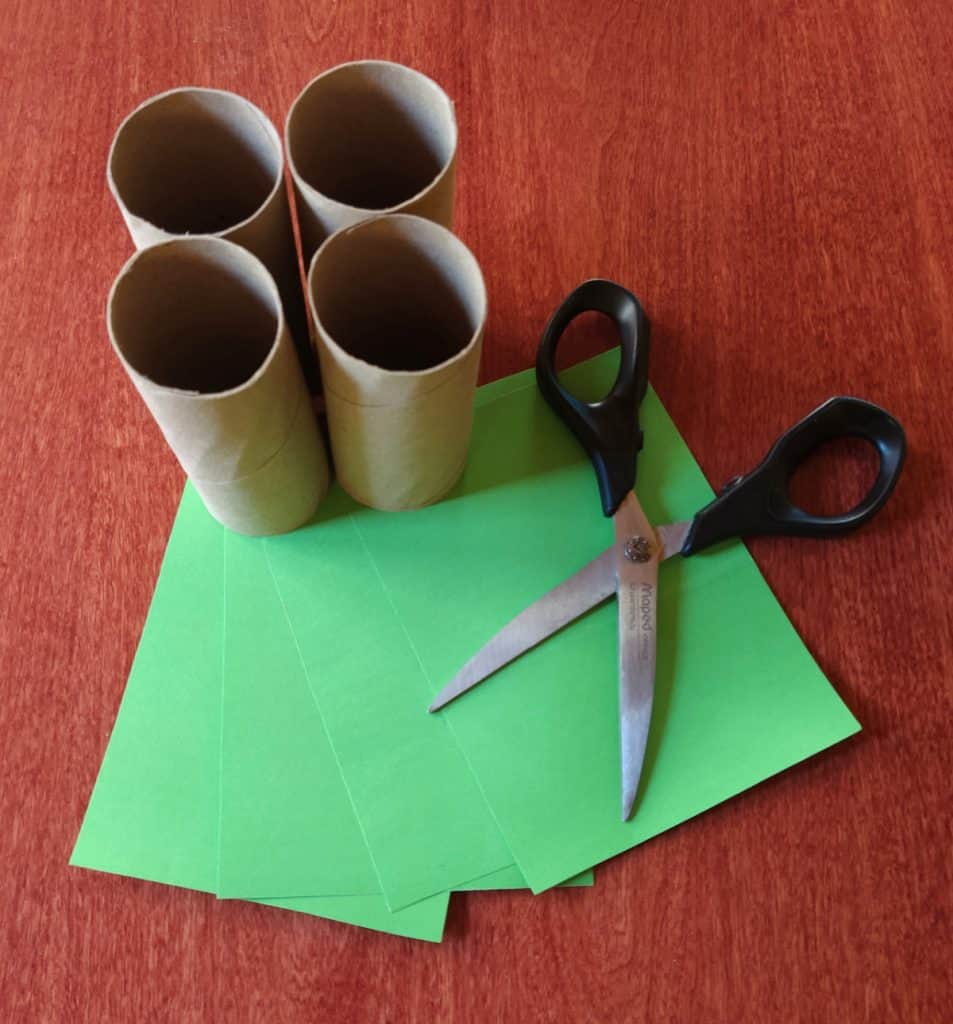
WHAT SUPPLIES DO YOU NEED TO MAKE A DIY PENCIL HOLDER?
- four toilet paper rolls
- green, yellow, and white construction paper
- glue
- scissor
- pencil
- black marker
- stapler
- ruler
- hole punch
HOW DO YOU MAKE A PENCIL HOLDER CRAFT WITH PAPER TUBES?
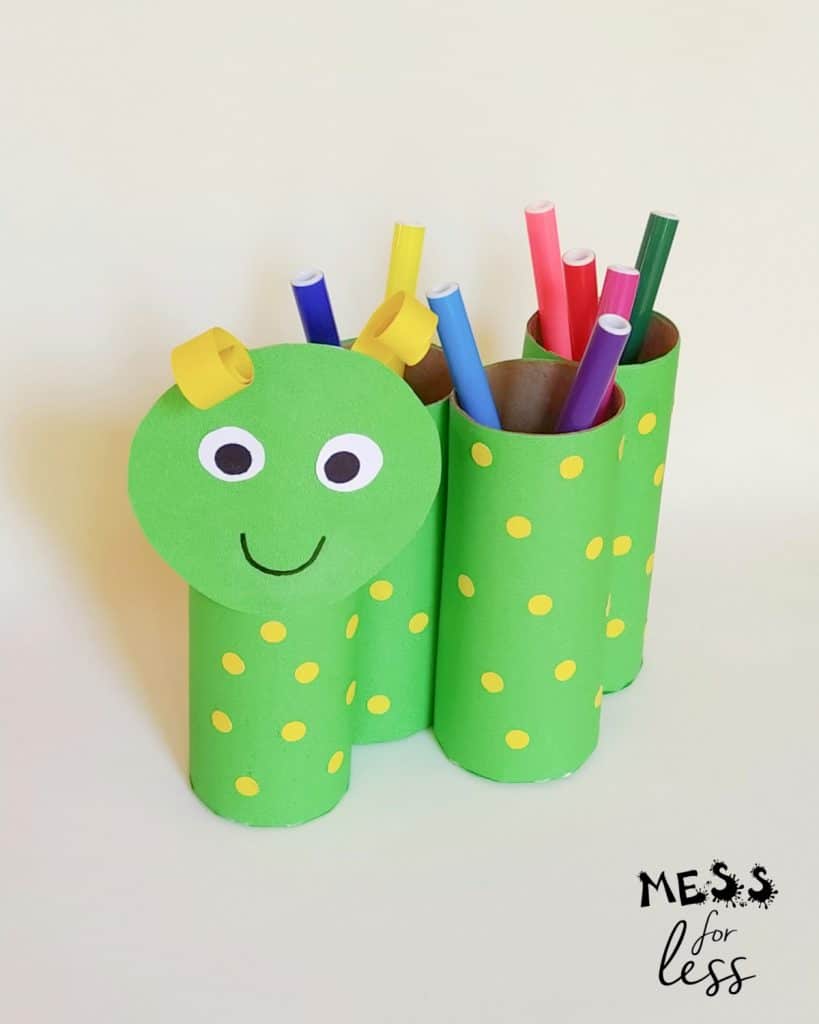
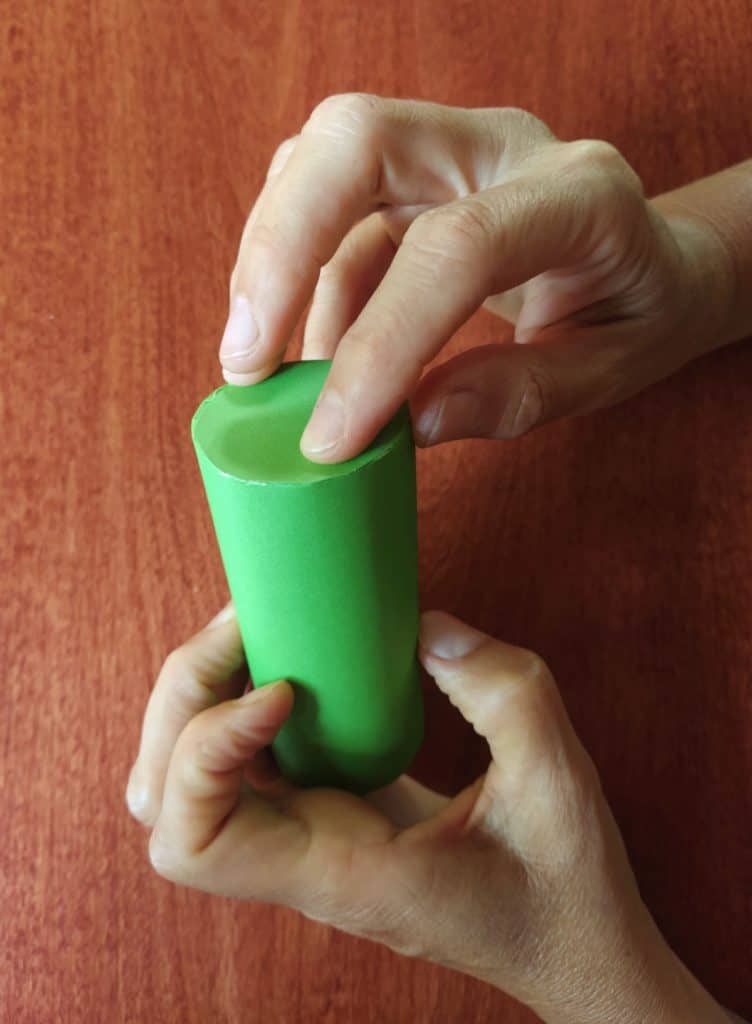
The base of the worm's body will be made using toilet paper tubes. You will be using 4 tubes. Measure and cut four green pieces of construction paper so they cover the tubes.
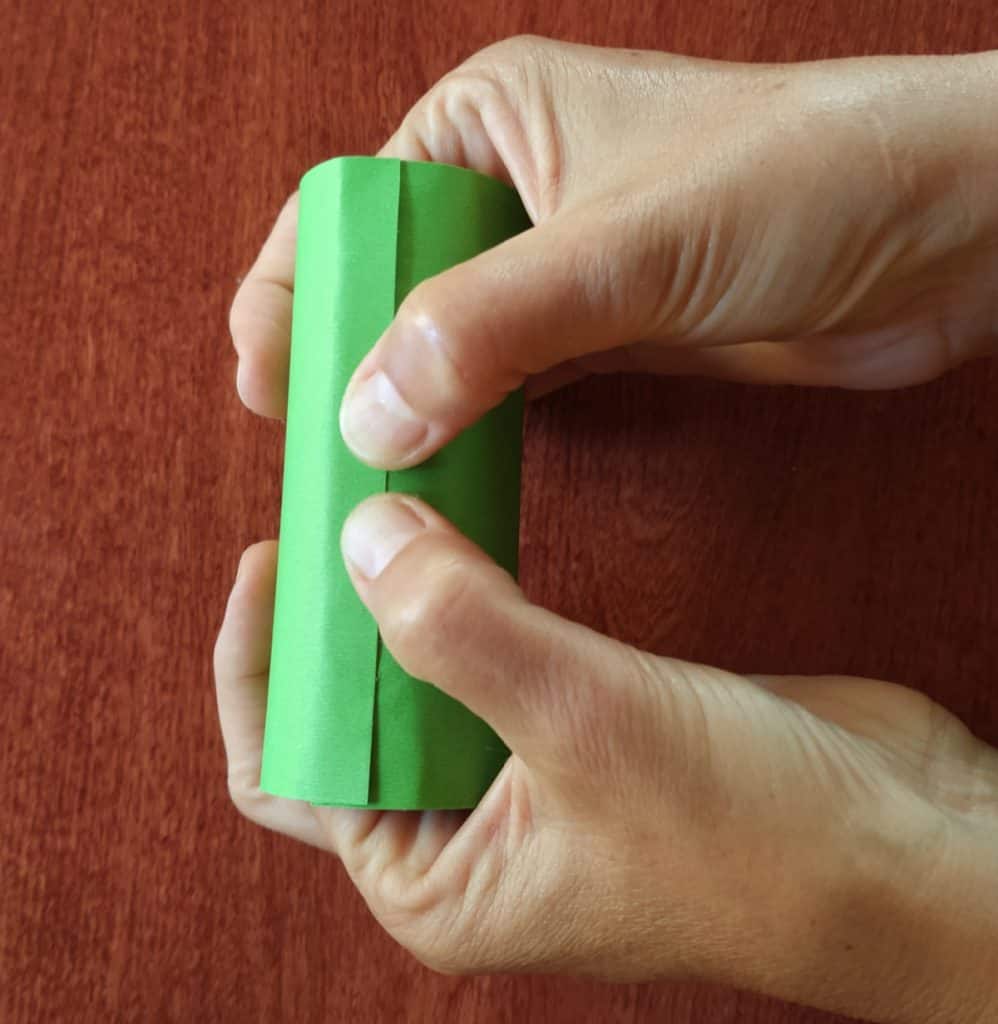
Glue the construction paper on to the toilet paper tube.
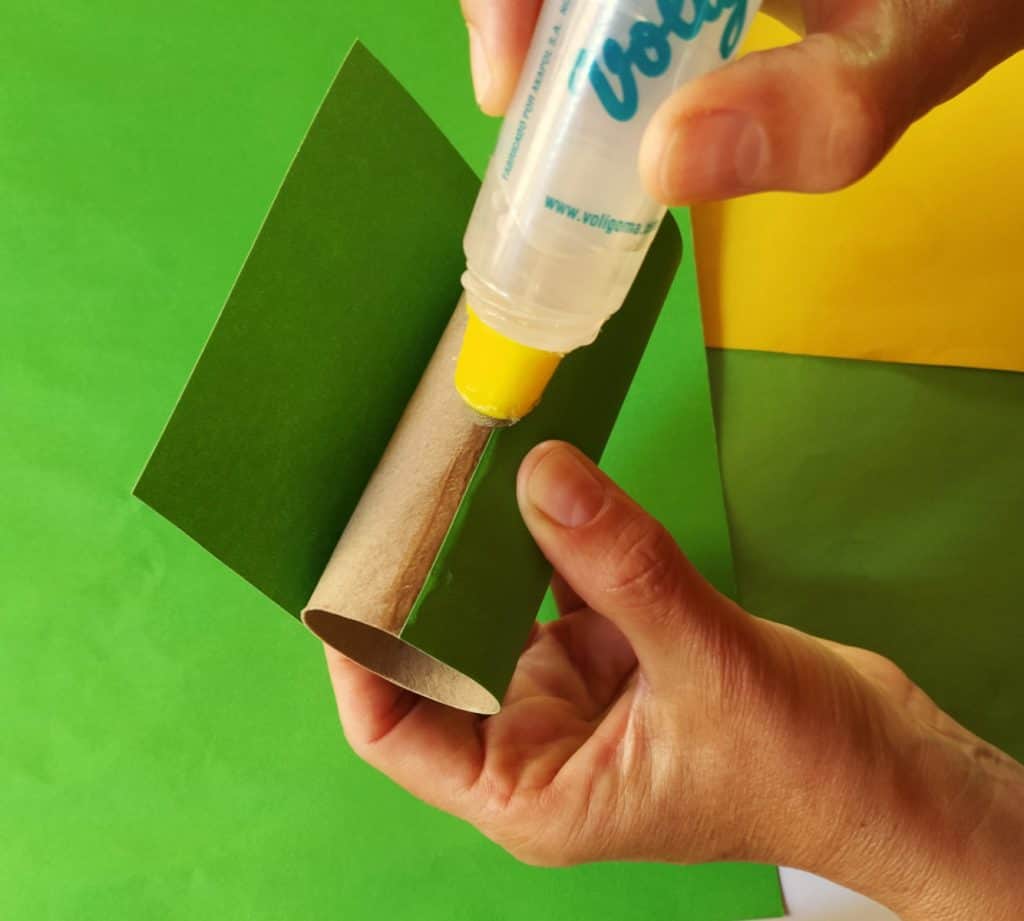
Hold closed for a few seconds so the glue sets a bit.
Trace 4 circles onto green construction paper using the tube as a template.
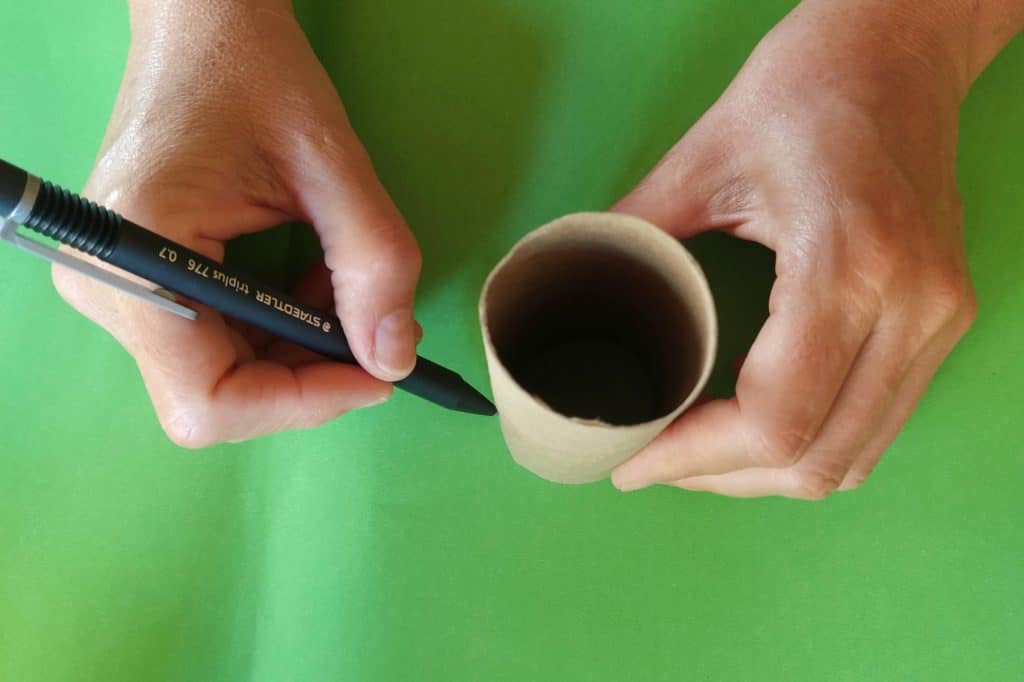
Cut out the circles.
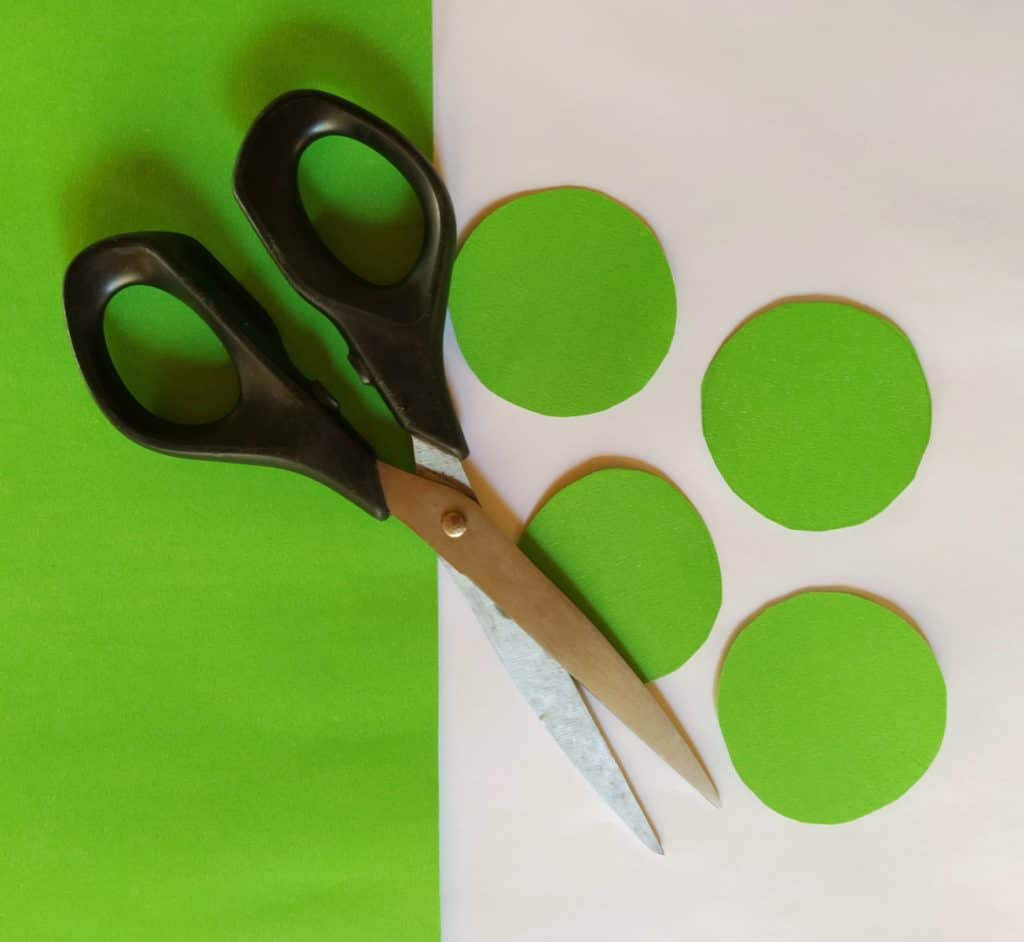
Glue the circles to the bottom of the four toilet paper rolls.
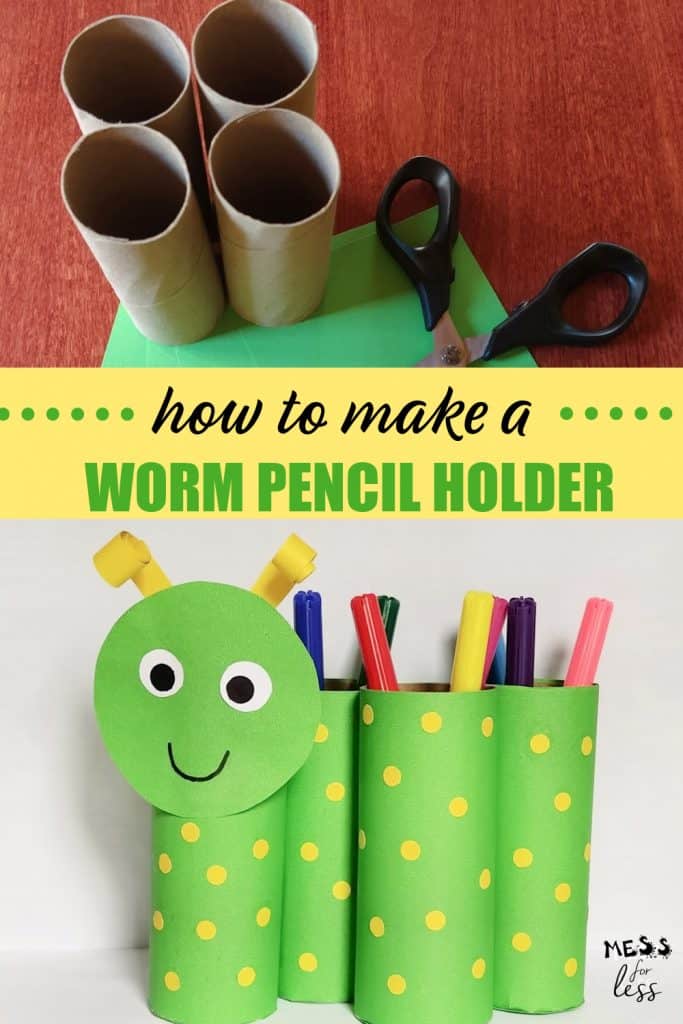
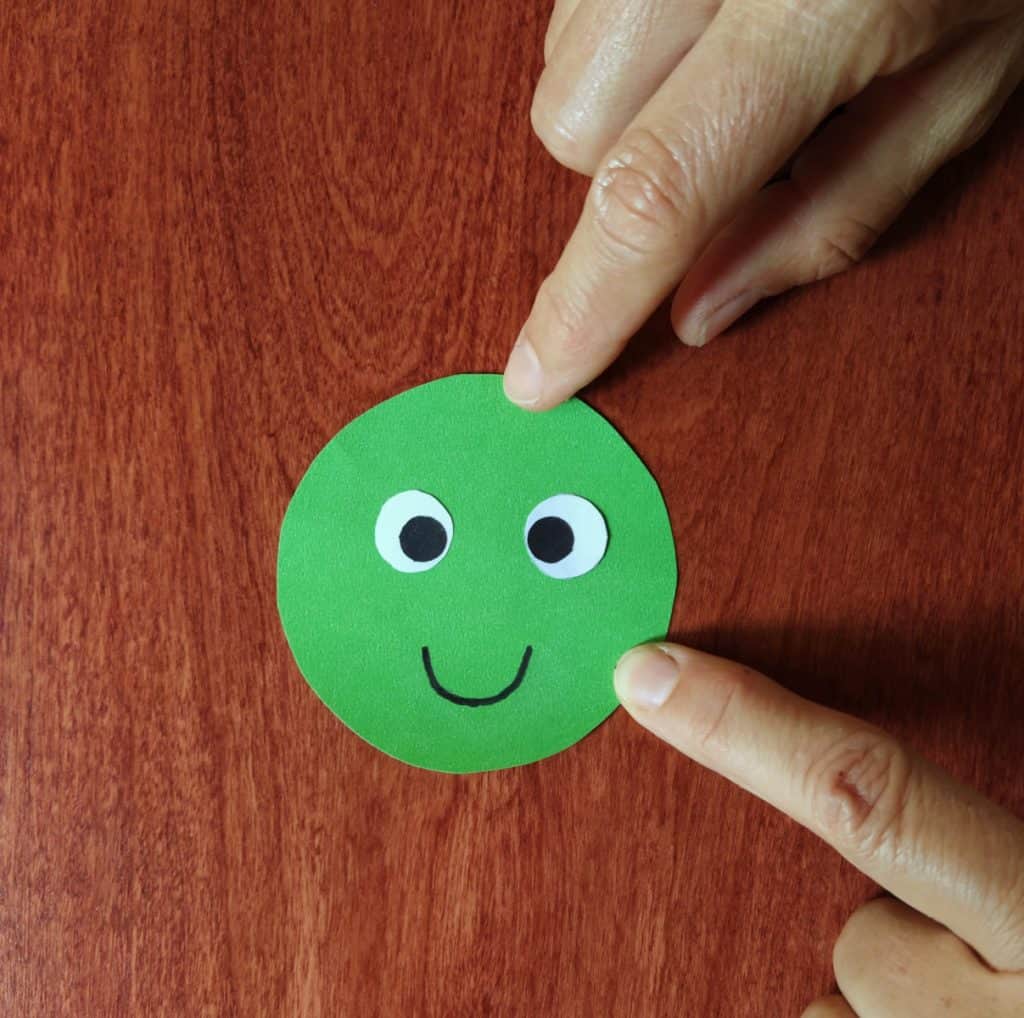
Cut a larger circle for the worm's face and draw a smile using a black marker. Cut out two eyes from white paper and glue those on. Draw black pupils on the white eyes using a black marker.
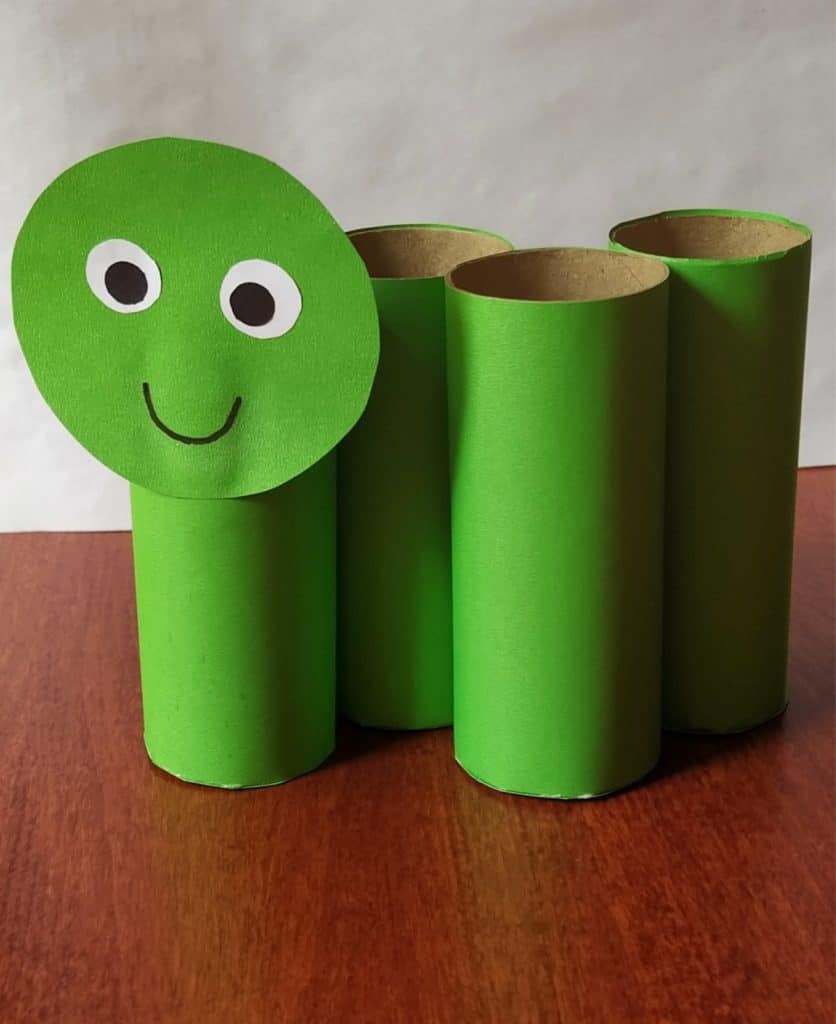
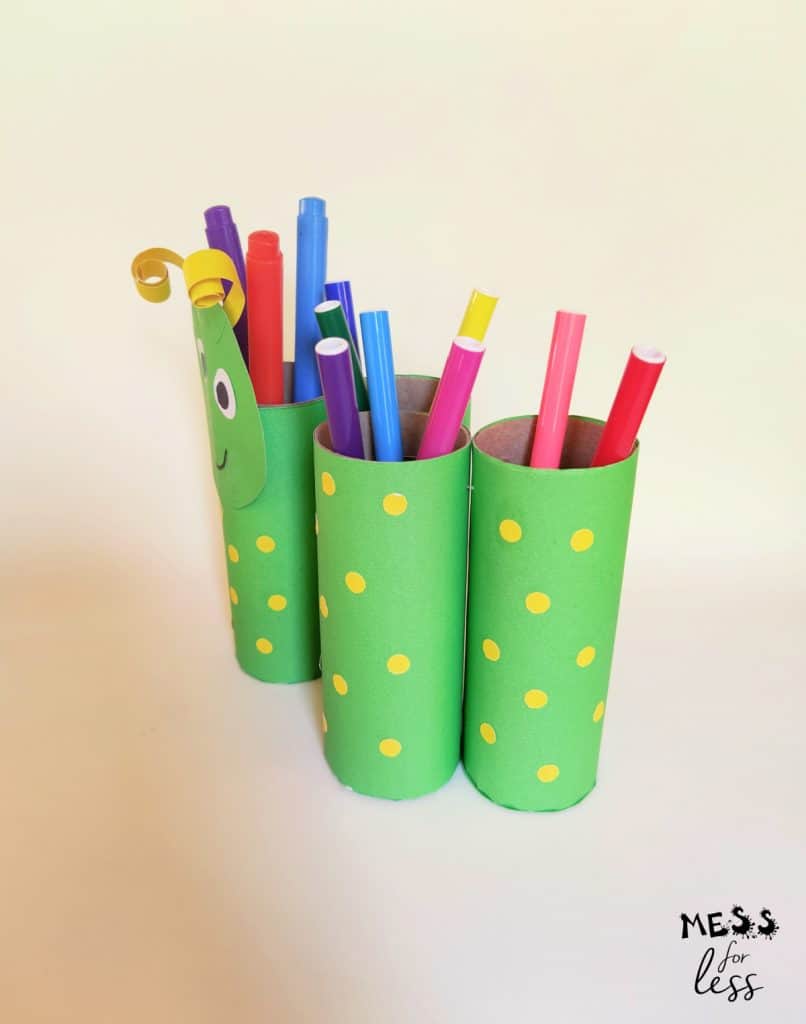
Glue the four toilet paper rolls to each other in a zig zag train that will make the worm's body.
Glue the worm's face to the body.
Cut two yellow paper strips for the antennae and roll them up with a scissor. Glue them to the back of the worm's face.
Use a hole punch to punch holes out of yellow construction paper. Glue them to the body of the worm to give him a little extra personality.
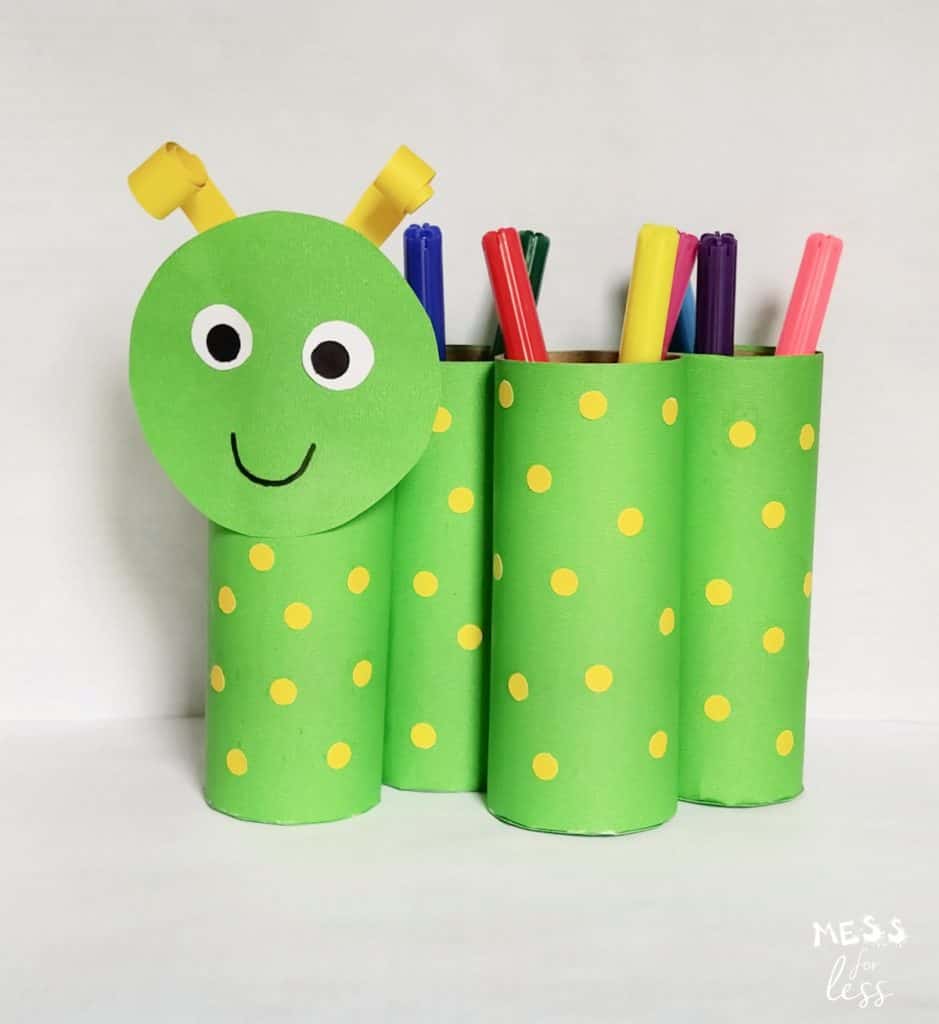
Now this worm pencil holder is ready to help your child stay organized!
Your girl's creative juices will start flowing thanks to the Creative Girls Club subscription package. Every month, girls receive two kits filled with creative fun.

Leave a Reply